Claim Item settings allow administrators to configure the claim limit, dependent limit, payment method, cost center, GL code, and custom fields for claim requests.
After setting up a claim item, it can be assigned to employees through a claim group.
Step 1
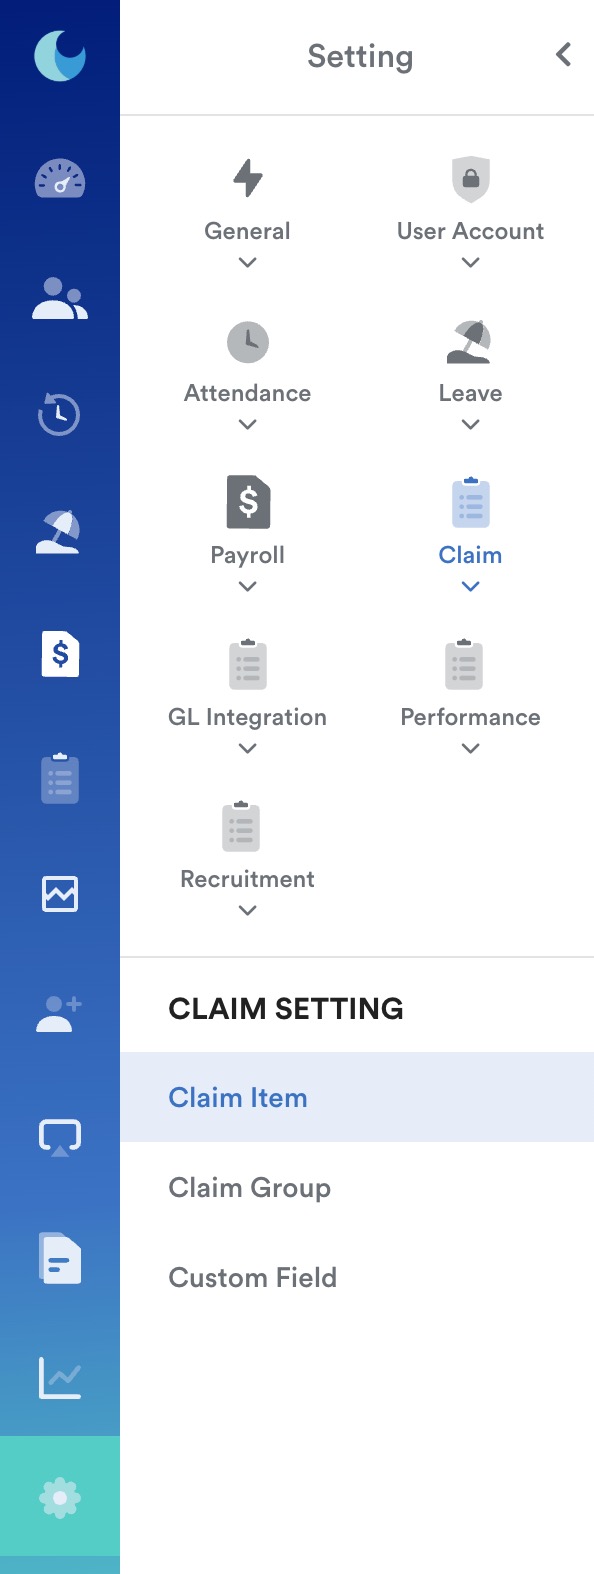
On the left menu, go to Settings > Claim > Claim Item.
Step 2
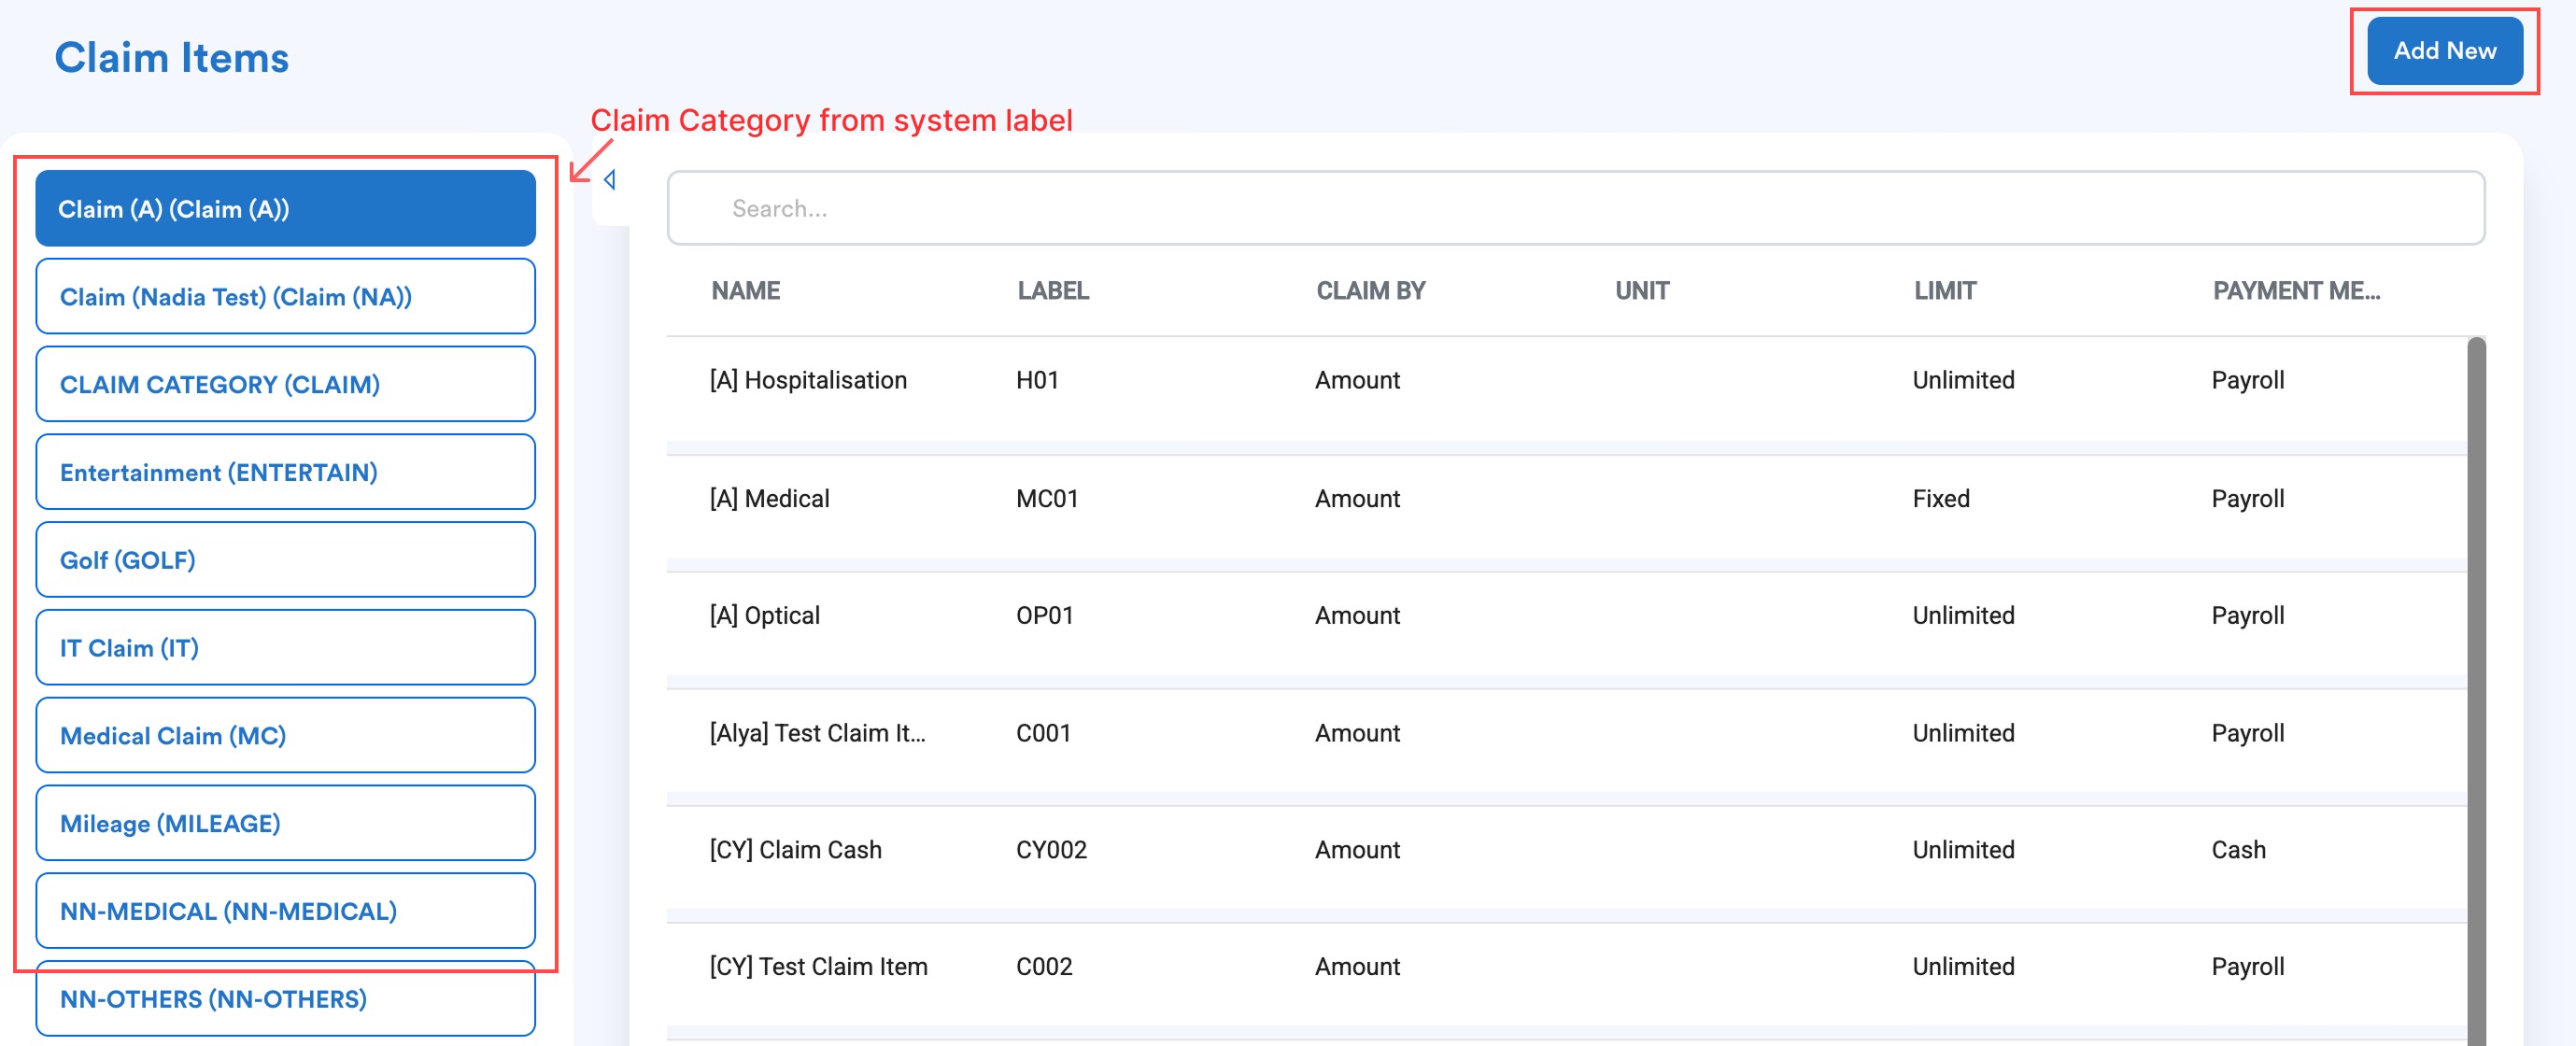
The Claim Item page displays the existing claim categories on the left and the claim items under each category on the right.
- Select the Claim Category where the new claim item should be added.
- Click Add New.
Note: A claim item must be created under a claim category. If no claim categories have been created, refer to Setting Up Claim Category.
Step 3
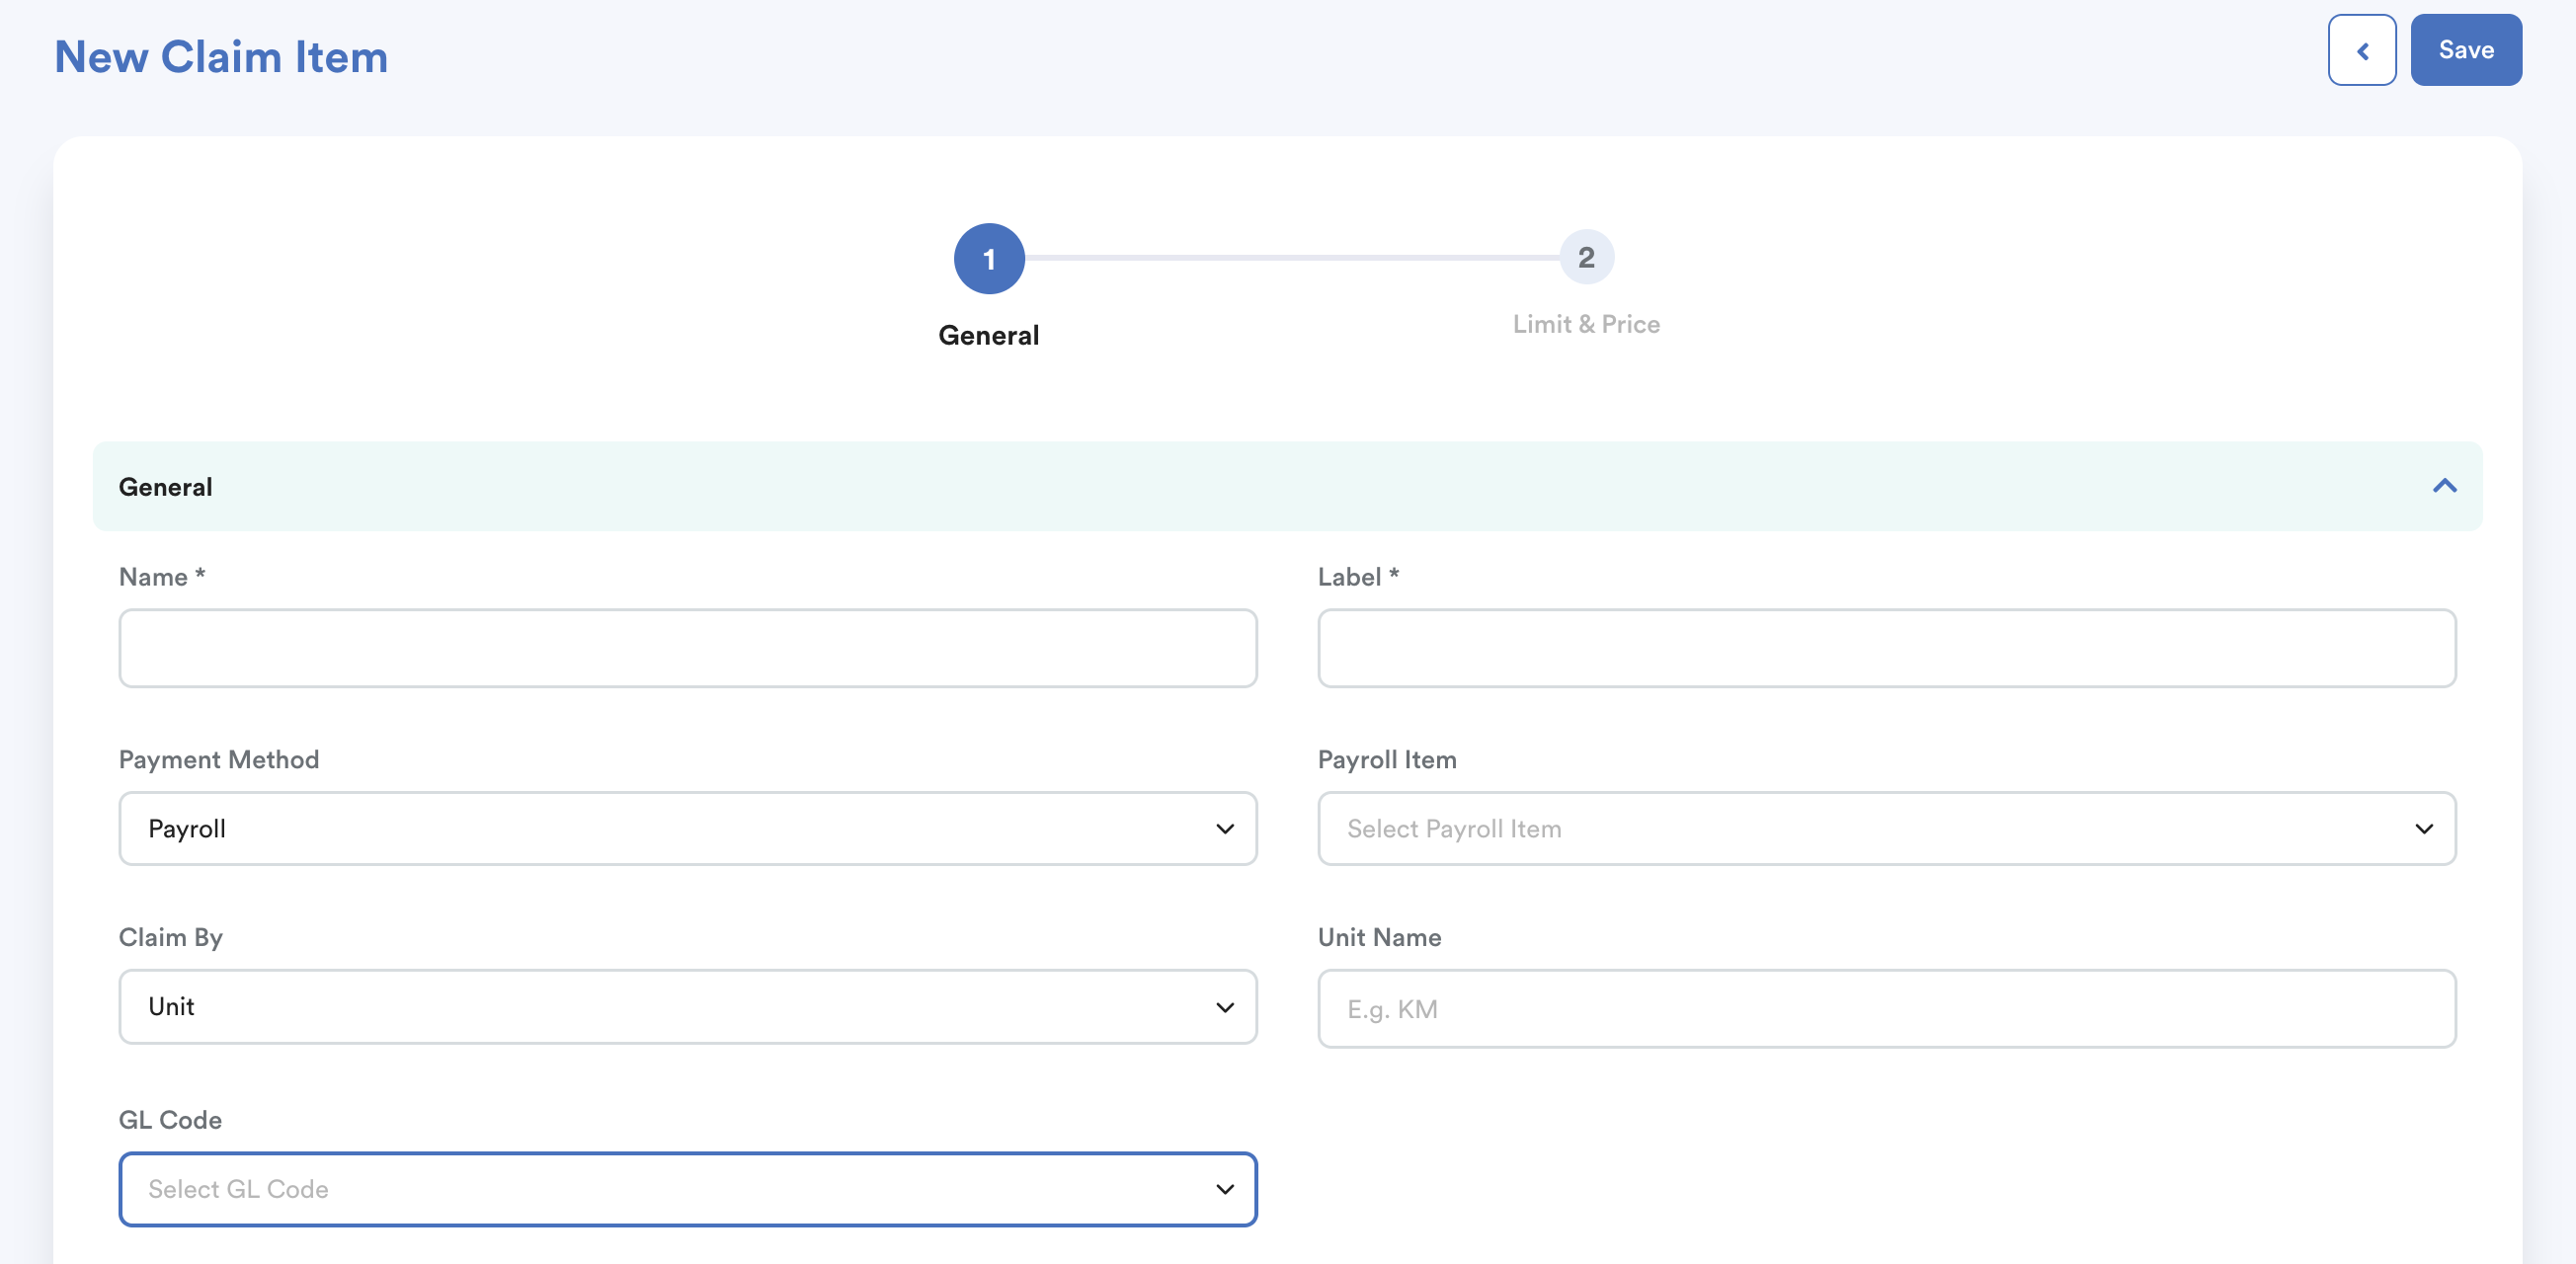
Enter the basic information for the claim item.
Claim Item Name and Label
Enter the Claim Item Name and Label.
Payment Method
Select how the claim should be paid:
- Cash: The claim will not be displayed on the employee's payslip.
- Payroll: The claim will be processed through payroll and displayed on the employee's payslip.
- Claim Voucher: The claim will be processed through claim voucher.
When Payroll / Claim Voucher is selected, select the relevant Payroll Item / Voucher Item to link the claim item to payroll.
Important: A claim item must be linked to a payroll item / voucher for the claim amount to be displayed on the employee's payslip.
For more information, refer to Processing Claim in Payroll Run.
Claim Type
Select whether the claim is based on:
- Amount: The claim is based on a monetary amount.
- Unit: The claim is based on a unit, such as kilometres. This is commonly used for mileage or travel claims.
For more information, refer to Creating Mileage Claim.
GL Code
Select the relevant GL Code from the dropdown list.
If no GL Code has been set up, refer to Linking GL Code to Claim Item.
Step 4
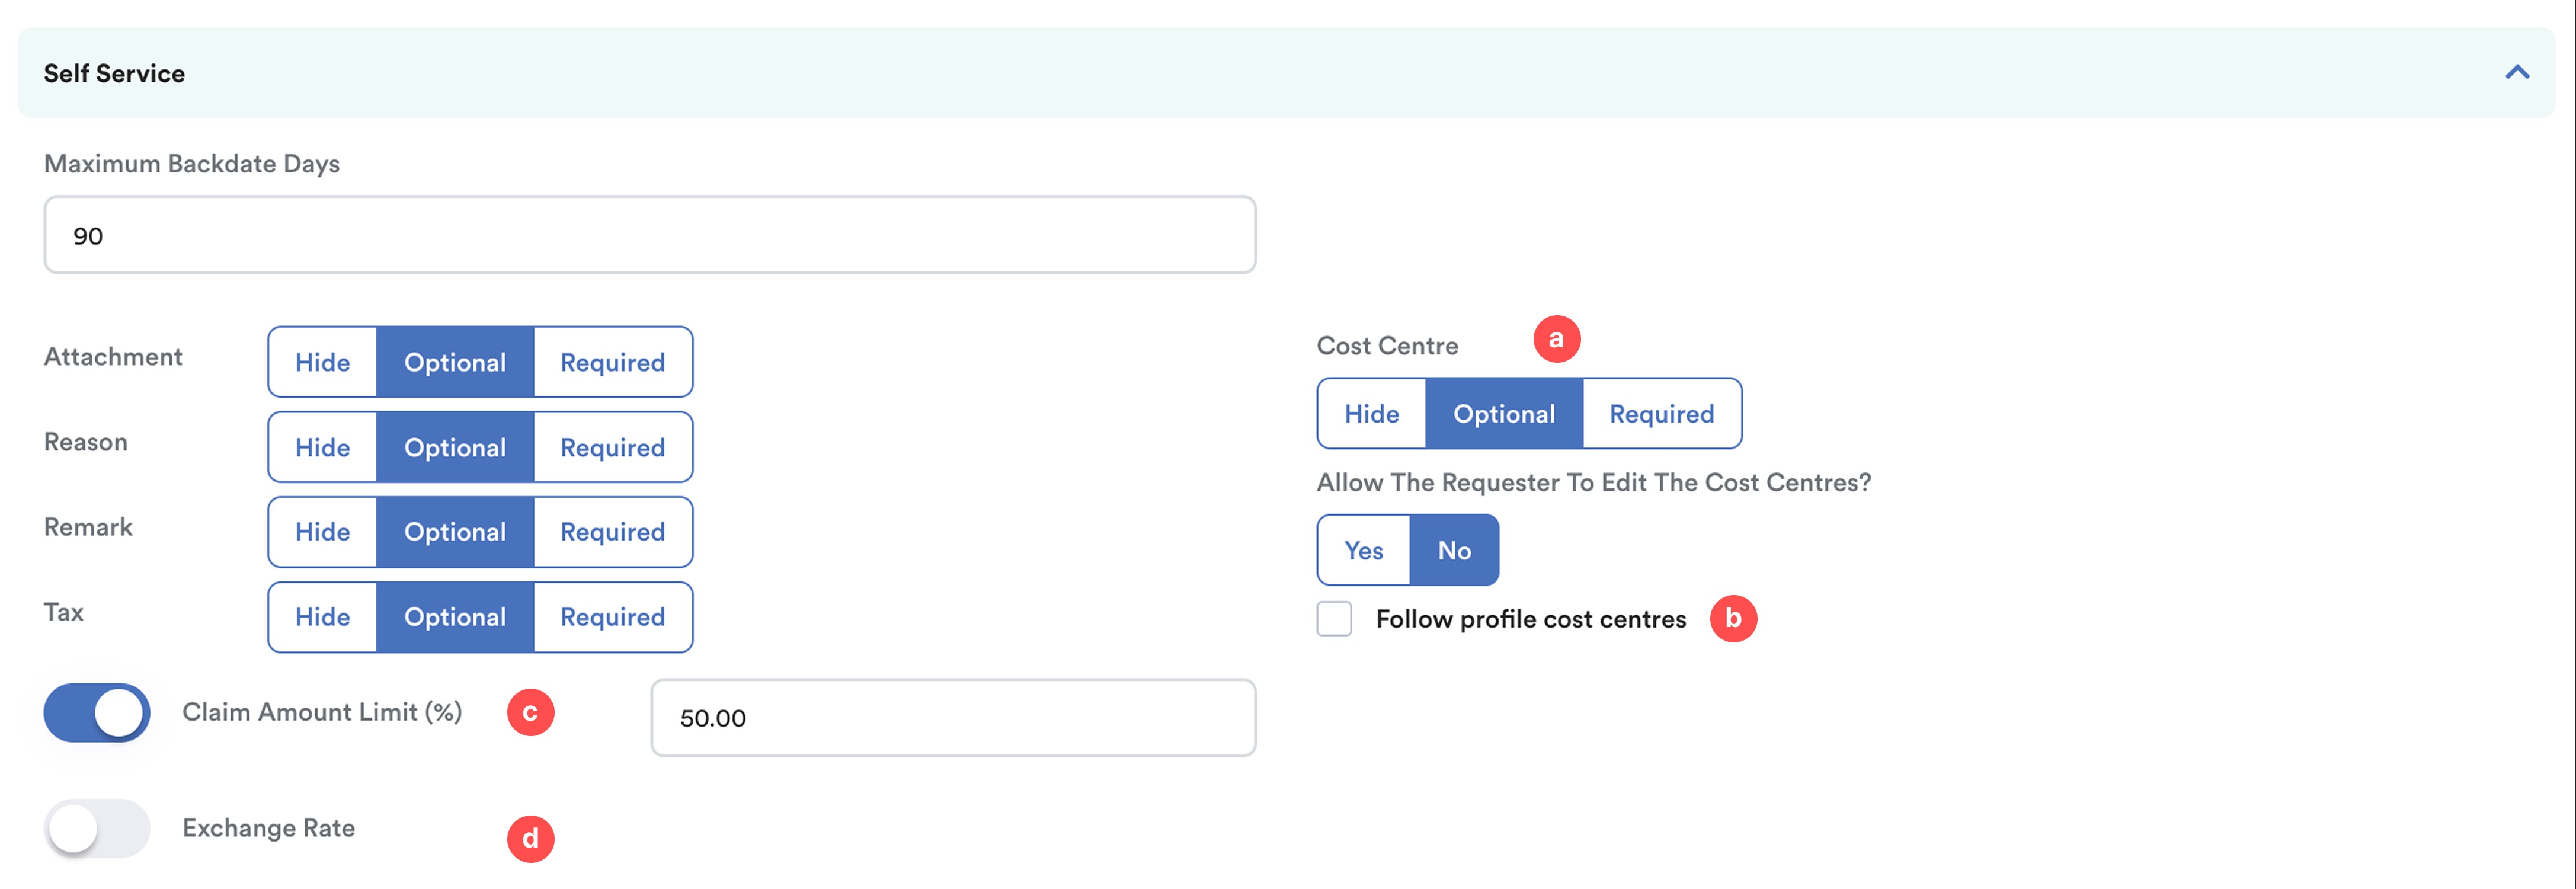
The Self-Service section controls the information employees can enter when submitting a claim request.
Cost Center
Configure whether the Cost Center is required for the claim request and whether the requestor can edit it when submitting the claim.
You can also tick Follow Profile Cost Center.
- When enabled, the claim item follows the cost center assigned to the employee's profile.
- If it is not enabled, the cost center can be configured separately for the claim item.
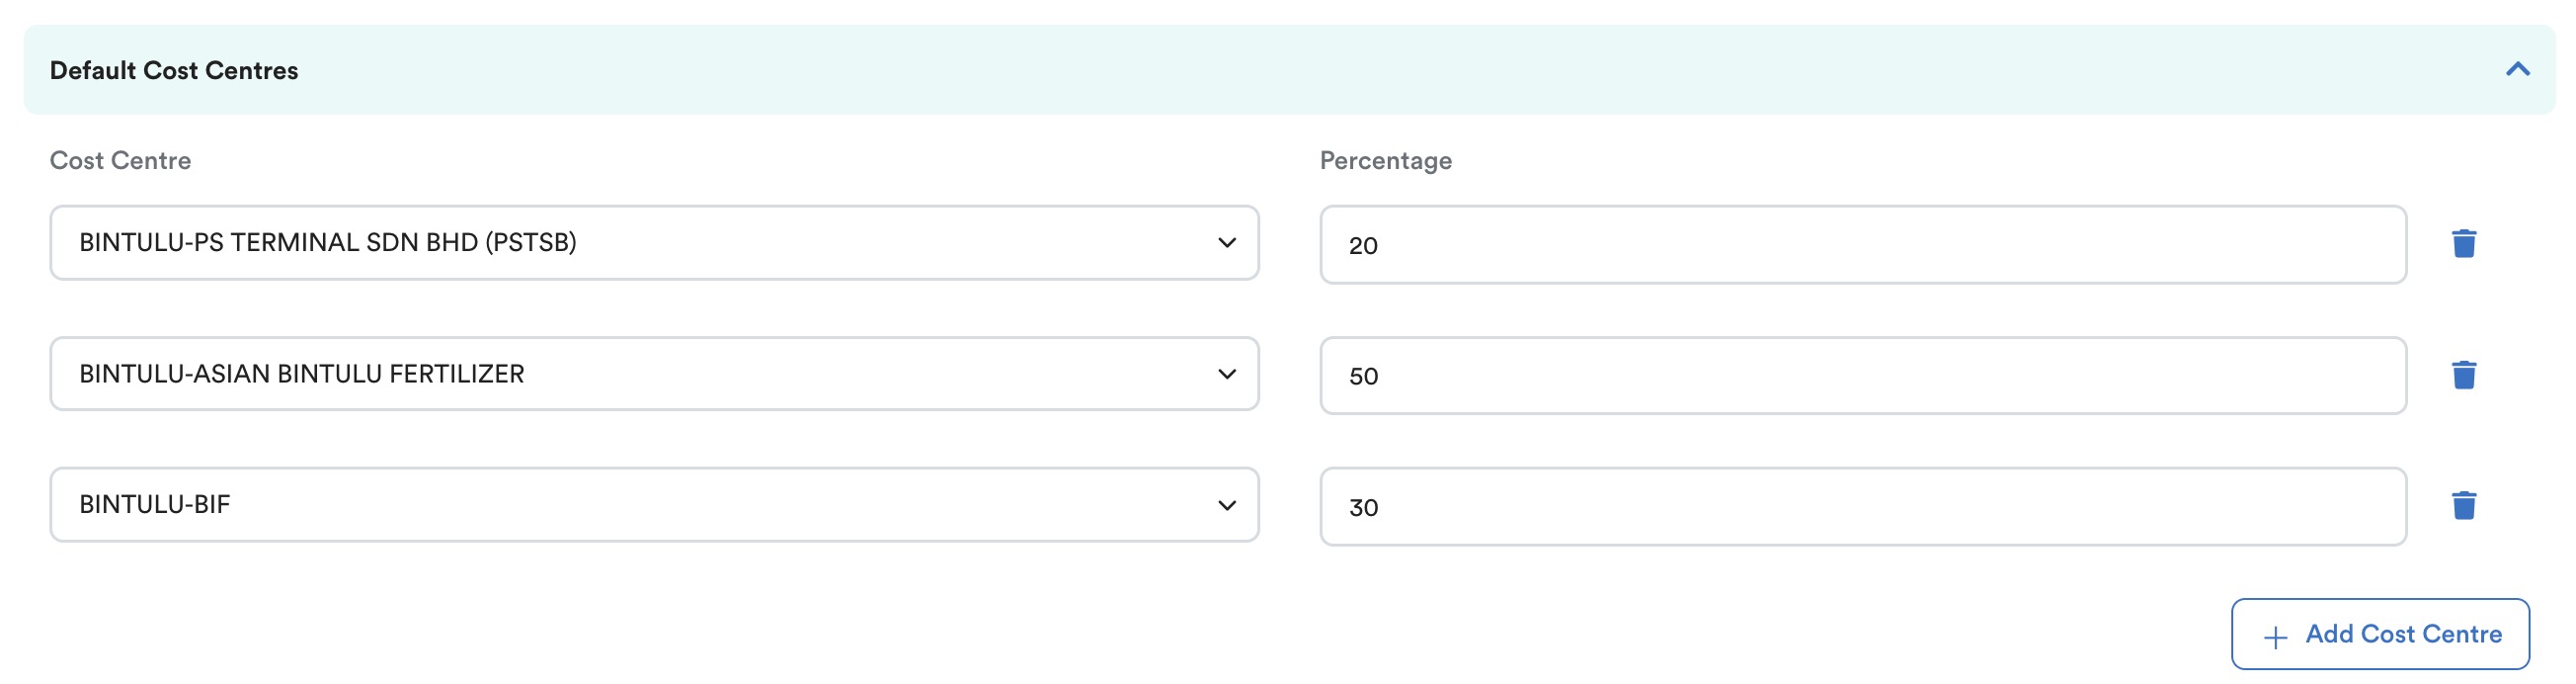
For example, you could put 20% for Company A to give claim allocation to their employees, while Company B pays the other 50% and Company C pays the rest of 30%.
For more information about using multiple cost centers, refer to Can I use the same cost center for an employee who paid by multiple companies?
Claim Amount Limit (%)
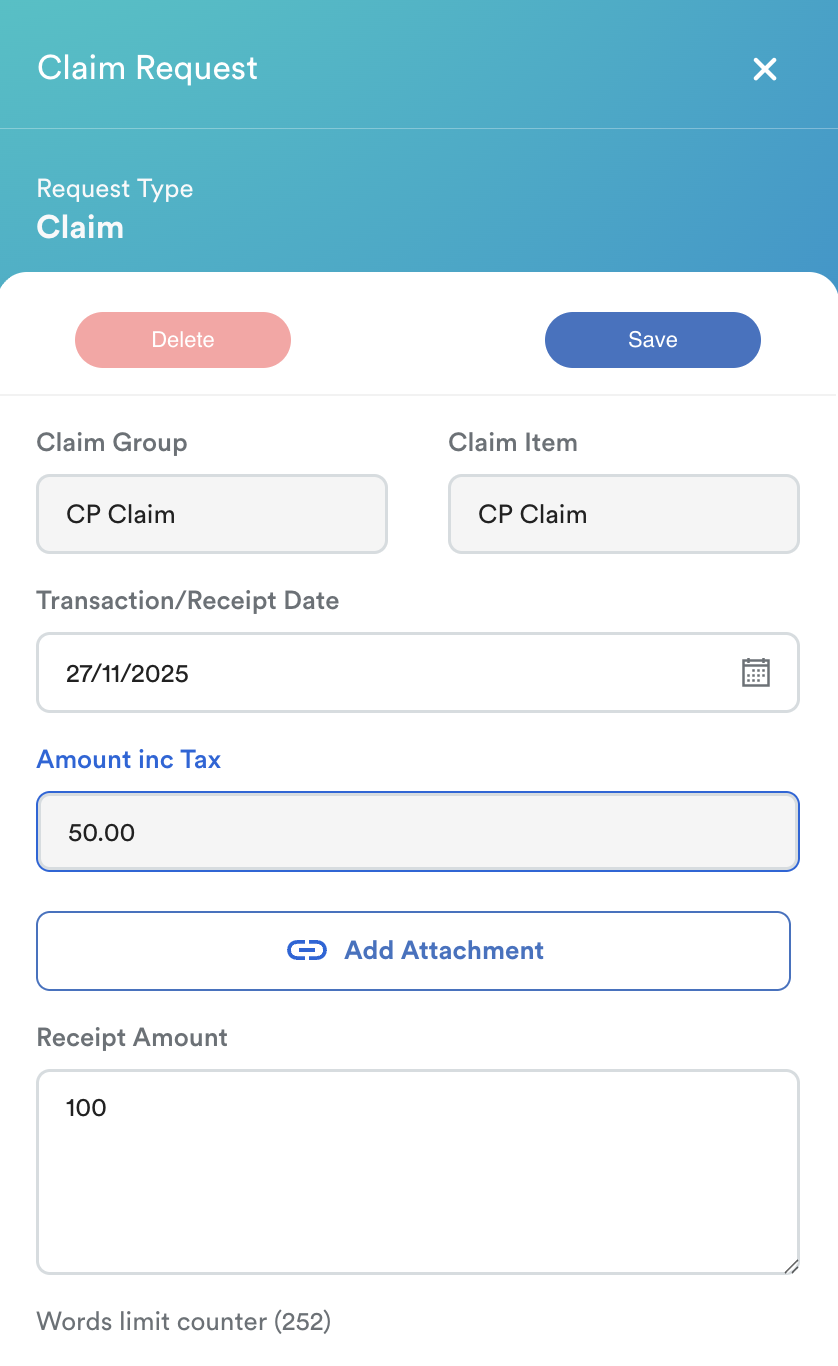
Enable Claim Amount Limit (%) to calculate the claim amount based on a percentage of the receipt amount.
When enabled:
- Amount Include Tax cannot be edited by the requestor.
- The requestor must enter the Receipt Amount.
- The claim amount is calculated based on the percentage configured.
Example:
If the claim amount limit is set to 50% and the receipt amount is RM100, the claim amount will be RM50.
Exchange Rate
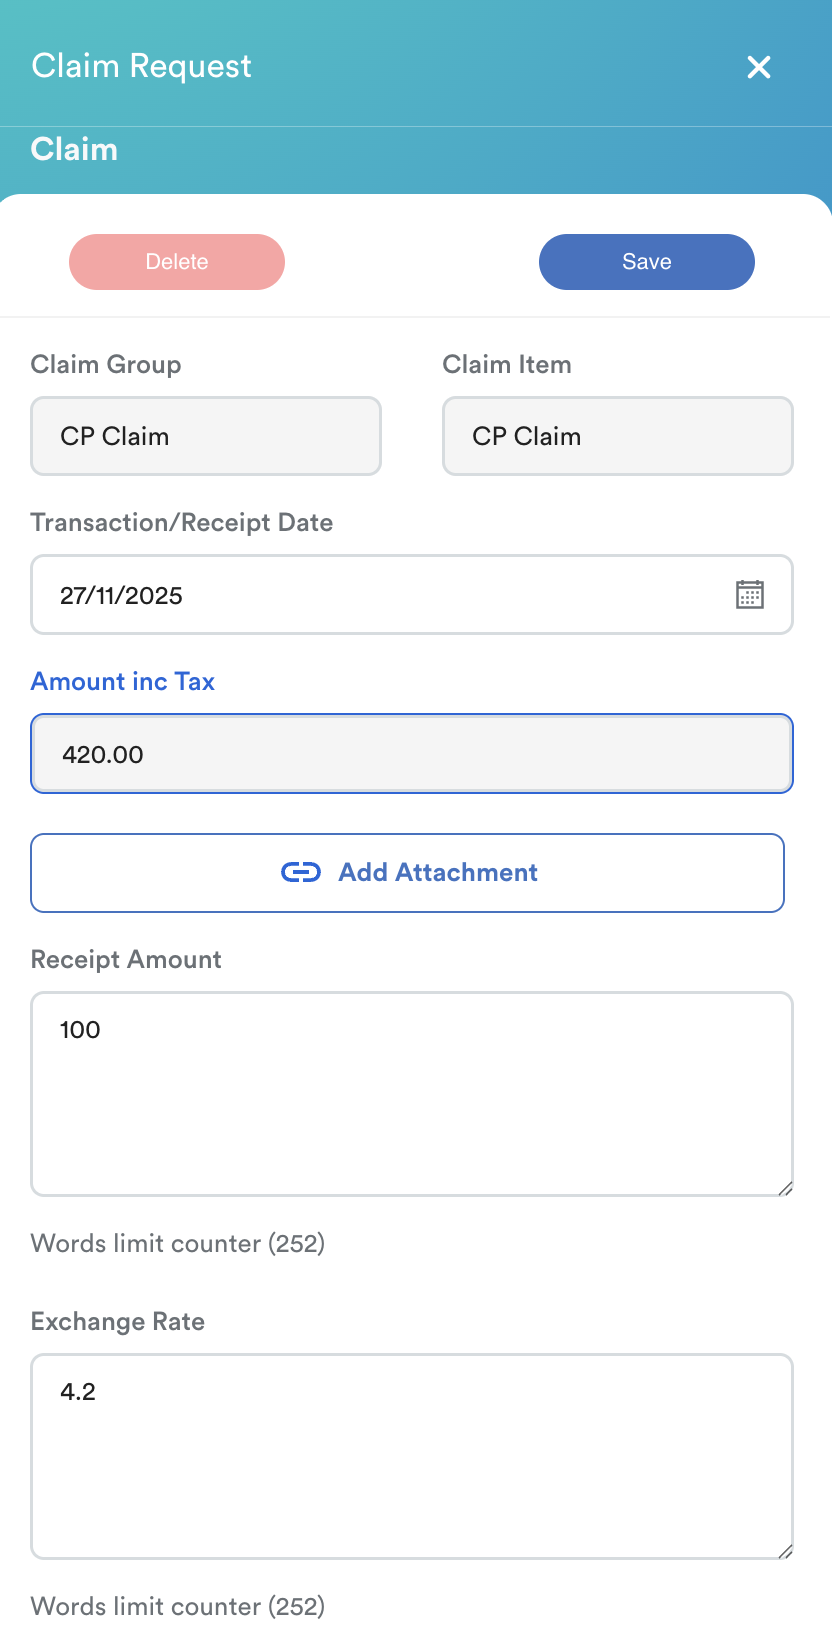
Enable Exchange Rate if the claim requires currency conversion.
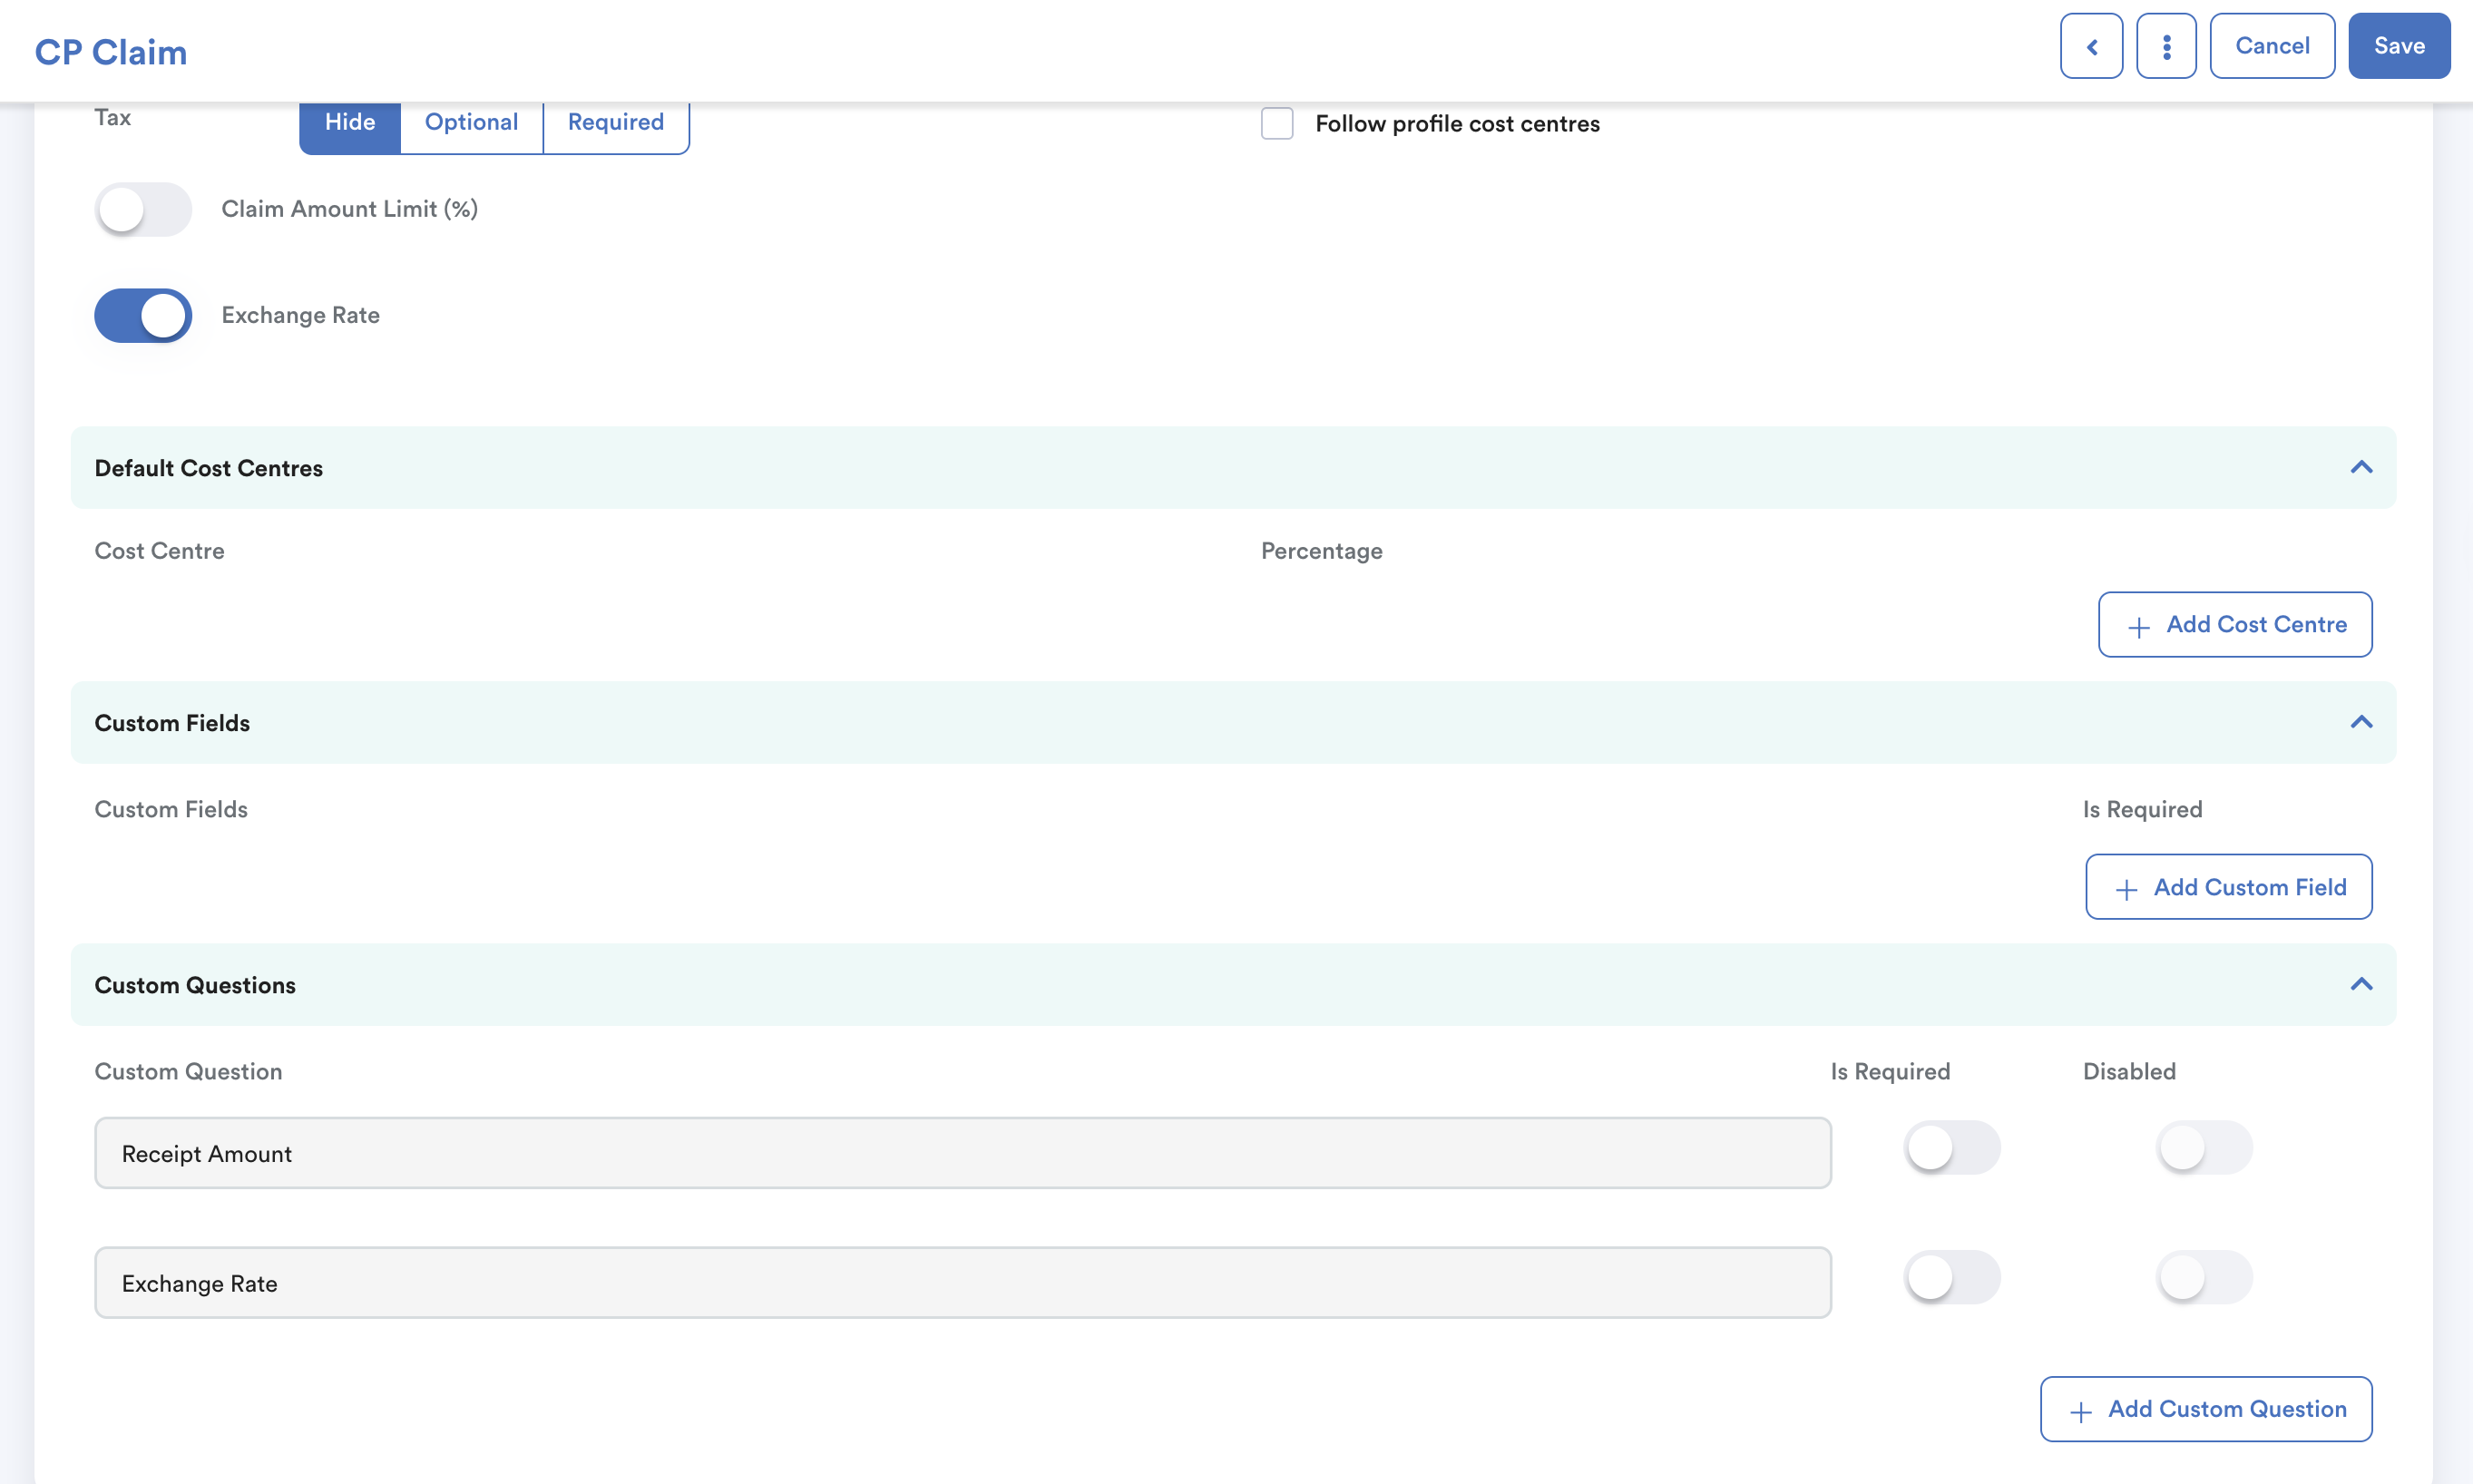
When enabled, Receipt Amount and Exchange Rate will be available under Custom Questions.
Set these fields as Required so the requestor must provide both values when submitting the claim.
Important: The requestor must enter an exchange rate to calculate the Amount Inc Tax. If no exchange rate is entered, the Amount Inc Tax will be calculated as zero.
Custom Fields
Add custom fields or questions to collect additional information when employees submit a claim request.
For each custom field, enable the Is Required option if employees must provide the information before submitting the claim.

For more information, refer to Creating Custom Field for Claim Request.
Step 5
Click Limit & Price at the top of the page to configure the claim limit and entitlement settings.
Limit
Select the Limit Type for the claim item:
- Unlimited: No claim limit is applied.
- Fixed: Set a fixed yearly claim limit.
- By Year of Service: Set the period for the claim entitlement to refresh based on the employee's years of service.
- By Job Position: Set different claim limits based on job position.
- By Job Grade: Set different claim limits based on job grade.
- By Category: Set different claim limits based on claim category.
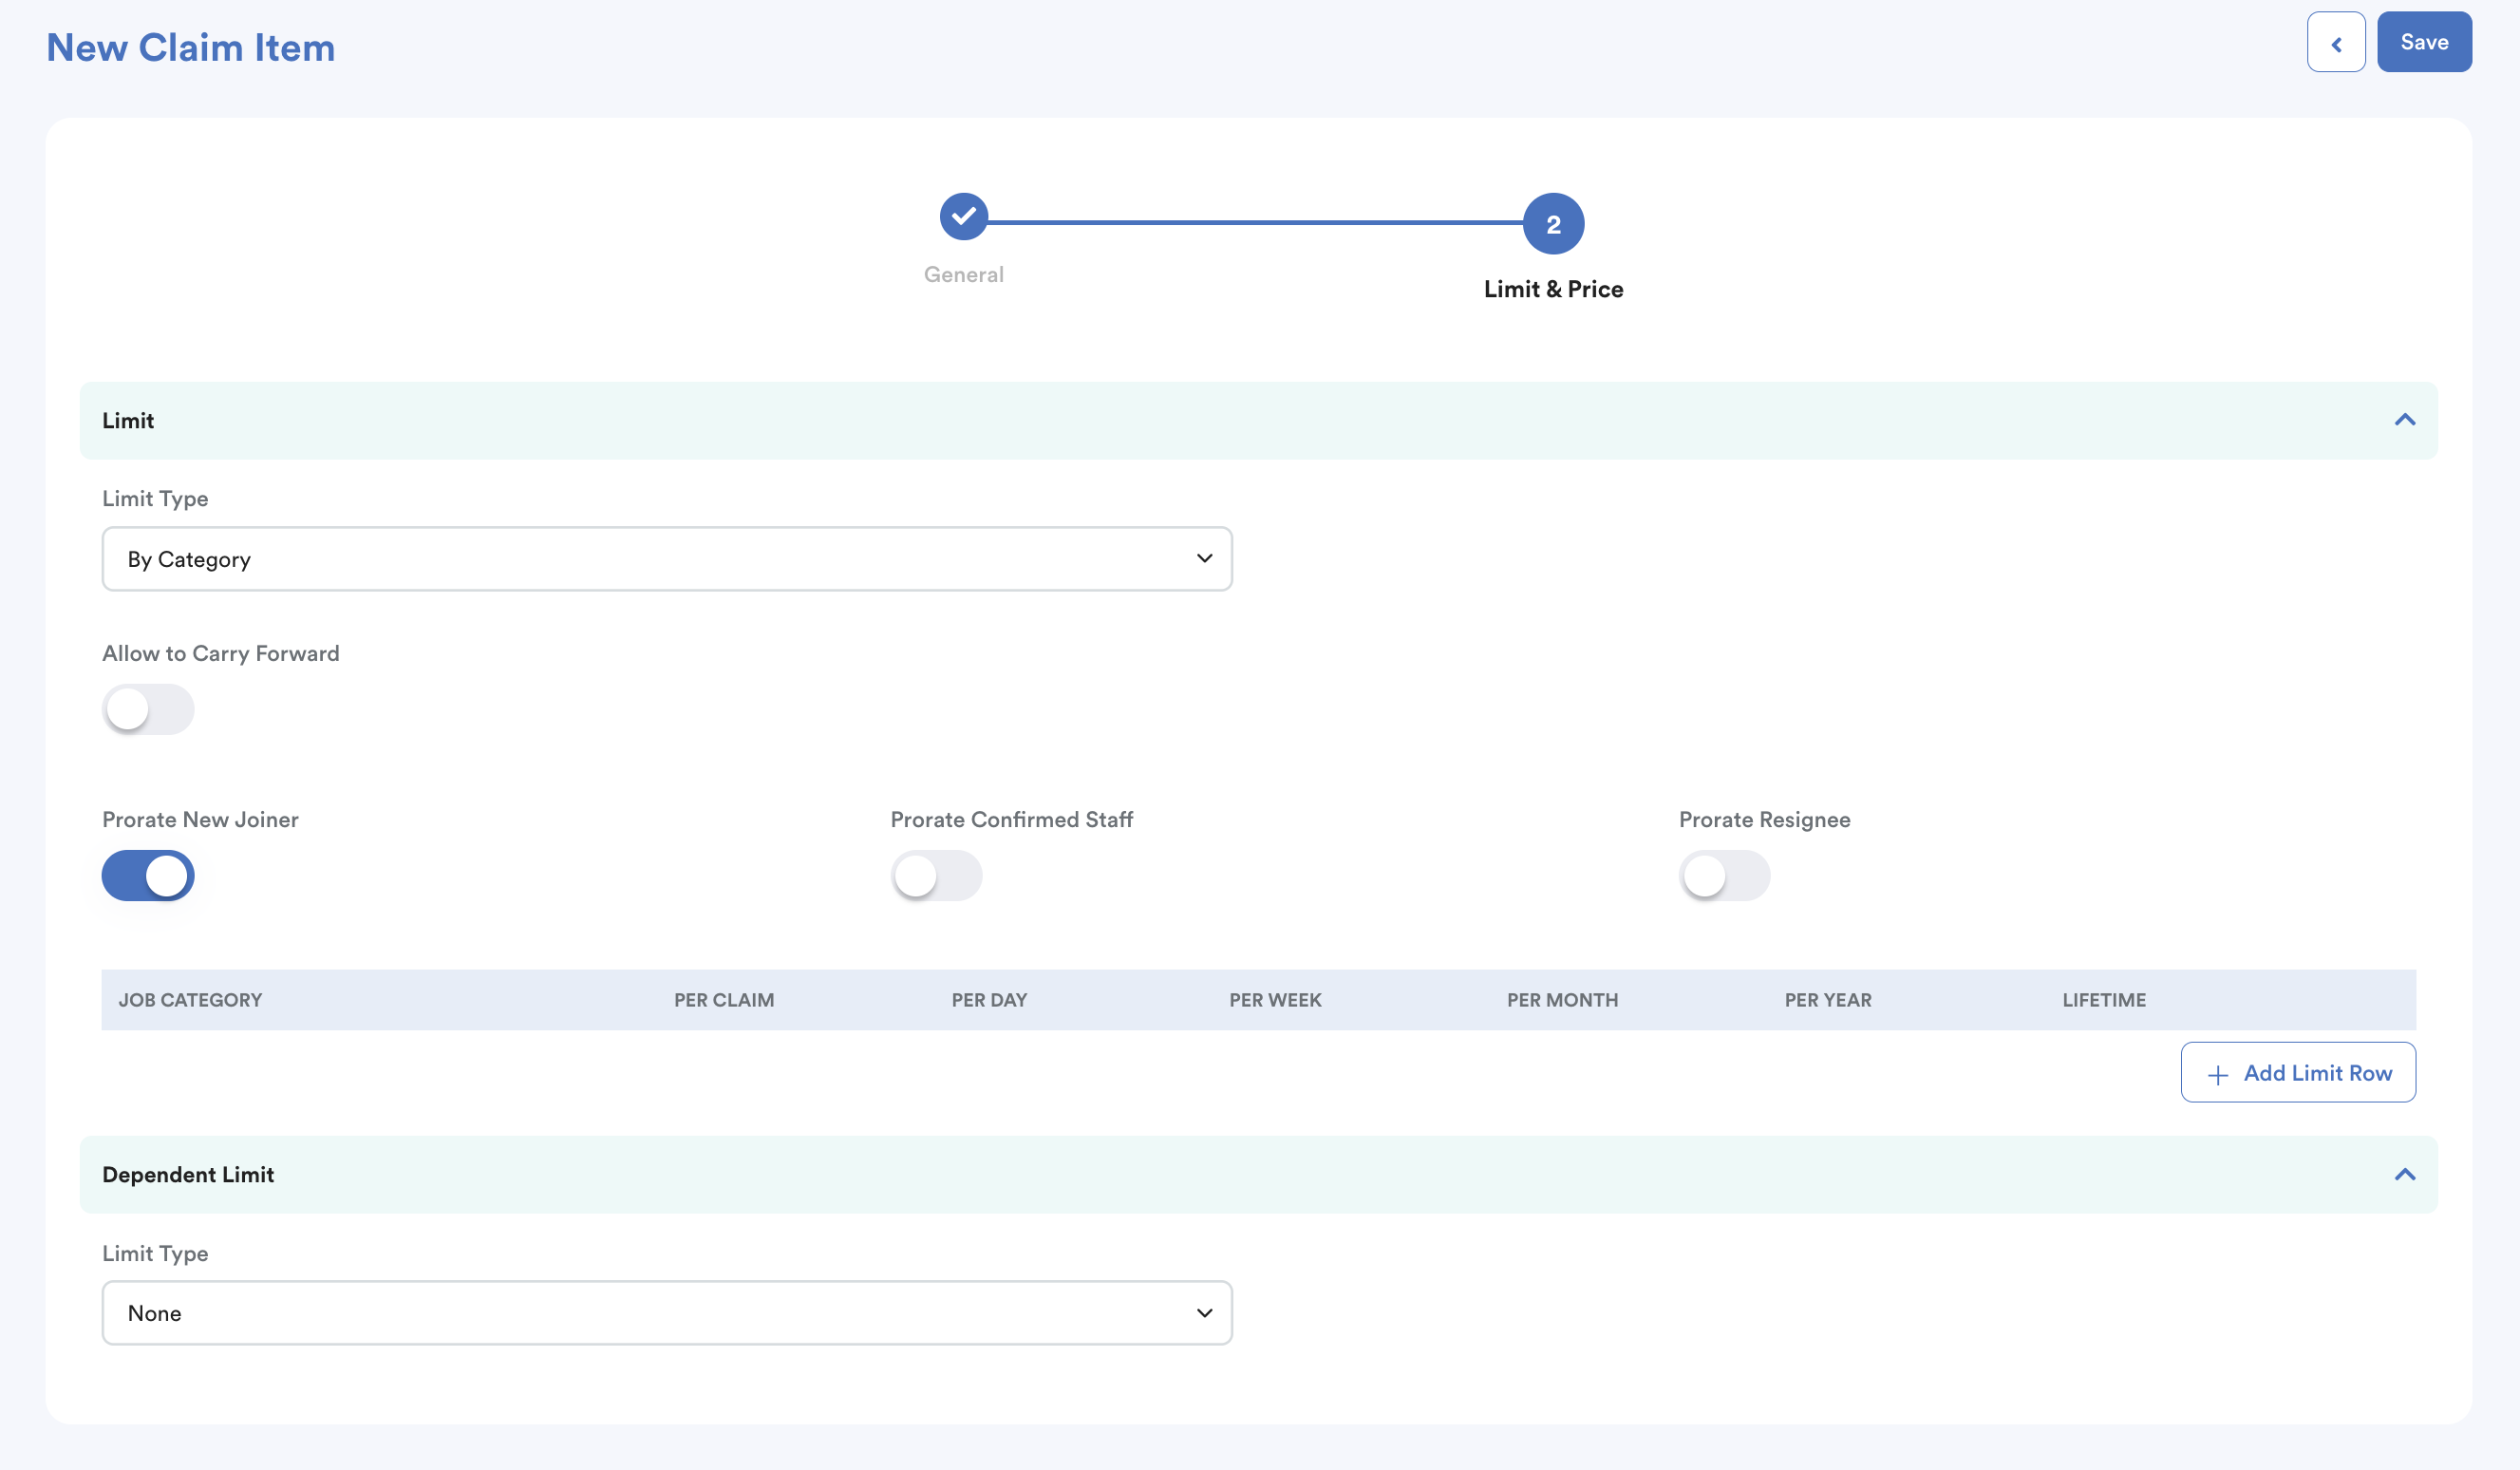
You can also enable:
- Allow Carry Forward
- Prorate for New Joiner
- Prorate for Confirmed Staff
- Prorate for Resignee
Enable the relevant proration option to prorate the claim entitlement based on the employee's eligible period. The system uses the following dates:
- Confirmed Staff: Confirmation Date or Benefit Start Date, if available
- Resigned Staff: Resigned Date
- New Joiner / Rehired: Join Date or Benefit Start Date, if available
Note: If a Benefit Start Date is available, it takes priority over the Confirmation Date or Join Date.
Prorated Claim Entitlement = Claim Entitlement × (Eligible Days ÷ Total Days in Entitlement Period)
Example:
For an annual claim entitlement of RM2,400, an employee eligible from 1 January 2025 to 9 May 2025 (129 days) will receive a prorated entitlement of RM848.22.
RM2,400 × (129 ÷ 365) = RM848.22
Dependent Limit
Configure the Dependent Limit if the claim needs a separate limit for dependents.
When a dependent limit is enabled, the system creates an additional claim item or limit that is separate from the main claim limit. Employees must select the appropriate dependent claim item when submitting a claim so that the claim is deducted from the correct limit.
If a dependent limit is not required, select None.
For more information, refer to Setting up Dependent Claims

Once all settings have been configured, save the claim item.
After the claim item is created, it can be assigned to employees by creating a Claim Group.
We hope this explanation clarifies the matter. If you require additional assistance, do not hesitate to contact our support team.
Was this article helpful?
That’s Great!
Thank you for your feedback
Sorry! We couldn't be helpful
Thank you for your feedback
Feedback sent
We appreciate your effort and will try to fix the article