A claim group allows you to assign specific claim entitlements, limits, and approval flows to a selected group of employees.
If you have not created a claim item, refer to Creating Claim Item.
Step 1
On the left menu, go to Settings (a) > Claim (b) > Claim Group (c).

Step 2
You will be directed to the Claim Group listing page, where all previously created claim groups are displayed.
Click Add New to create a new group of employees who are entitled to a specific set of claims.

Step 3
Fill in the required details for the claim group:

| a. | Name | Enter the name of the claim group. |
| b. | Label | Add a label to help identify or categorise the claim group. |
| c. | Limit Refresh on | Select the month when the claim entitlement resets each year. The entitlement record will only be displayed if the configured Limit Refresh Month is earlier than the employee's birth month. Example: If January is selected, the employee’s claim entitlement will refresh every January. |
| d. | Claim Group Limit | Toggle this on to set a maximum claim amount for employees under this group. Each approved claim will deduct from the available balance. If a claim exceeds the remaining limit, the employee will not be able to submit the request. |
| e. | Custom Approval Route | Toggle this on to apply a custom approval workflow instead of the employee’s default approval route. |
| f. | Claim items | Choose which claim items to include or exclude for this claim group. |
Step 4
Go to the Condition tab to define which employees should be included in this claim group based on specific criteria.

Example: Using Age as a Condition
You can create different claim groups based on employee age, such as:
- Optical (Below Age 40)
- Optical (Age 40 and Above)
The moment an employee reaches an age bracket, the system automatically transitions them to the next claim group on their birthday.
An employee is 39 years and 11 months old.

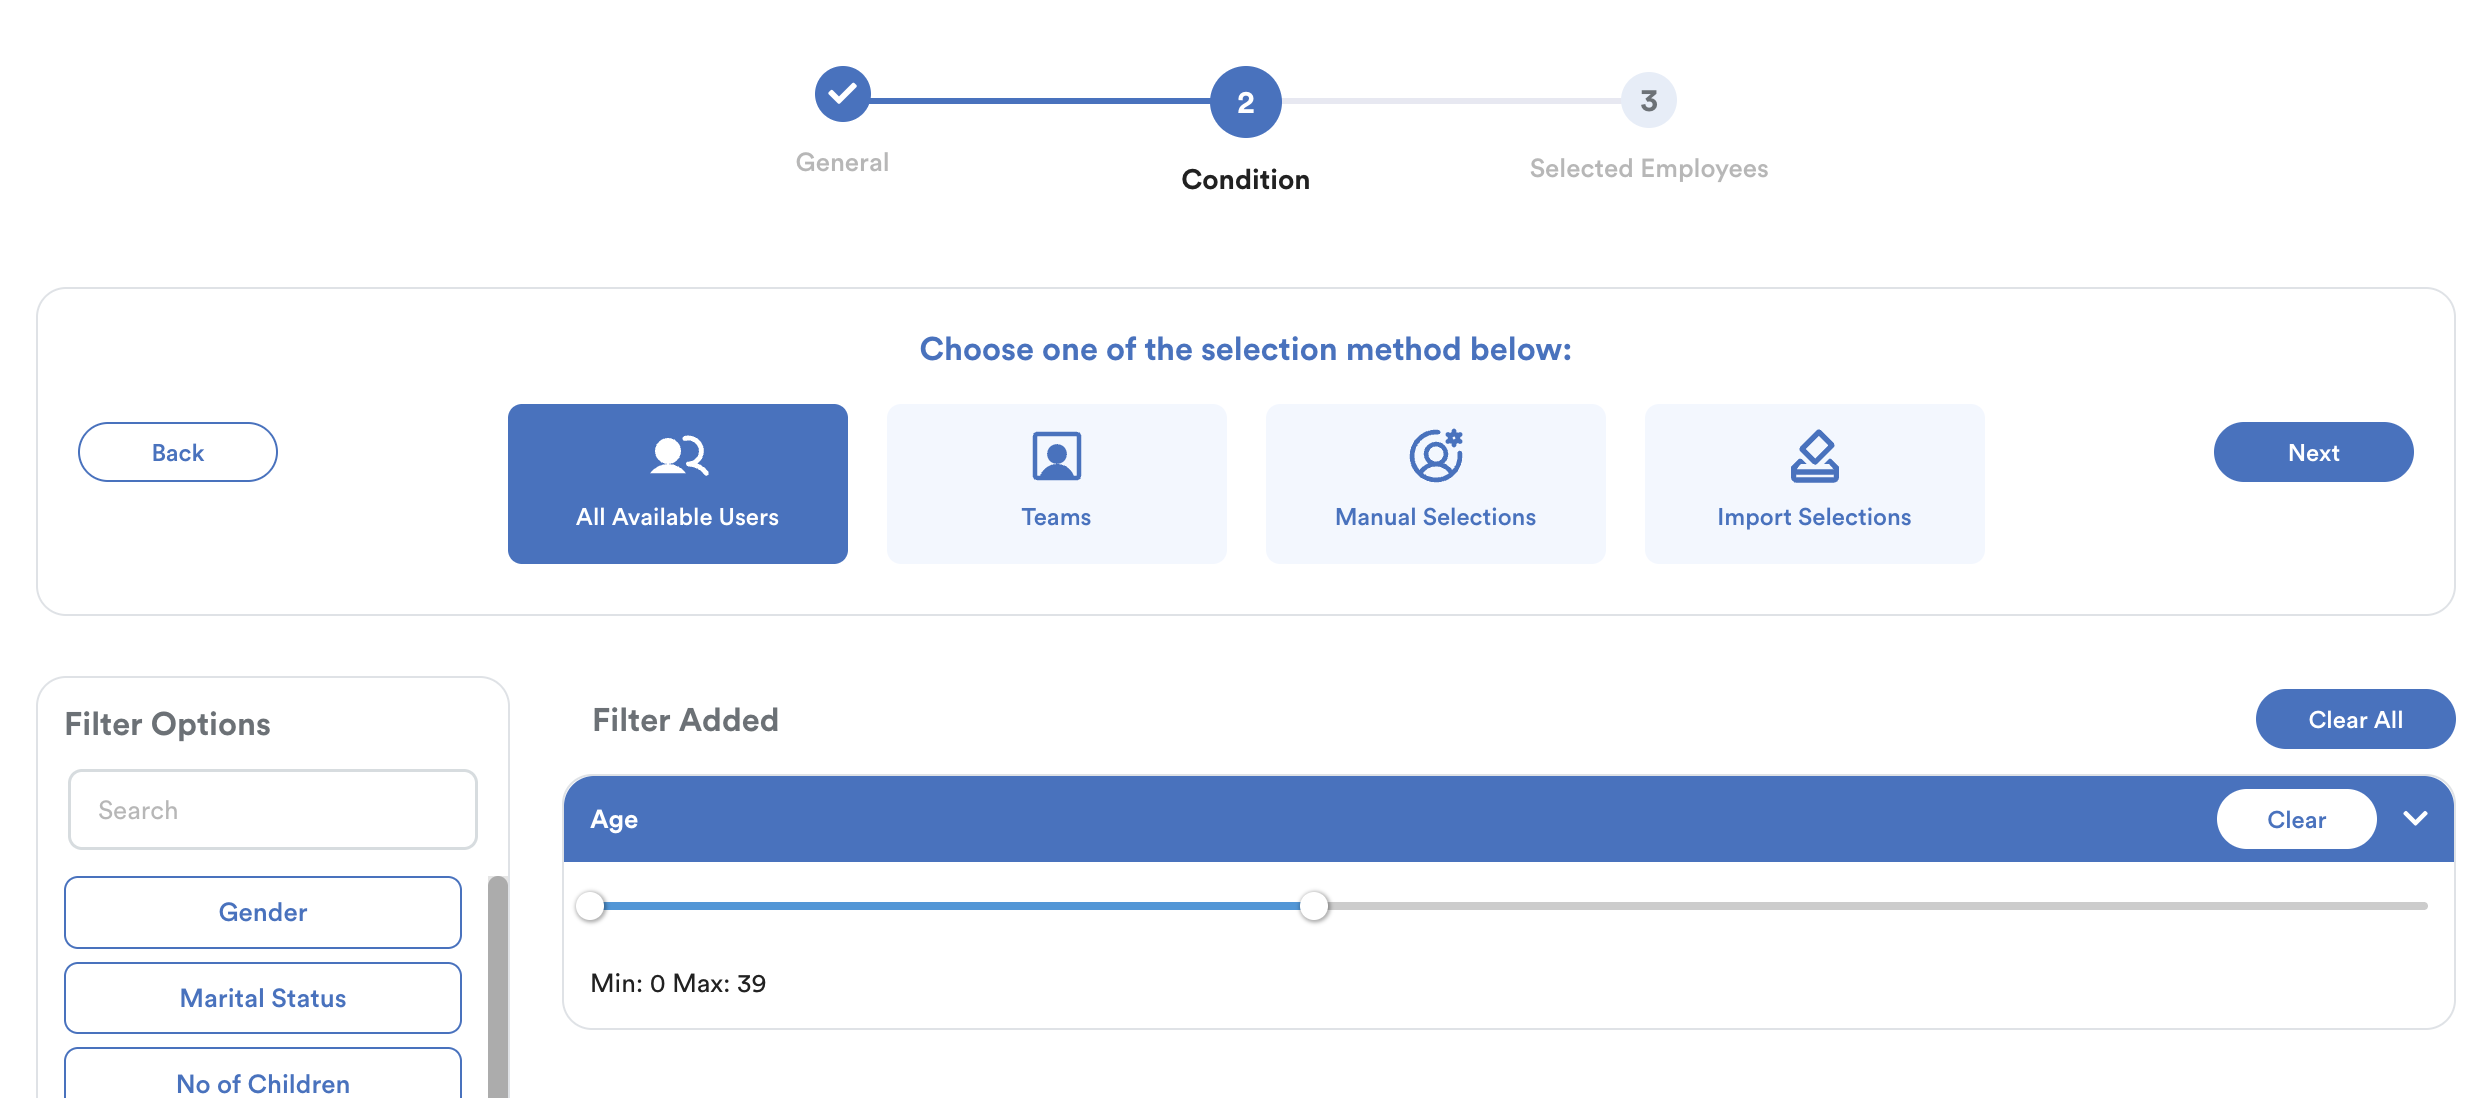
- Condition: Age = 0–39
The system will include the employee in this claim group as they are within the age bracket.

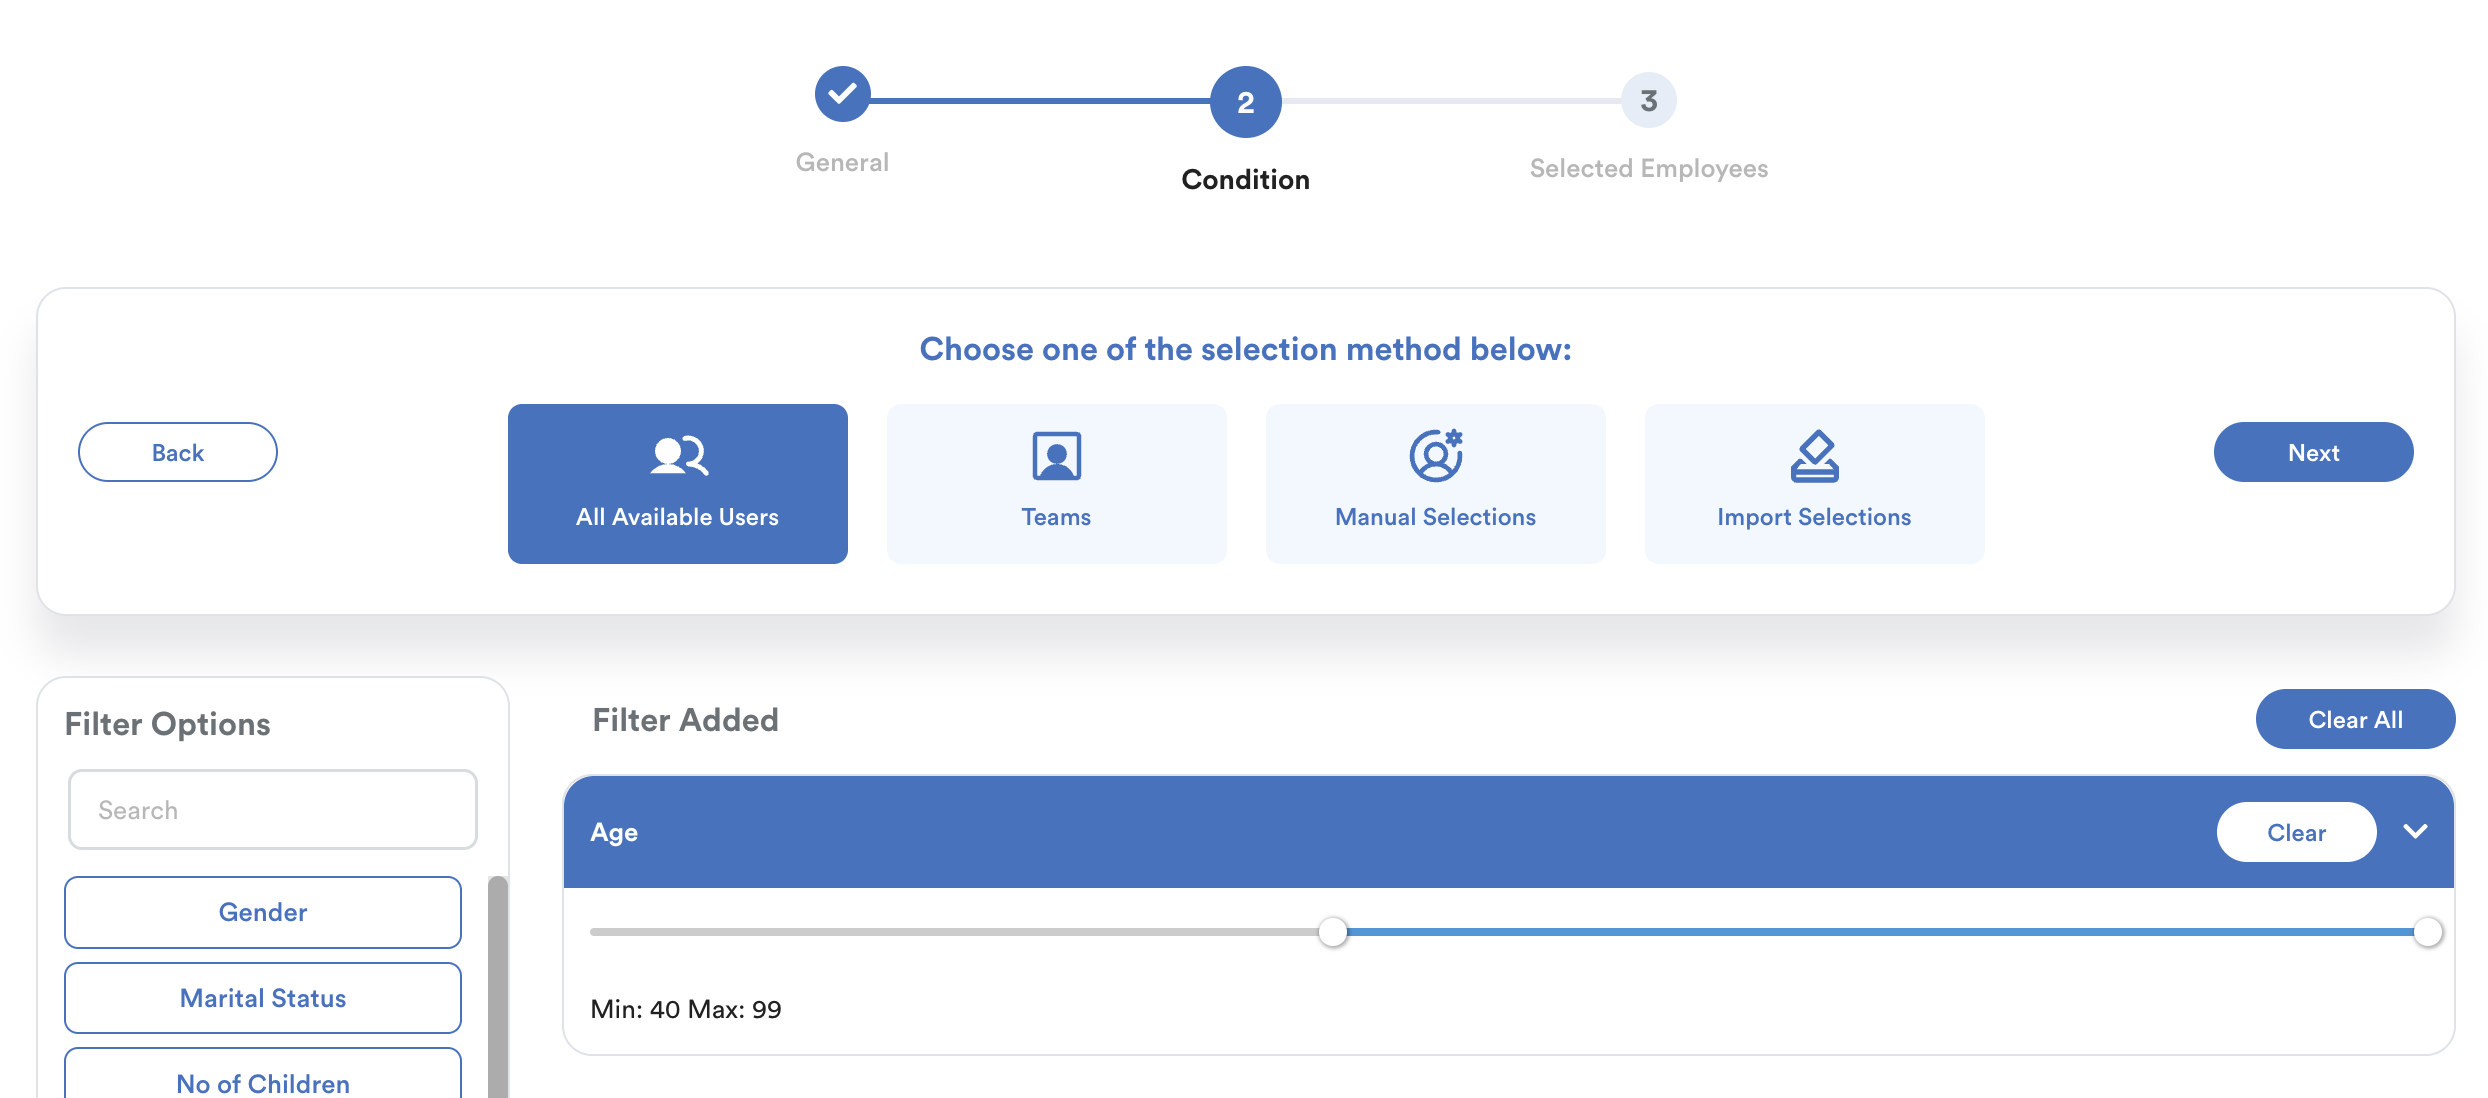
- Condition: Age = 40–99
The system will not include the employee in this claim group as they haven't reached the age bracket.

Step 5
Click on the Selected Employees tab to further refine your selection.
Here, you can include or exclude individual employees from the list generated in the previous step.

Once done, click Save at the top right to complete the setup.
Note:
When an employee has a claim entitlement from the previous year, the corresponding claim group will continue to appear in the claim request dropdown. This is designed to allow the employee to submit claims with a transaction date from the previous year.
Please note that this behavior is consistent with the system logic, and the previous claim group with claim records cannot be removed. If there are no claim records, you can exclude the employee from the claim group. And this claim group will be removed from the employee automatically.
If the employee tries to submit for a transaction date in the current year in the previous claim group, the request would automatically be blocked.
We hope this explanation clarifies the matter. If you require additional assistance, do not hesitate to contact our support team.
Was this article helpful?
That’s Great!
Thank you for your feedback
Sorry! We couldn't be helpful
Thank you for your feedback
Feedback sent
We appreciate your effort and will try to fix the article