Employees or managers can initiate a hiring request through the My Request screen. Depending on the hiring flow or requirement, you may choose between Standard Hiring or Direct Hiring.
Prerequisites
To enable a user to submit a requisition request, they must first be assigned to a specific requisition template. This is configured under the "Who can request?" tab within the Requisition Template settings.
Refer to: How to Create Requisition Template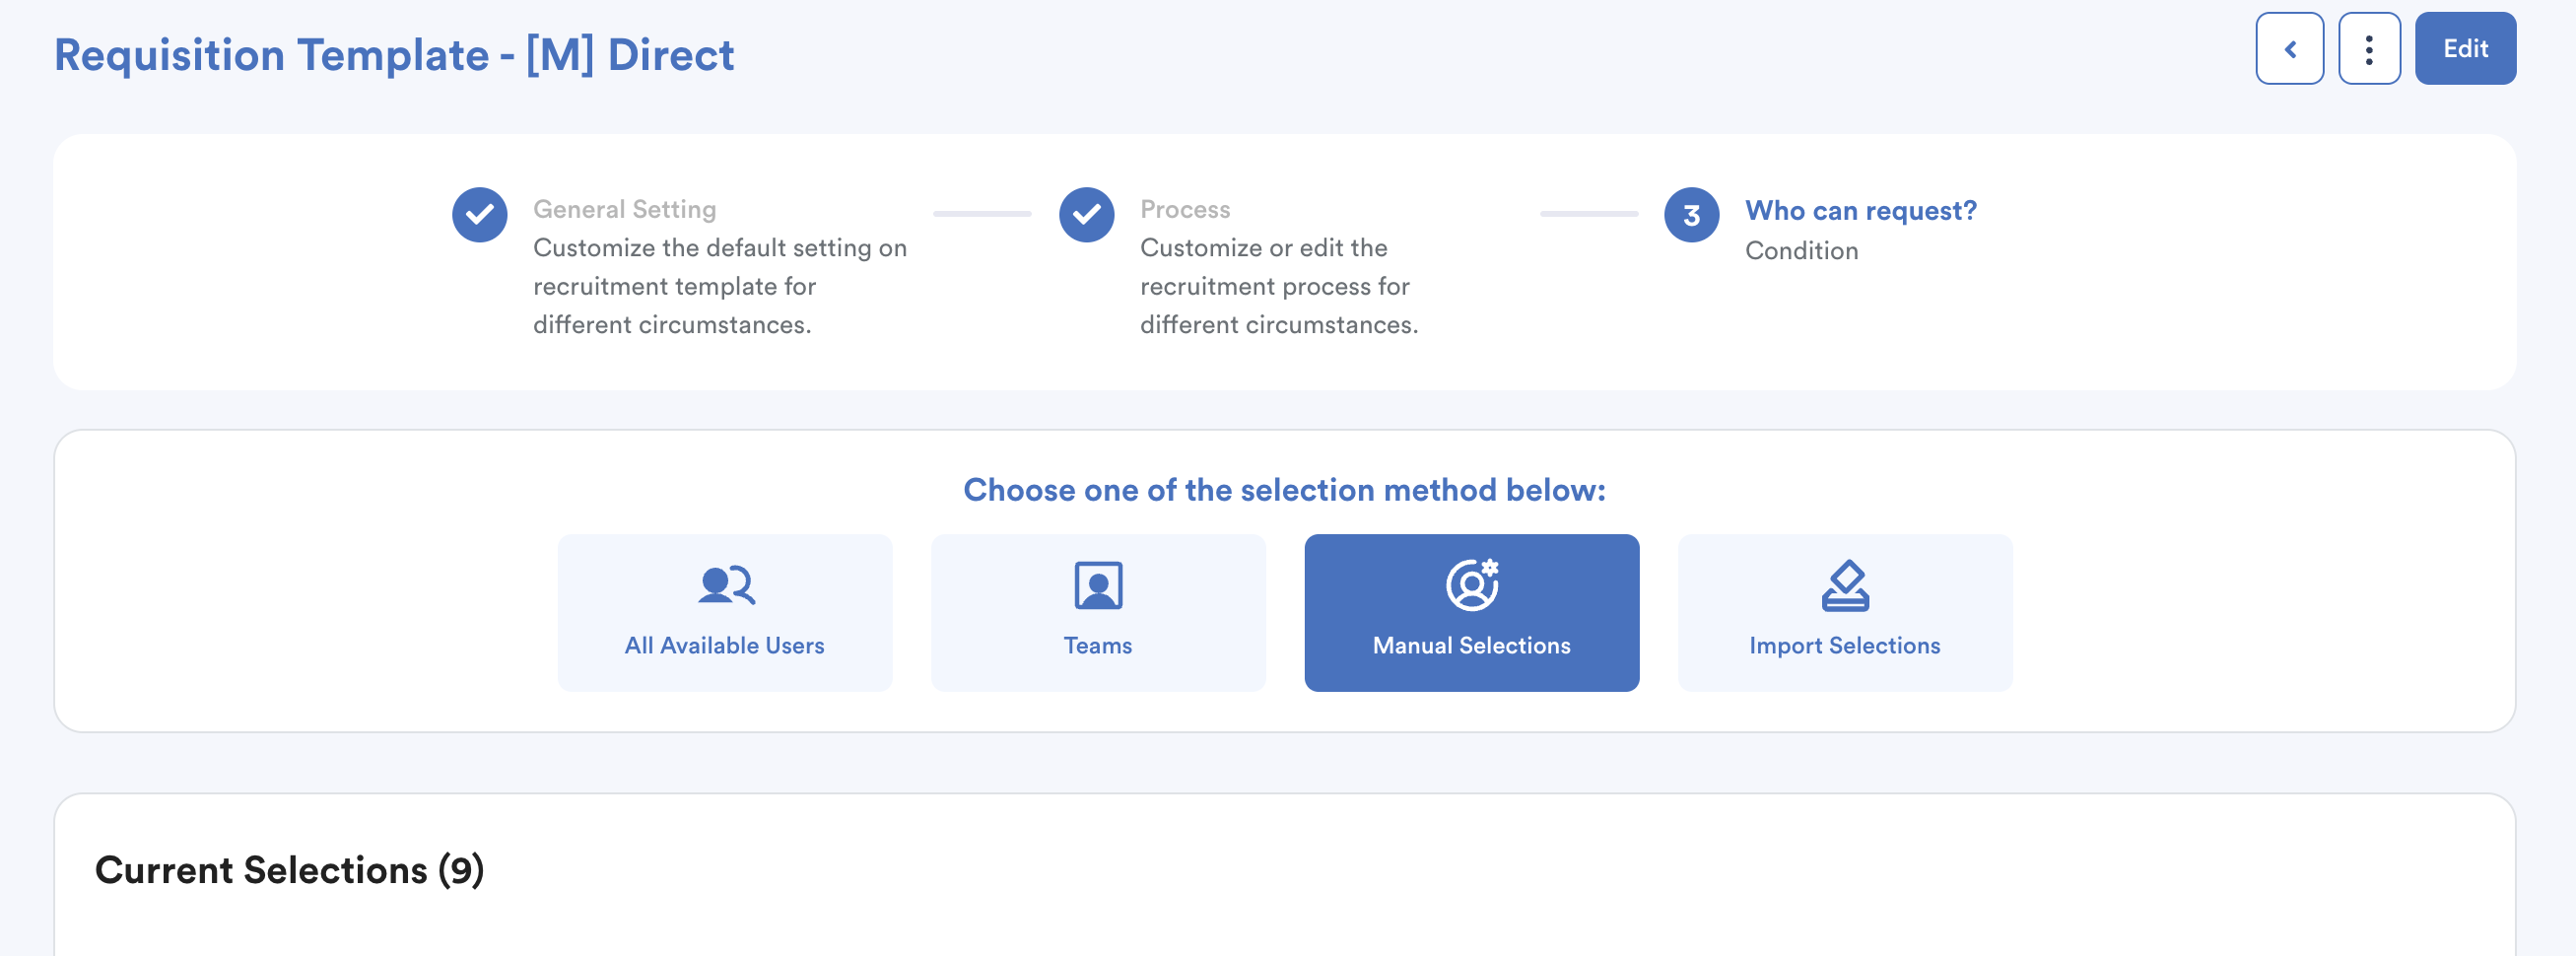
Step 1
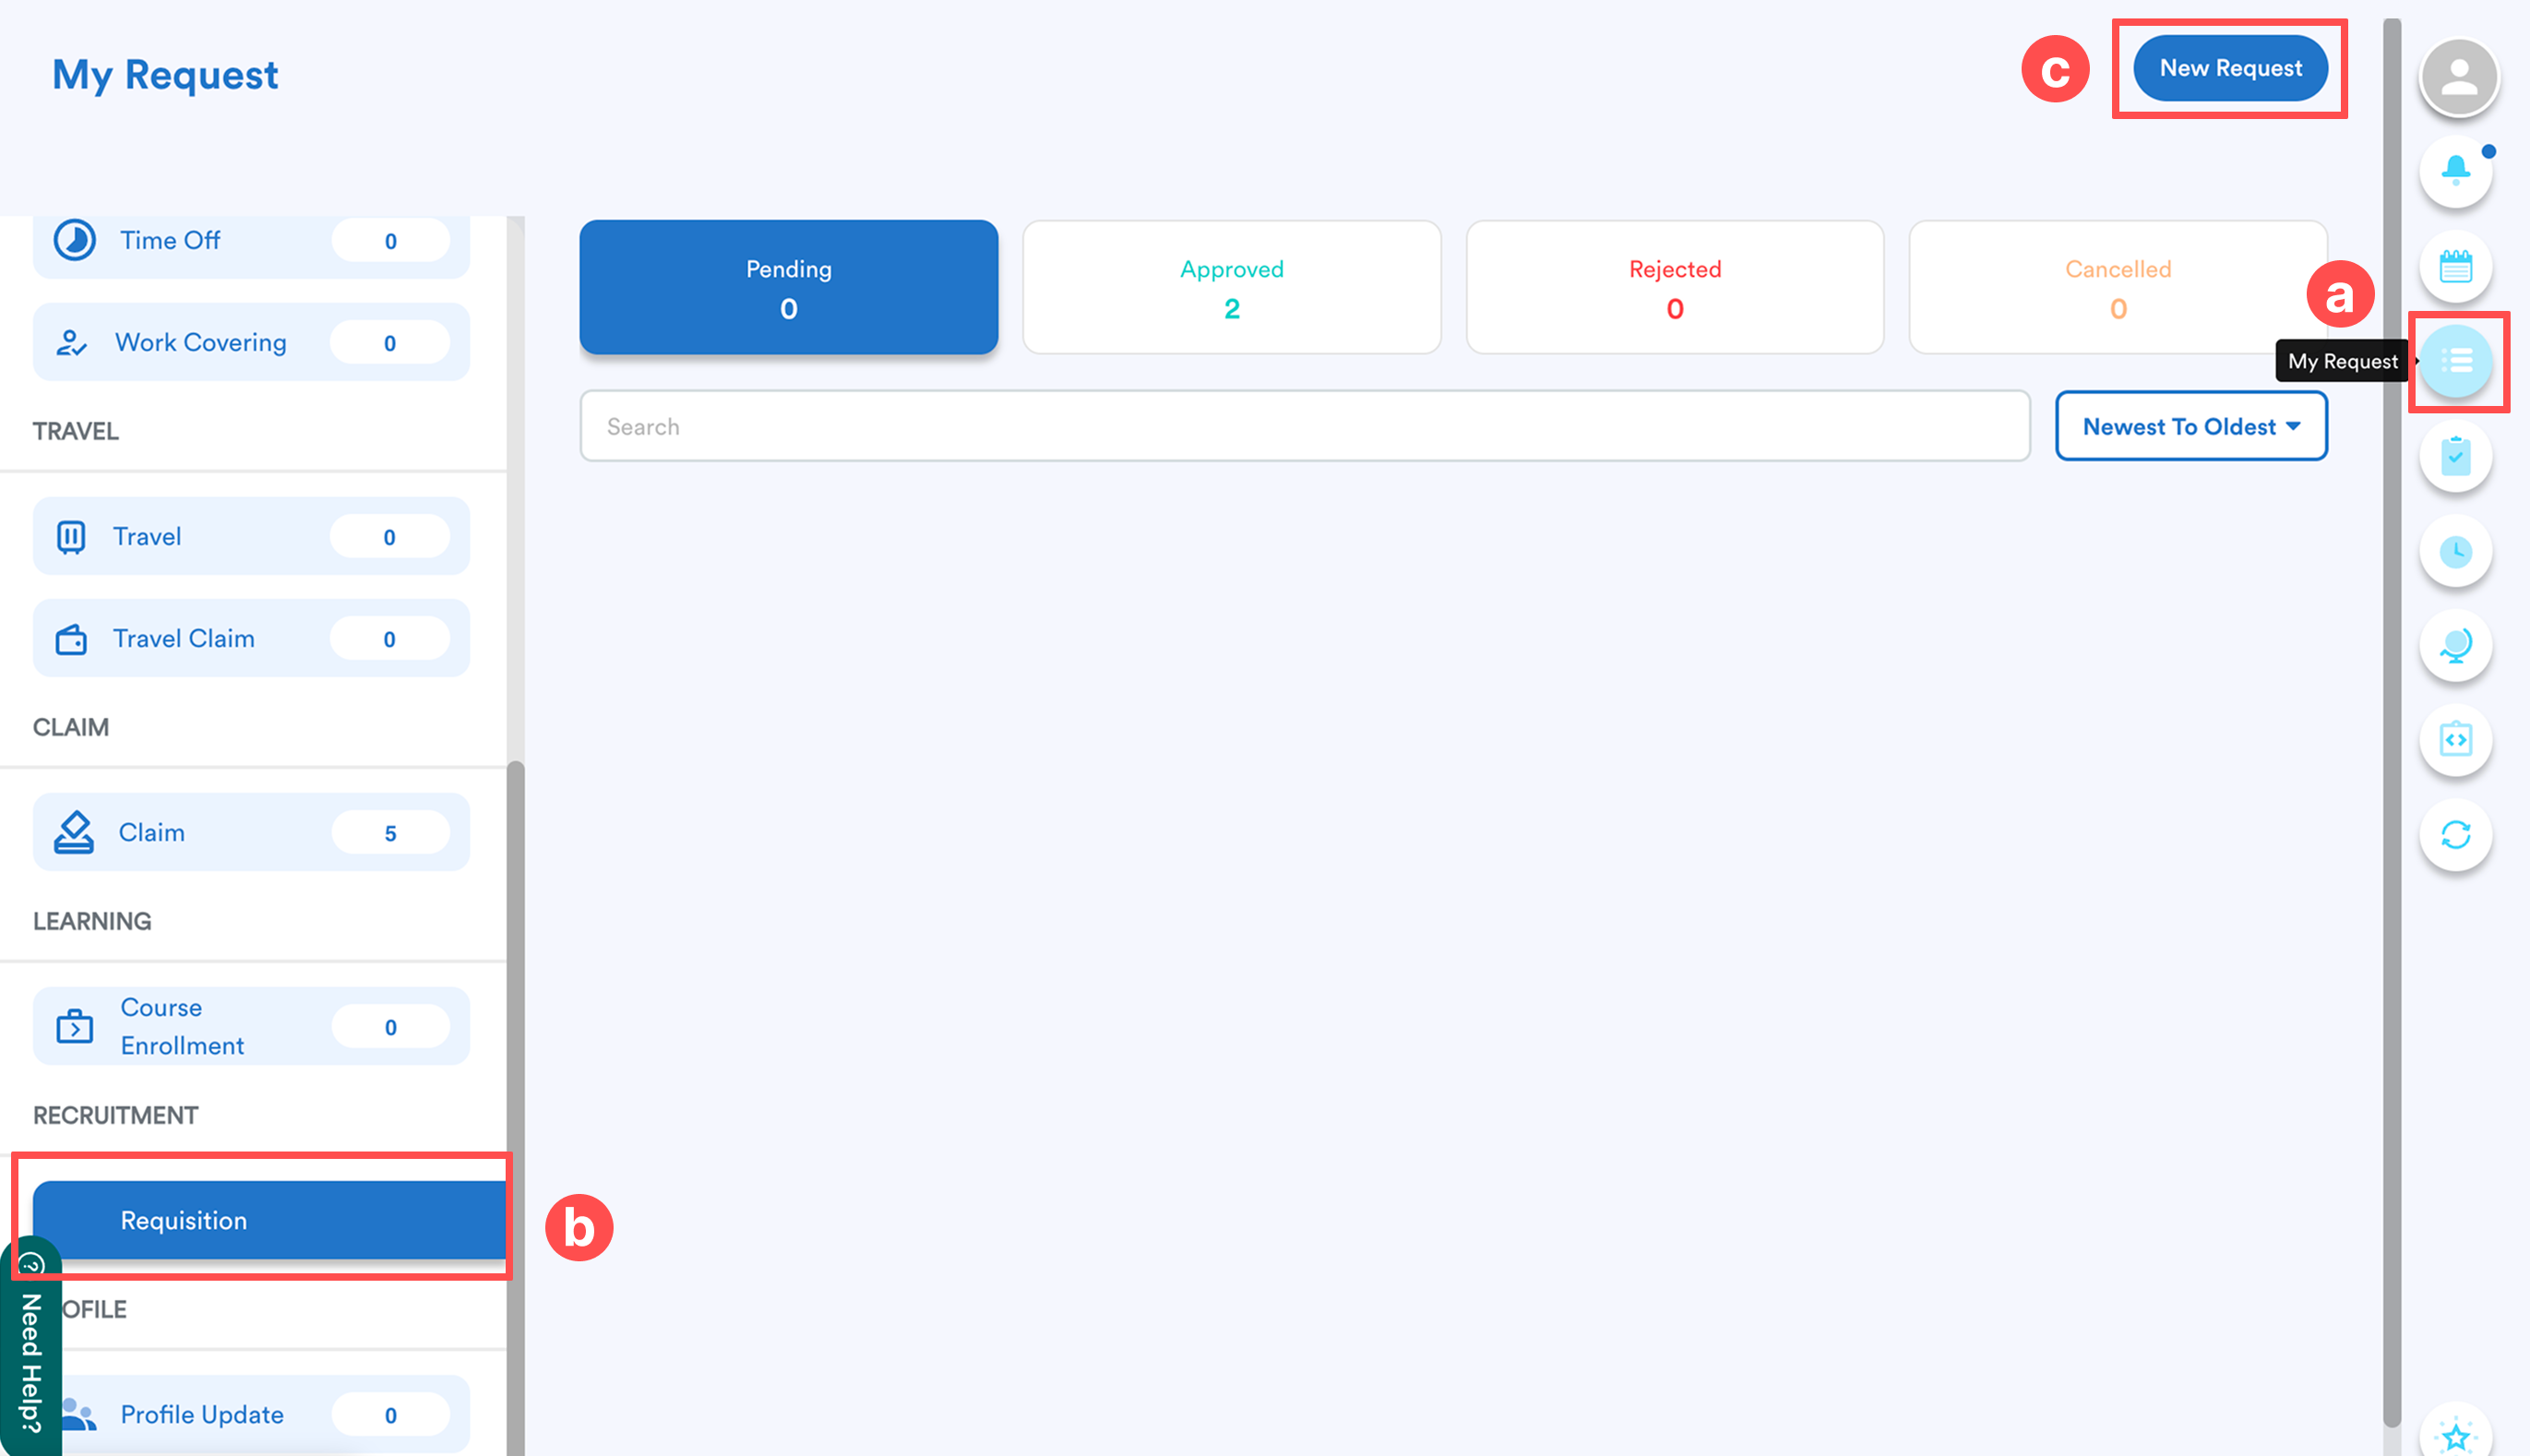
On the right menu, go to My Request (a). Then, click Requisition (b). To make an overtime request, click New Request (c).
Step 2
The Request Info panel will appear.

You must first select your recruitment method (click the link to navigate):
a. Standard Hiring
Fill in the following details:
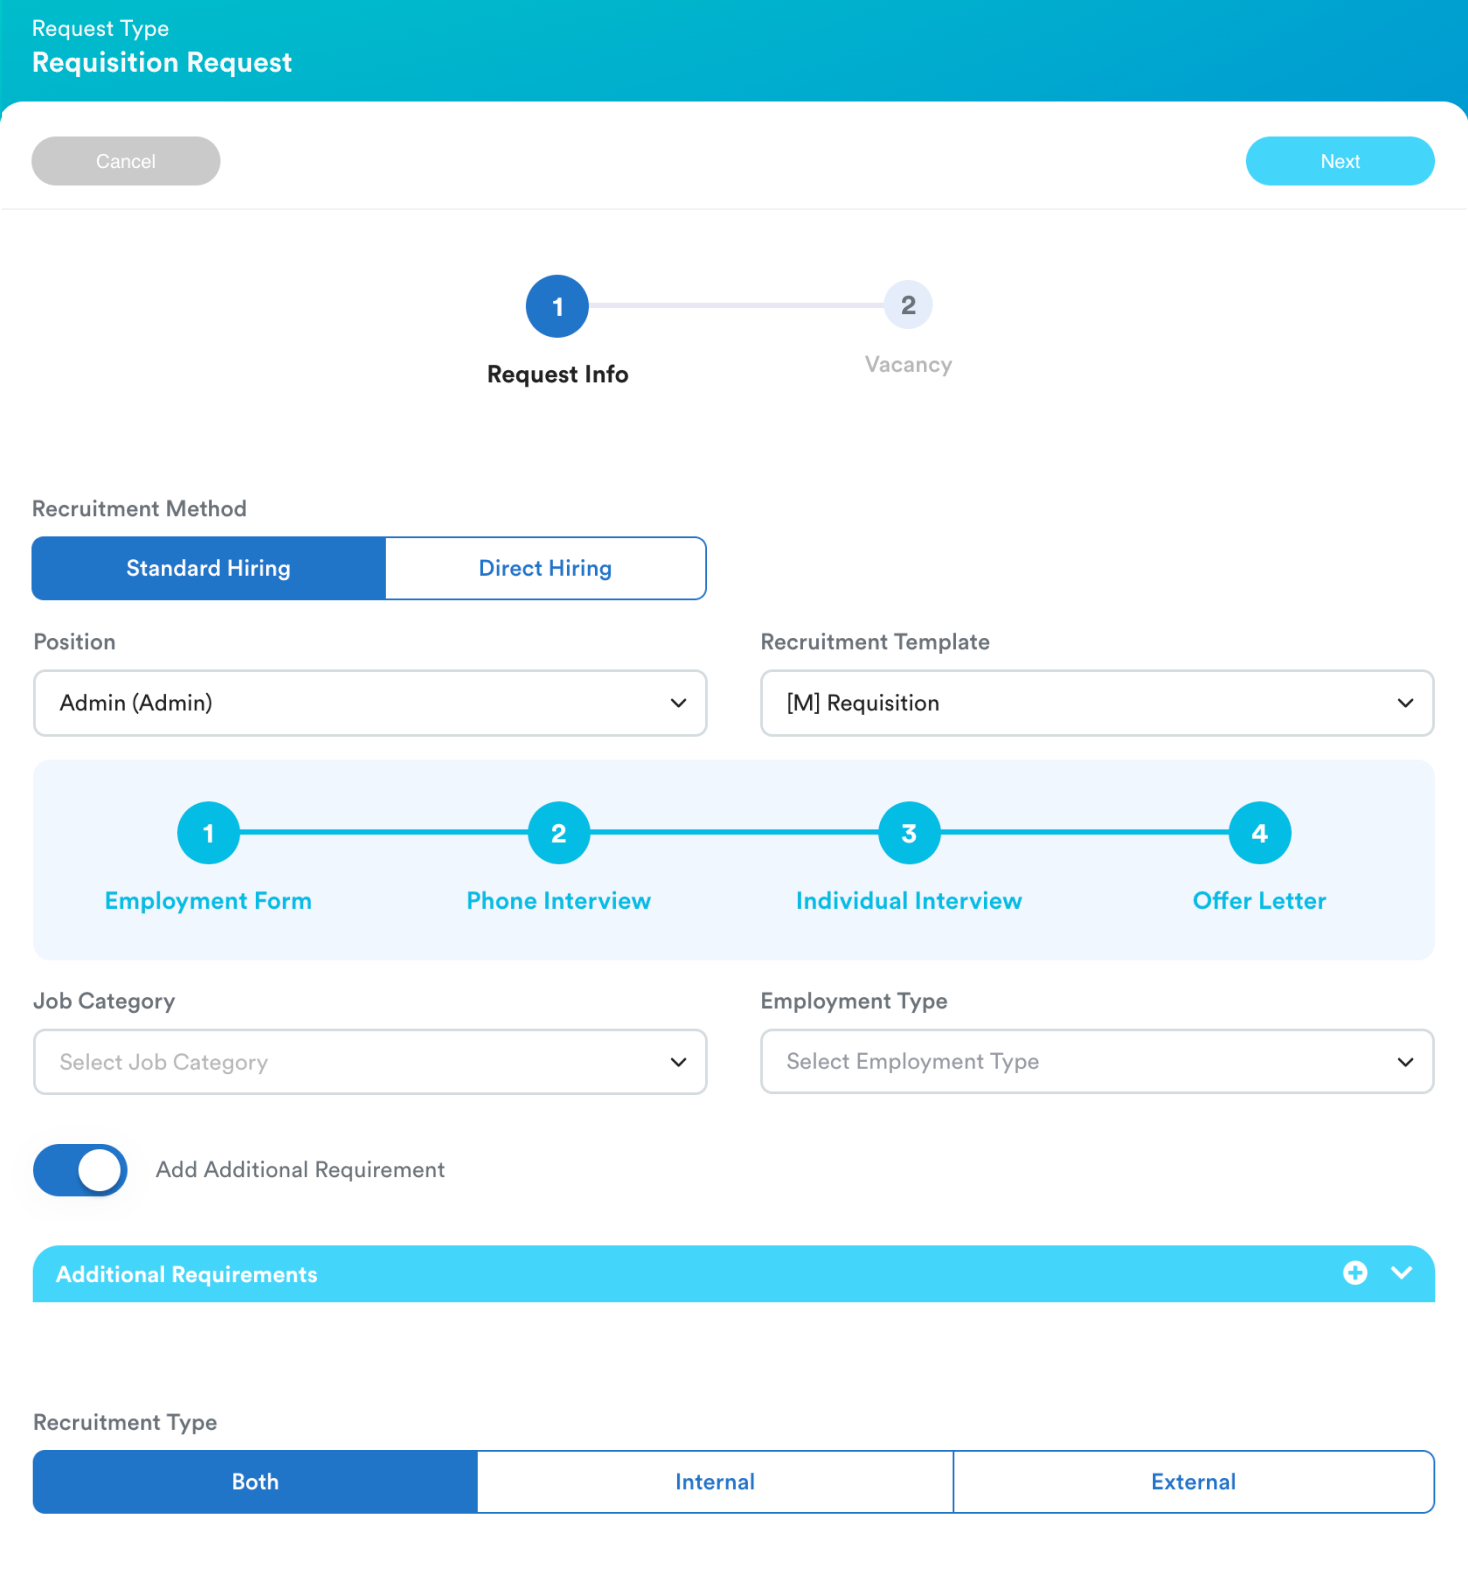
- Position: Select the job title for the requisition. If you cannot find the position you want, create it under system label > employee > position, refer to Managing System Labels
- Recruitment Template: Choose a template. The system will automatically display the requisition flow based on this selection.
Important: If you could not see any template for the selected position, ensure the position is added to one of the recruitment templates. Refer to How to Create Requisition Template
- Job Category & Employment Type: Categorize the role accordingly.
- Additional Requirement: Toggle this on if you need to include specific criteria for the position.
- Recruitment Type: Select Both, Internal, or External.
Once all fields are completed, click Next.
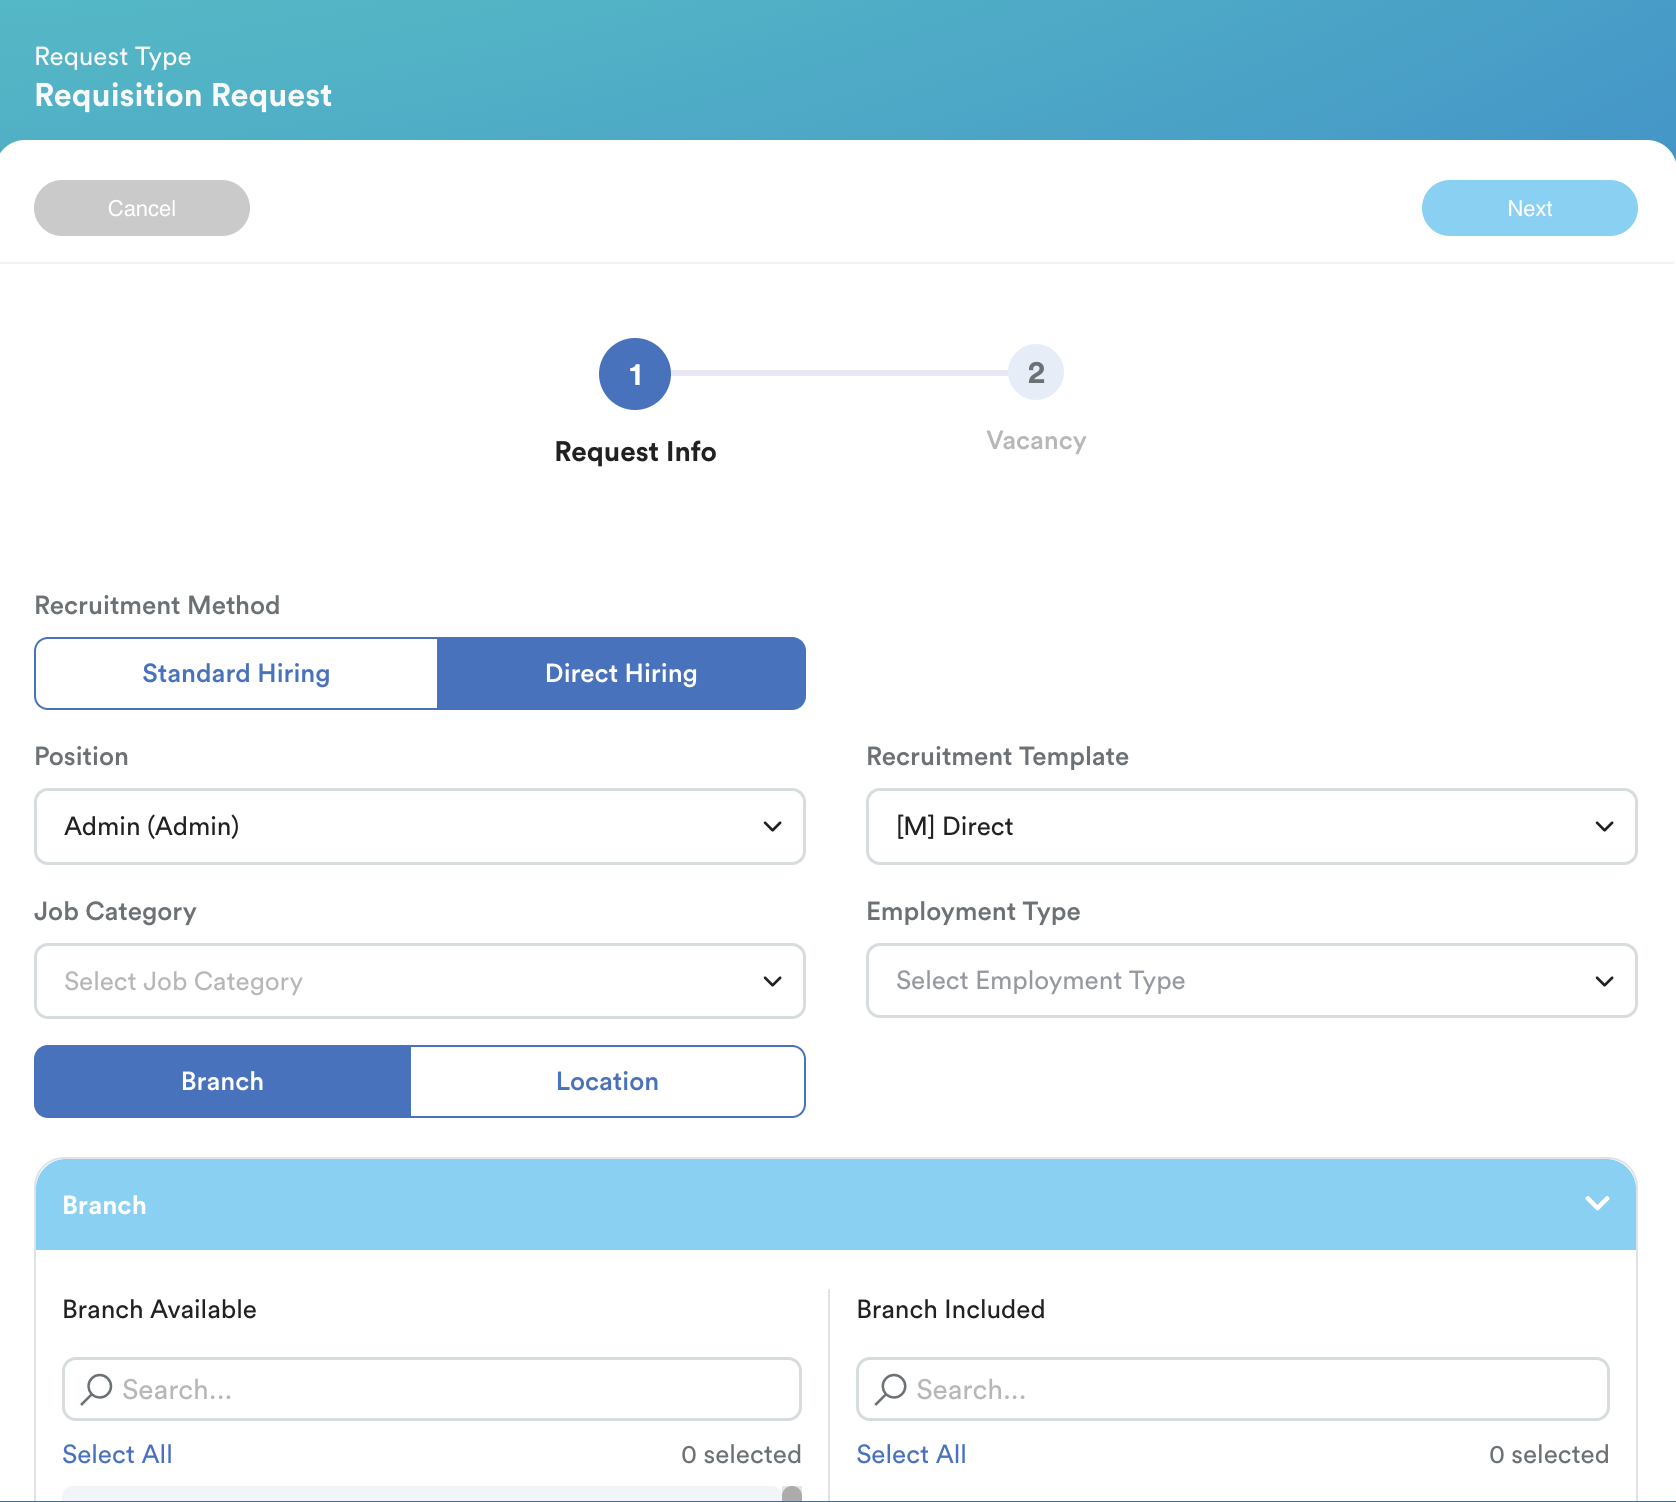
b. Direct Hiring
This method follows a simplified setup. Complete the basic position details as required.
Note: Additional requirements and recruitment type selections are not available for this method.
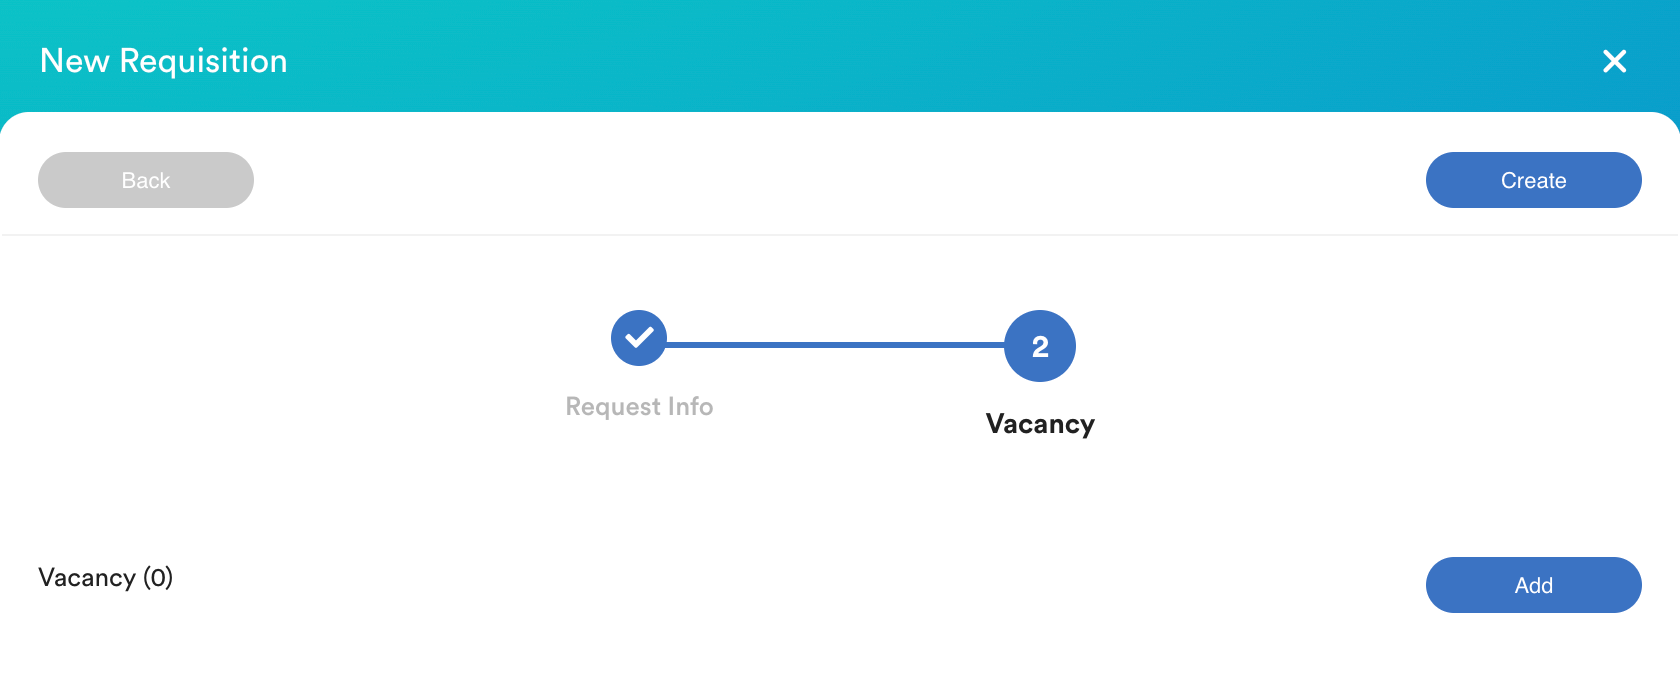
Step 3
You will be directed to the Vacancy tab. Click Add to begin defining the vacancy specifications based on your recruitment method.
Recruitment Method Vacancy (click the link to navigate):
a. Standard Hiring
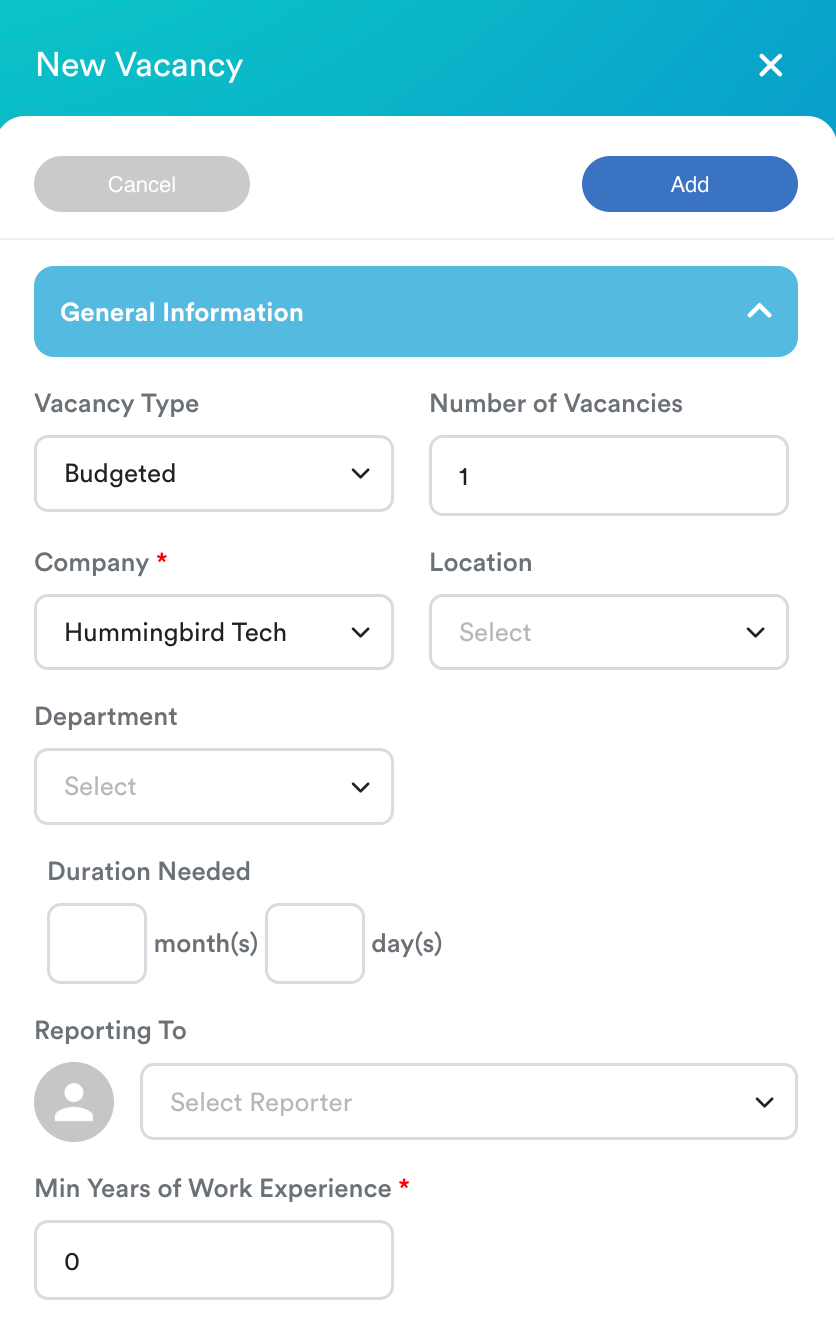
The New Vacancy tab contains four sections:
- General Information: Complete all mandatory fields marked with an asterisk (*), including Company, Location, and Min. Years of Work Experience.
- Career Level: Select the applicable professional levels for this position.
- Budget: Select a pay band or select Custom to define a currency, minimum and maximum value.
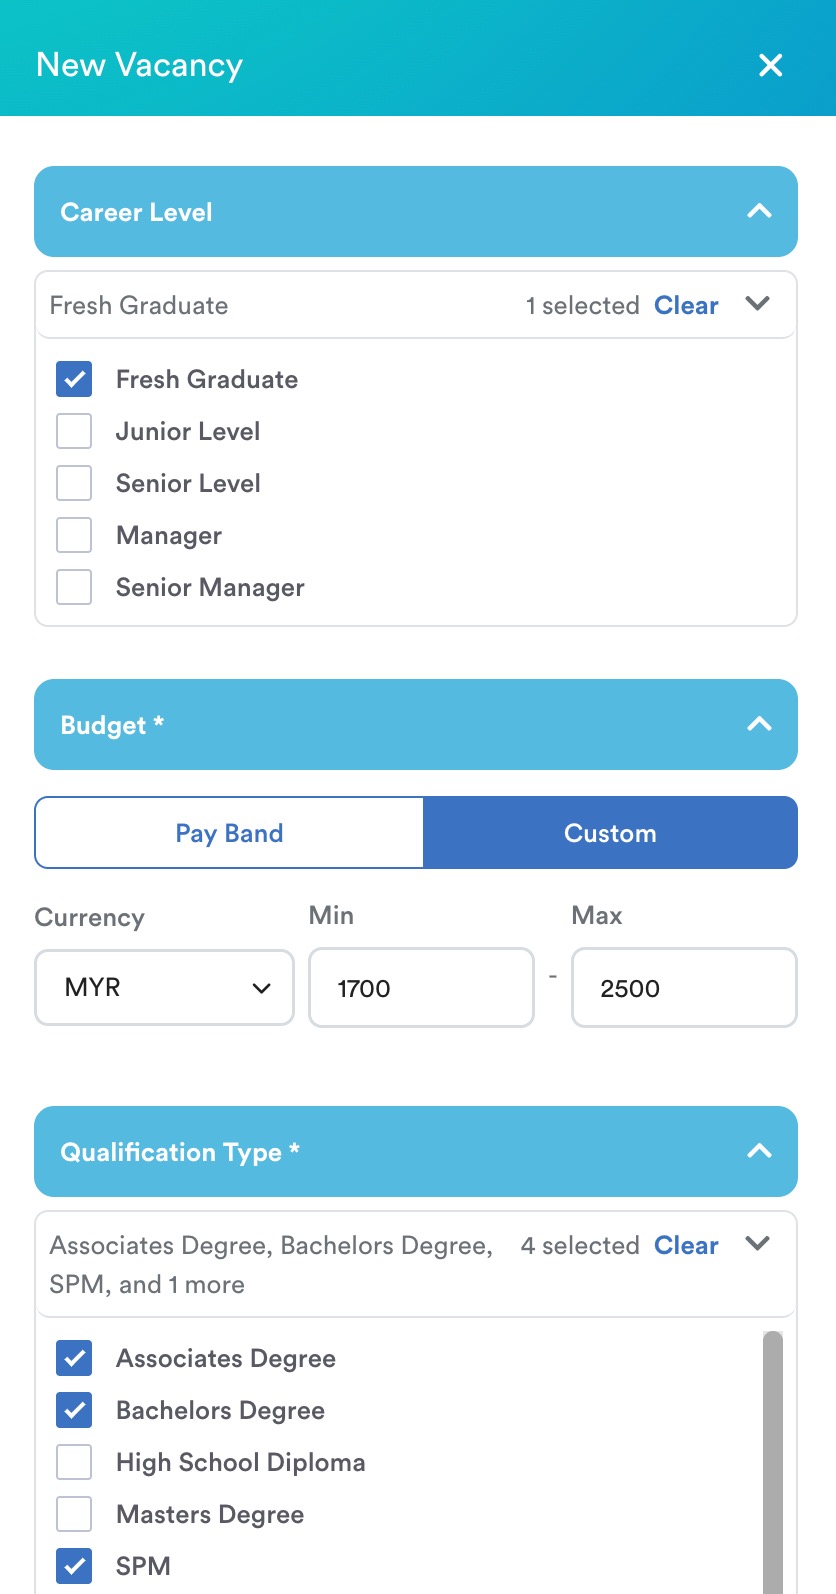
- Qualification Type: Select the required educational background for the role.
Once the information is confirmed, click Add.
The screen will now display the created vacancy. You can manage the entry using the following icons:
- Pencil: Edit the vacancy details.
- Trash bin: Delete the vacancy.
- Add: Create additional vacancies with different specifications if necessary.
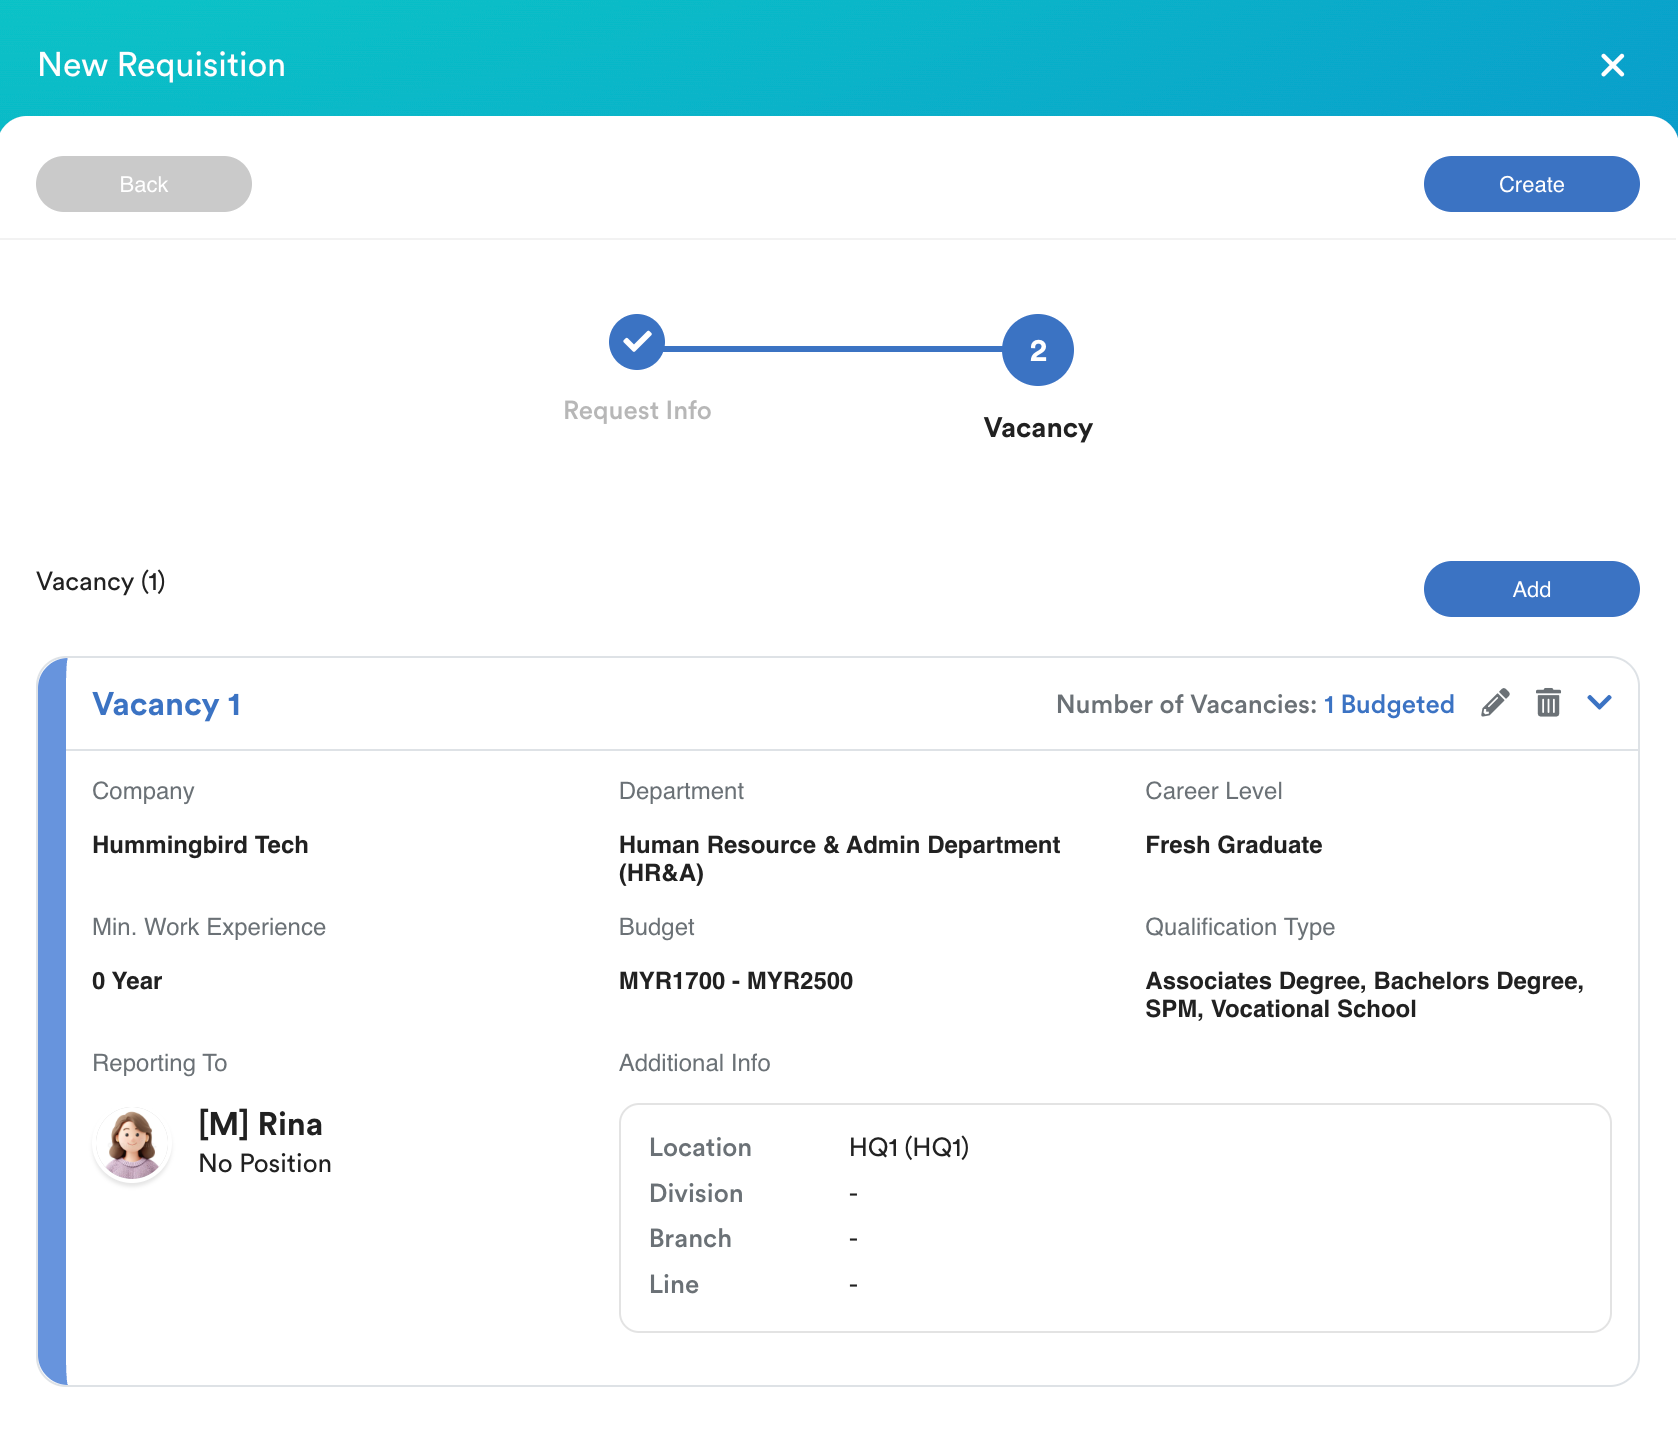
Review all details and click Create to finalize the process.
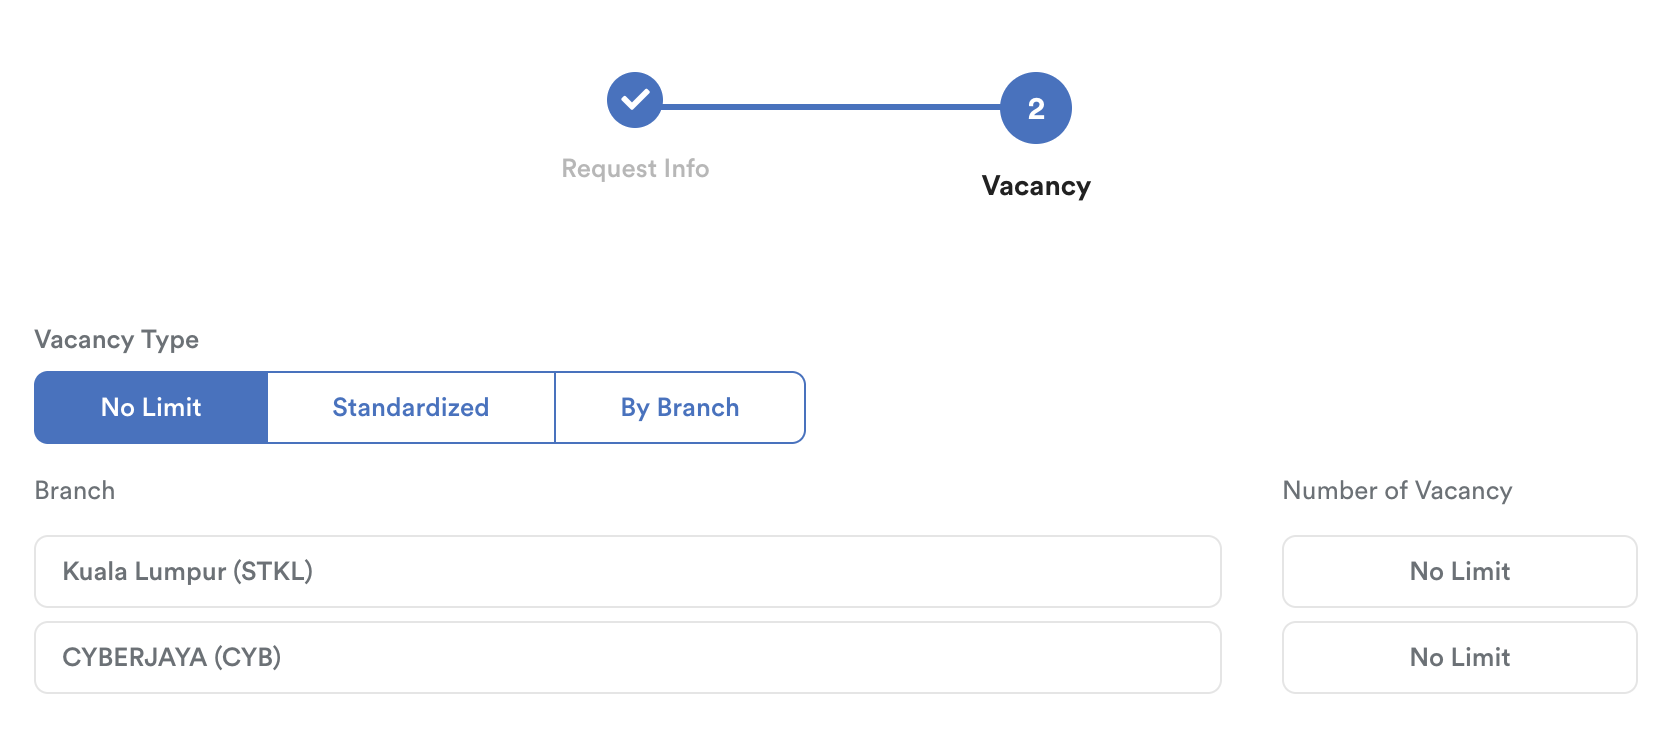
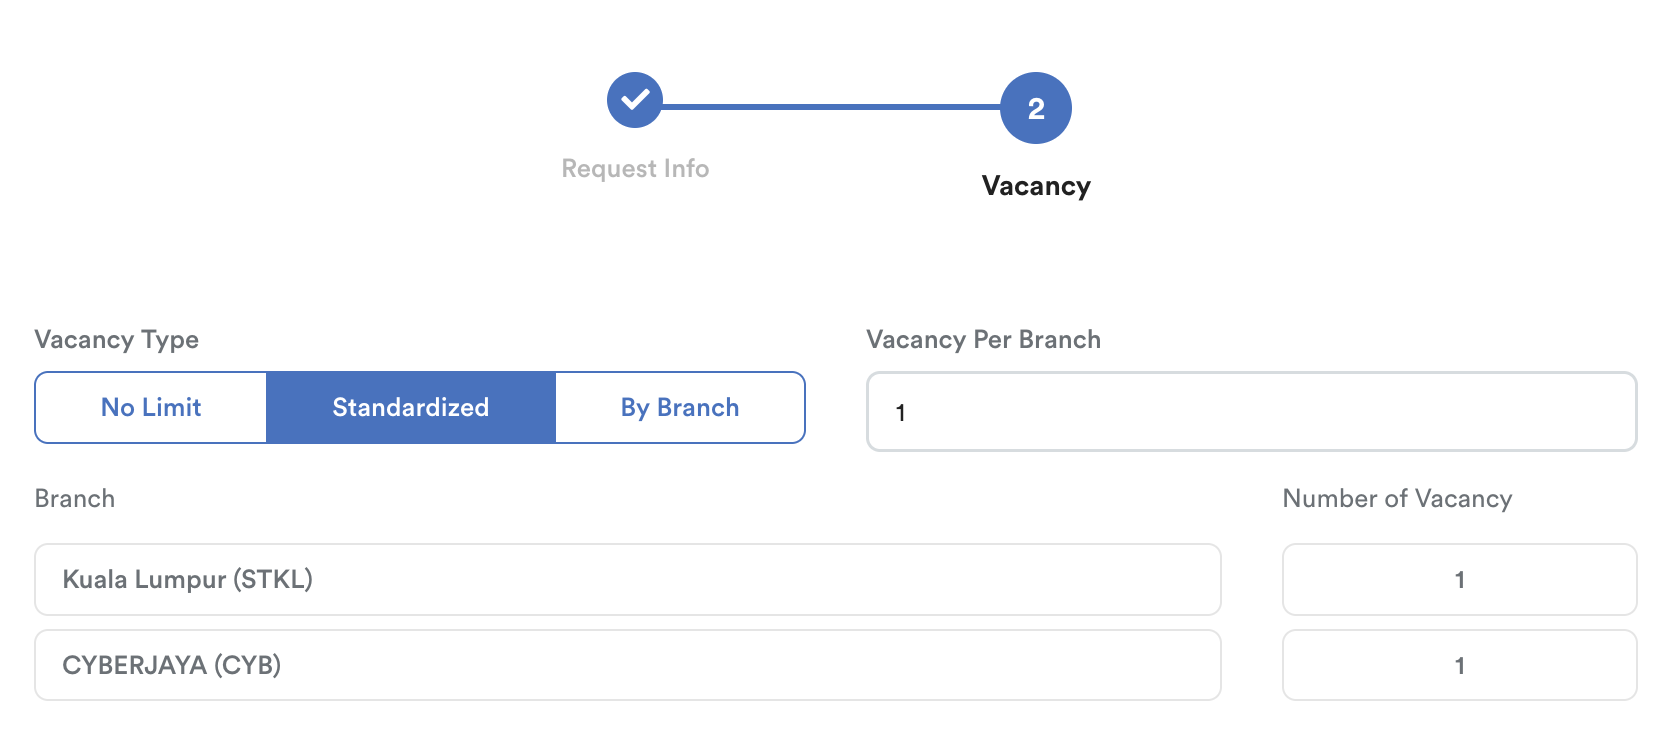
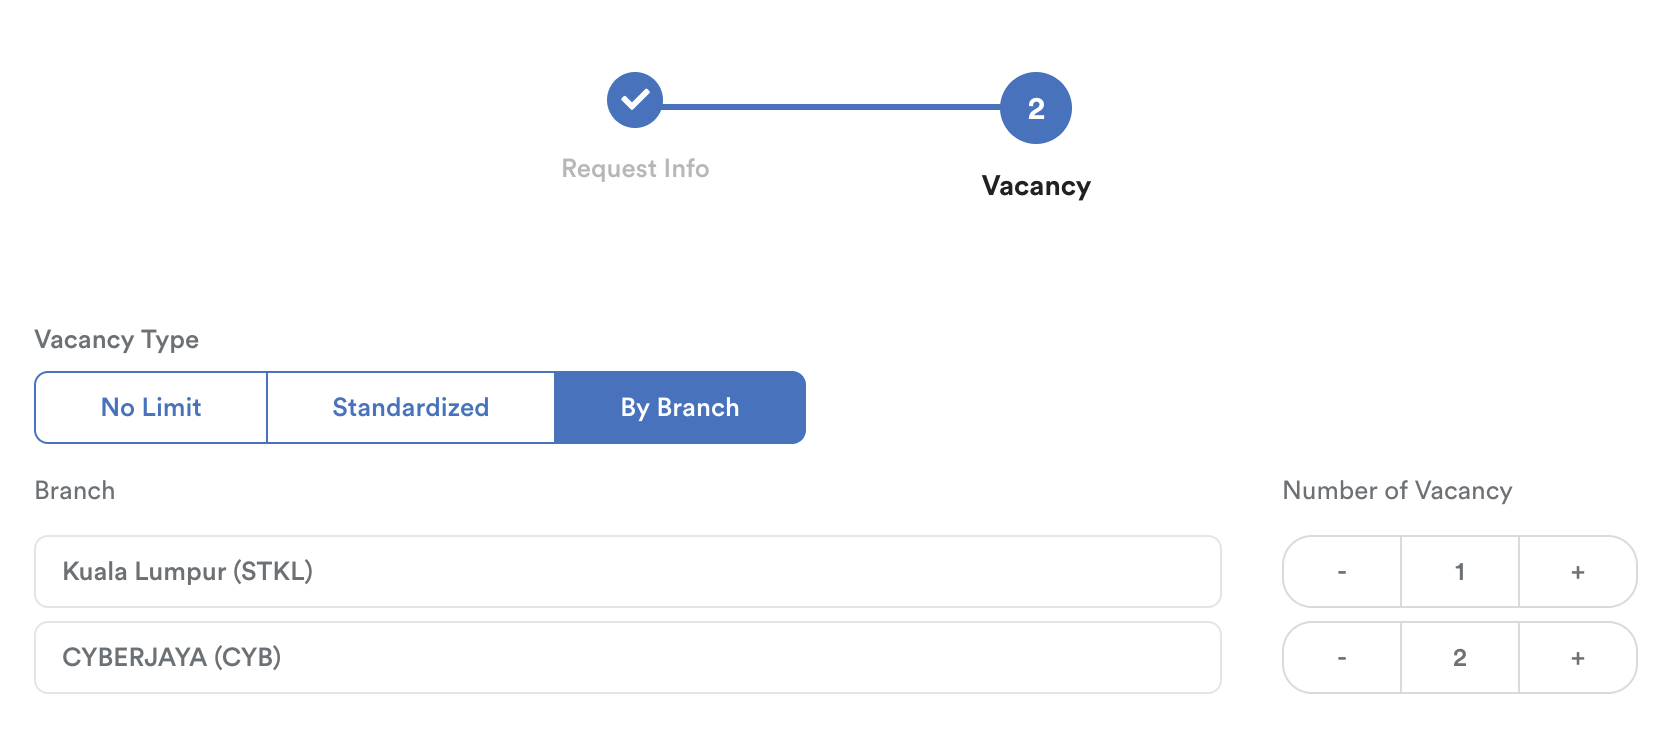
b. Direct Hiring
Select your preferred Vacancy Type: No Limit / Standardized / By Branch
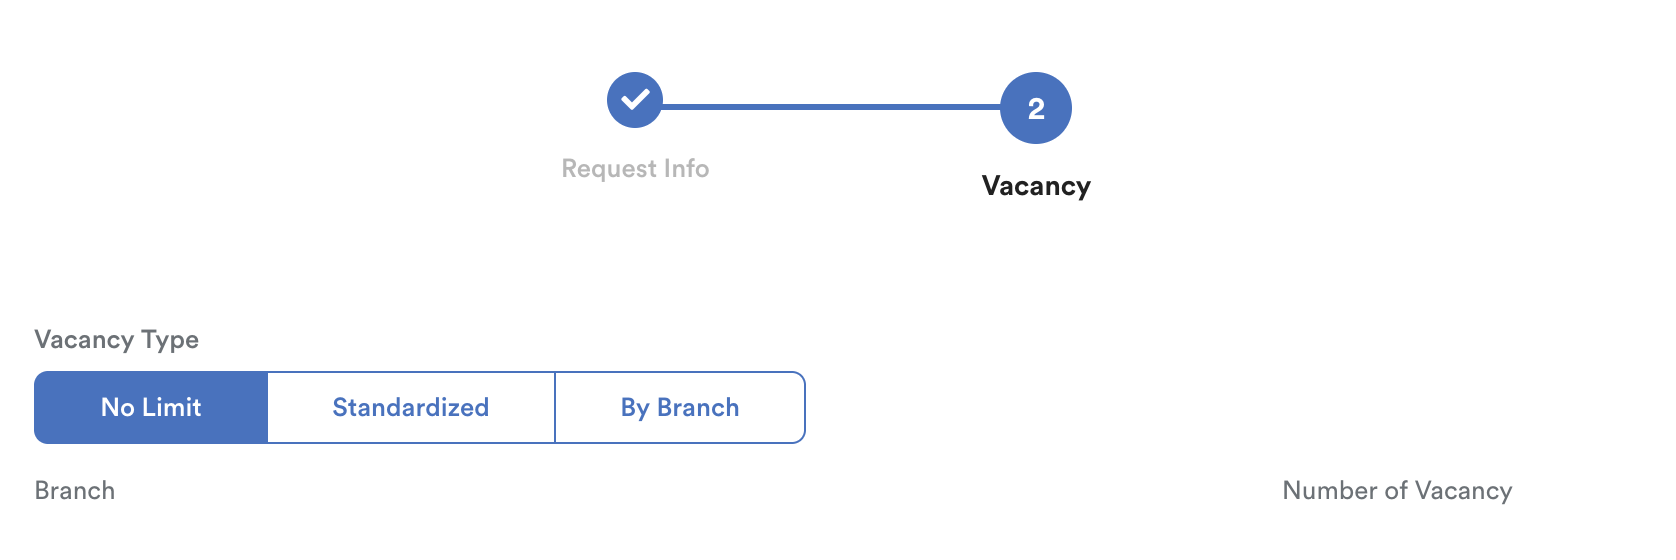
No Limit: No specific number of vacancies is required for the selected branches/locations.
Standardized: Set a fixed number of vacancies that will apply automatically to all selected branches.
By Branch: Manually specify a different number of vacancies for each individual branch
Review all entered information for accuracy. Then, click Submit to finalize the request.
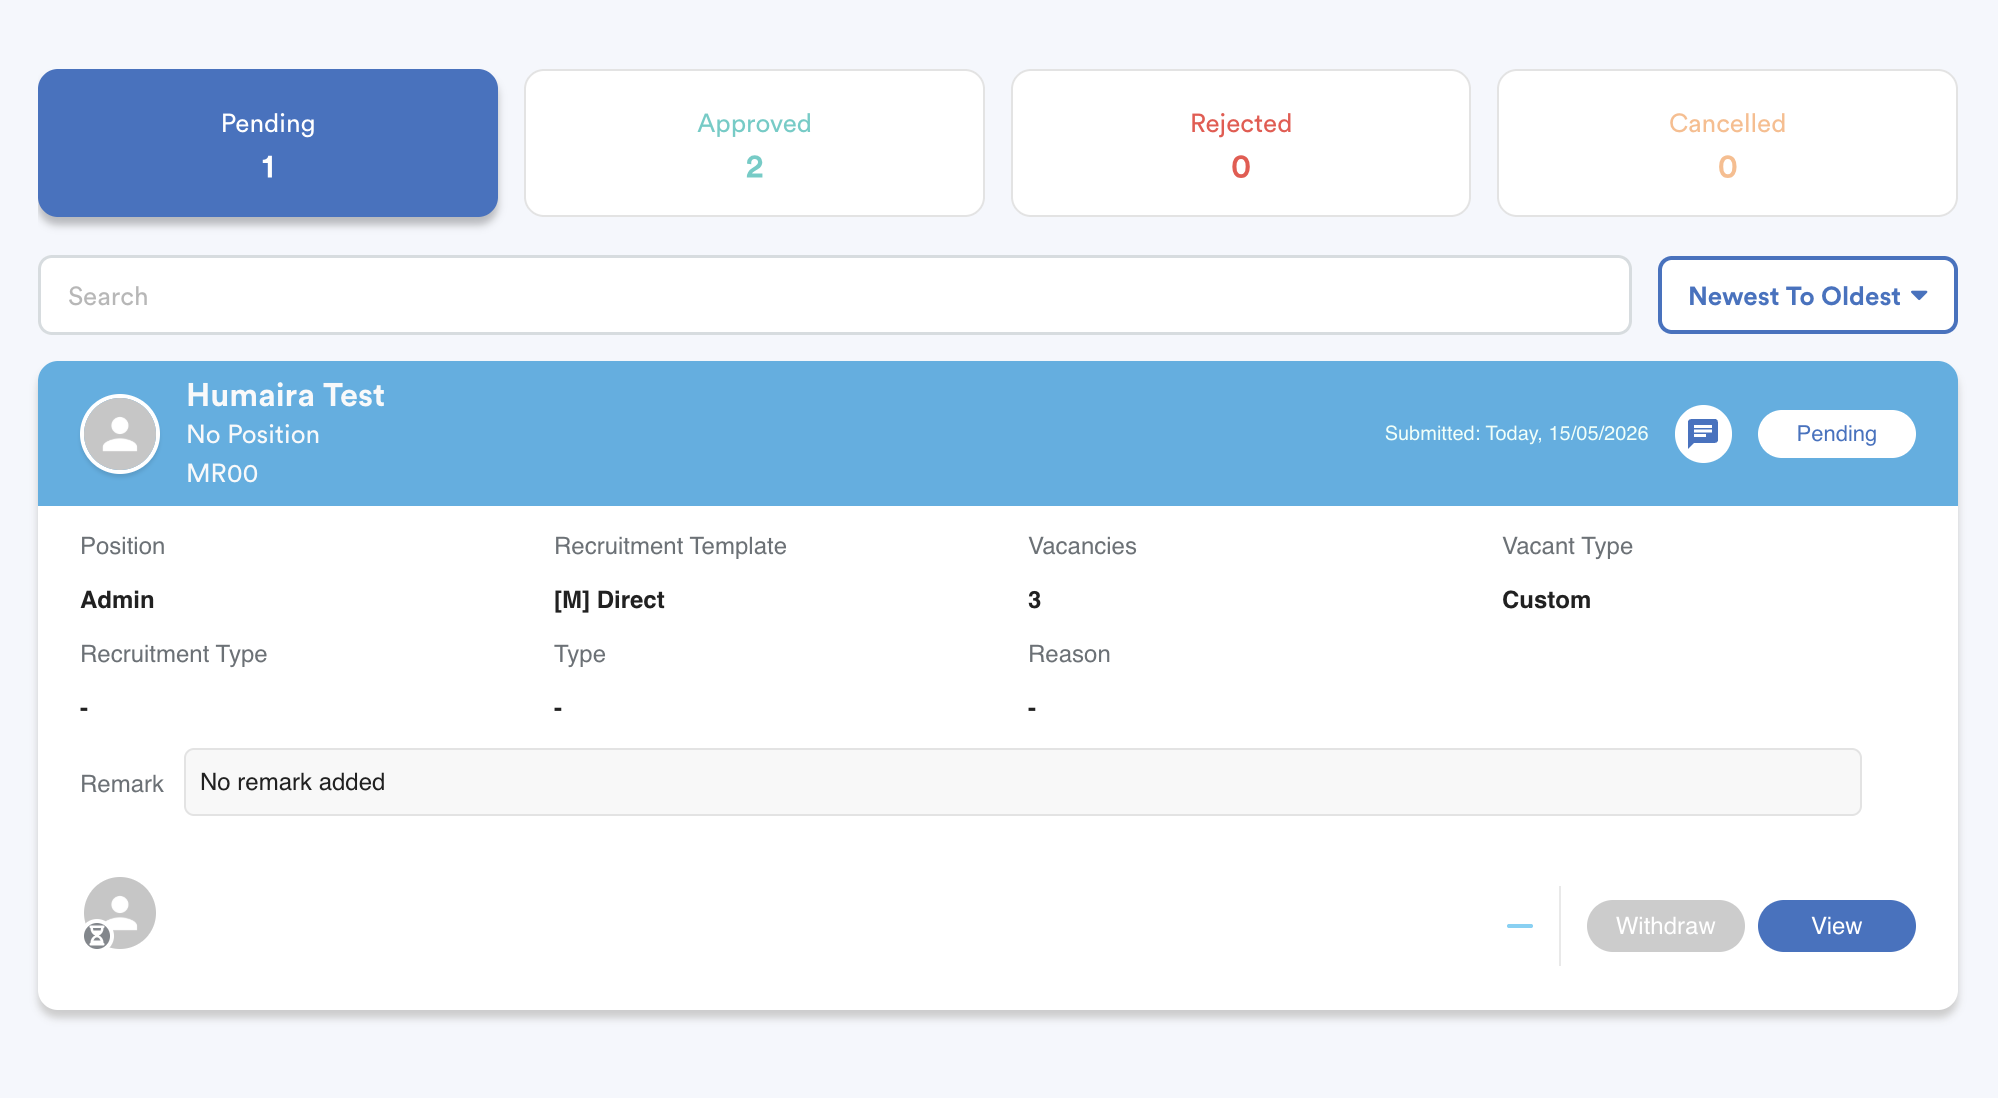
Once submitted, the request will appear under the Pending tab for approval.
We hope this explanation clarifies the matter. If you require further assistance, please don't hesitate to contact our support team.
Was this article helpful?
That’s Great!
Thank you for your feedback
Sorry! We couldn't be helpful
Thank you for your feedback
Feedback sent
We appreciate your effort and will try to fix the article