Step 1
On your homepage, go to your left menu, click on your Settings(1), go to Claim(2), then scroll down to click Claim Item(3).

Step 2
You will then be redirected to this page, where you will see a list of the claim items you have created in Creating Claim Items & Setting Claim Limit: Knowledge Base (freshdesk.com).
Click on Add New or one of your claim items to create a mileage or traveling claim.
For example, we are going to be using Mileage (Car) as an example.

Step 3
Click the Edit(1) button on the top right corner and you will be able to see "Claim By"(2) on the right side of your screen.
Click it to choose whether you want to claim by Amount or Unit. Once you are done filling out this screen, click on the second column, labeled "Limit & Price"(3) to choose the specific amount of units.

Step 4
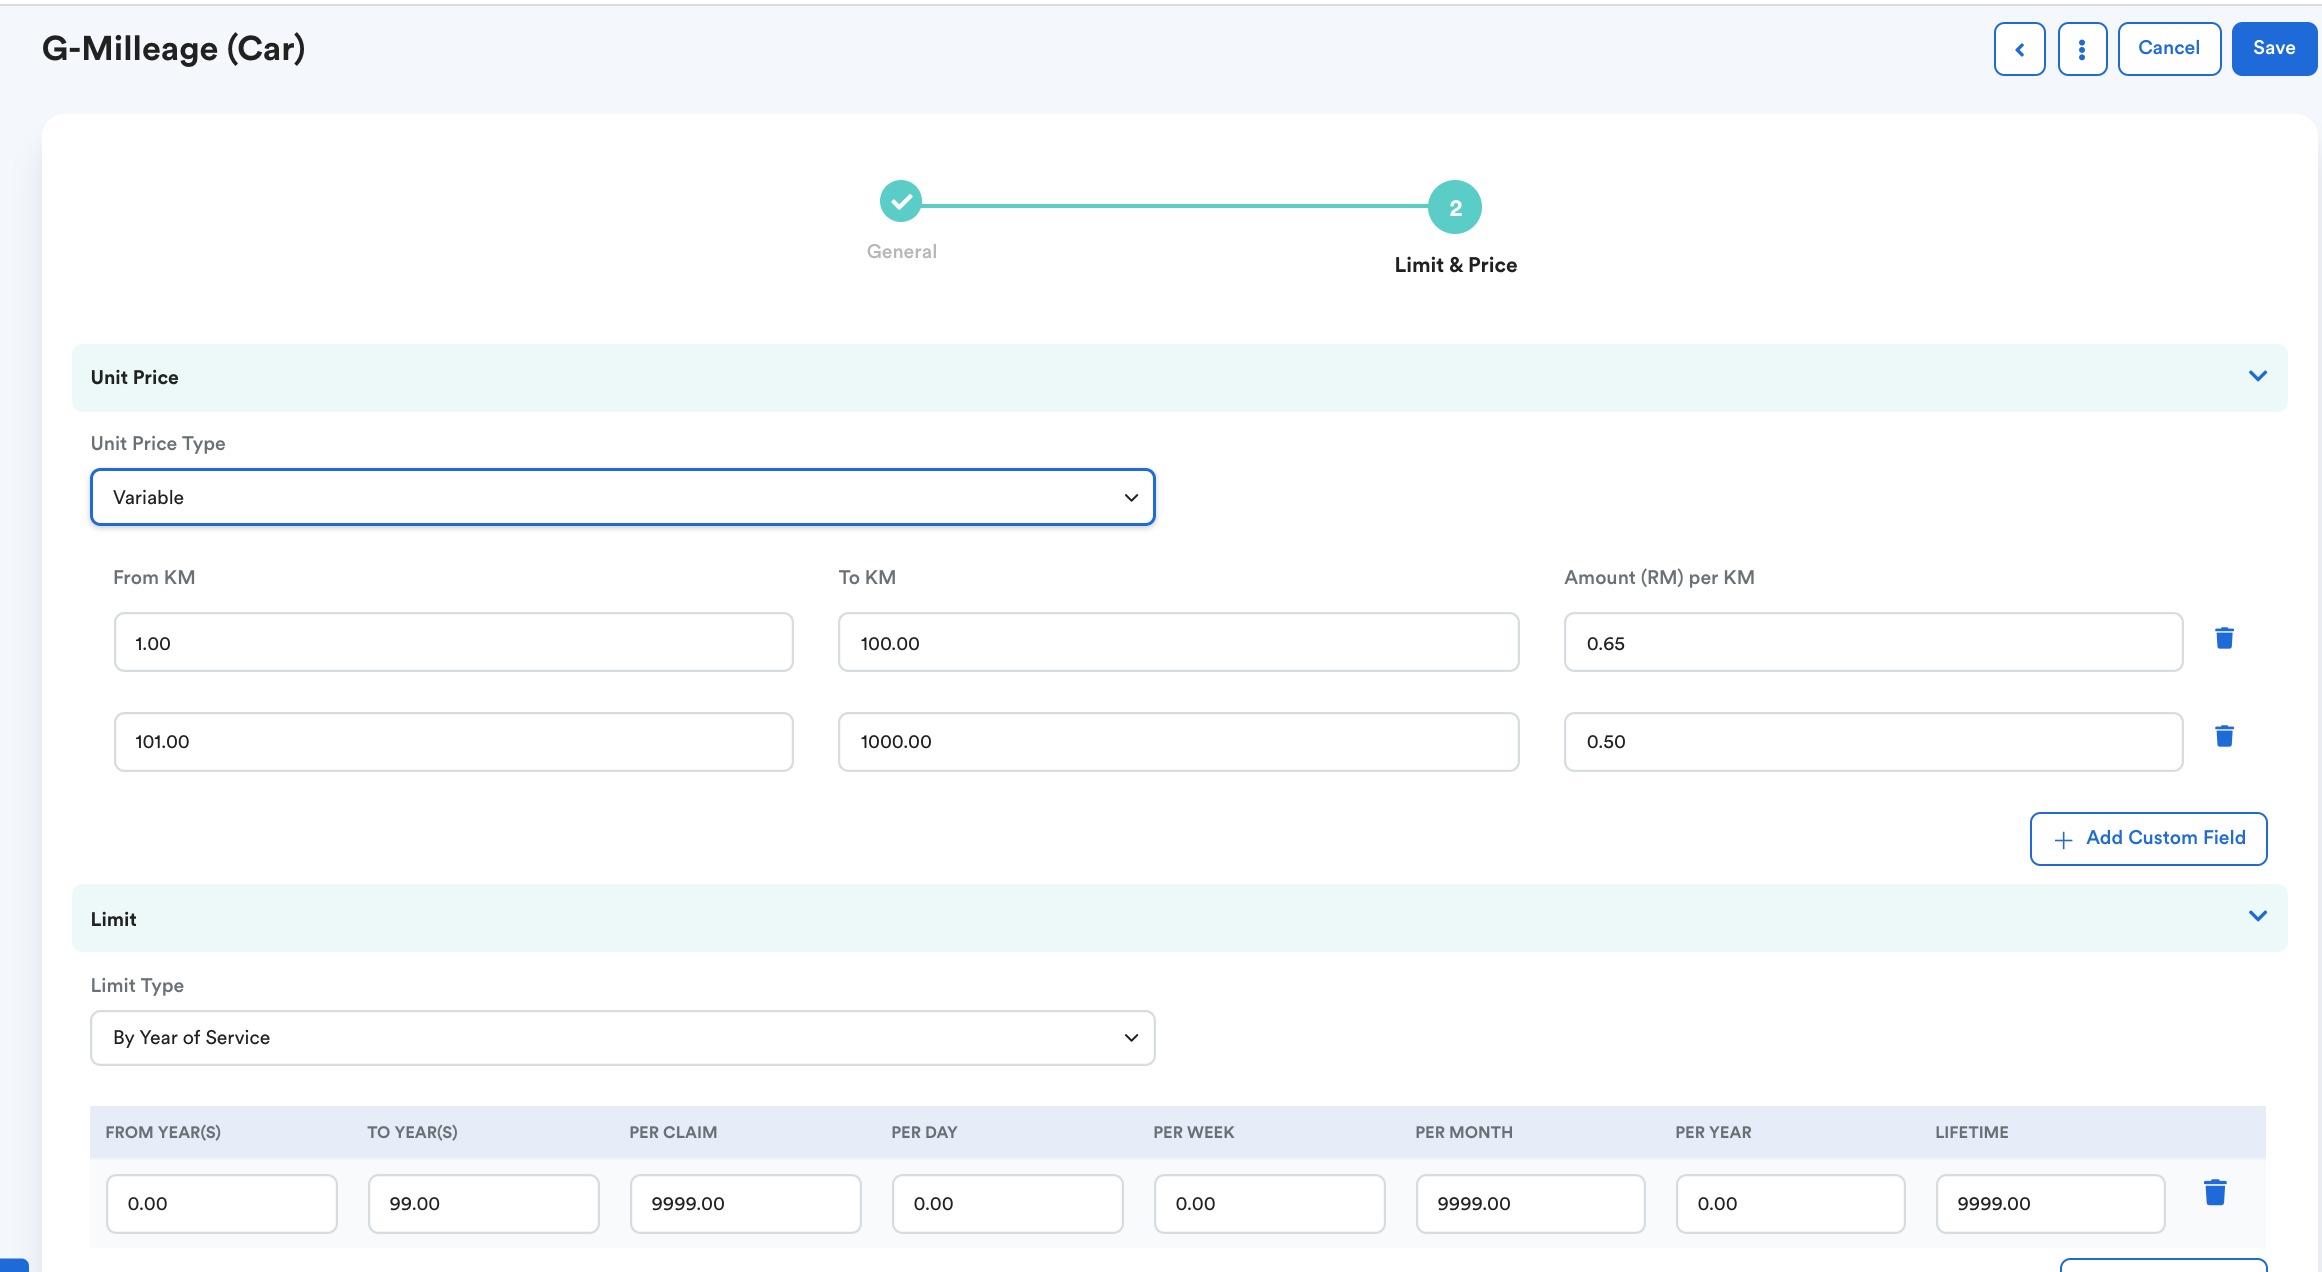
You will see this page, click on your "Unit Price Type" and change it to Variable so you can adjust your specific entitlements.
For example, you could add a custom field by pressing the Add Custom Field button on the right side of your screen. Then, you can fill in how many KM and how much each employee is entitled to with the distance that they travel.
Click Save when you are done to finish up your progress.

Tips: For limit, we advise you to insert the value from the lowest value to the highest value.
Was this article helpful?
That’s Great!
Thank you for your feedback
Sorry! We couldn't be helpful
Thank you for your feedback
Feedback sent
We appreciate your effort and will try to fix the article