The Year-End Leave Management feature allows you to cash out employees’ unutilized leave at the end of the year and add it directly into payroll without having to create individual payroll transactions for each employee.
Important: This feature is designed to process only one time for each leave type. If you have processed payroll, do not "unpull" and change the encashable amount. This might cause a discrepancy in the leave balance.
Before using this feature, make sure you have created a Leave Encashment payroll item.
Refer to this article: Leave Encashment for Unutilized Leave Balance
Path: Right menu > Leave > Year-End Leave

Overview
When you access the Year-End Leave screen:

The system displays all employees reporting under you for the selected year.
- At the top right of the screen, click the Year button and select the relevant year.
- The list is organized into tabs based on leave types allowed for encashment in their settings.
Leave Balance = Entitled + Brought Forward – Brought Forward Expired – Taken – Pending ± Adjustment
Carry Forward = Set in leave setting > Entitlement table > Maximum brought forward
Forfeited = Leave Balance - Carry Forward
Encashable Balance = Cap by leave balance
1. Encash Leave Process
To convert leave balance or forfeited leave into encashable balance.
Step 1
Under the relevant leave type, tick the box to select employee(s) you would like to process. Click Encash Forfeited Leave as a batch action to convert all forfeited leave into an encashable balance.
Note: If you do not see the desired leave type, go to Setting > Leave > General Setting, toggle on "Allow Leave Encashment".

Step 2
Navigate to the top right of the screen and click Edit.

Key-in the amount for encashable balance, this amount will be capped at total leave balance. Once confirmed, click Save. The status will change to "Pending".
After "Save", the available balance from Individual Leave will be reduced by this encashable balance as well.

The employees’ Encashable Balance will be updated in bulk based on their forfeited amount, and the forfeited balance will be deducted accordingly.

Important:
Ensure the encashable balance is correct before proceeding. If the encashable balance is zero, the following Pull to Payroll process will fail.
2. Pull to Payroll Process
Once the encashable balance is confirmed and status has changed to Pending, you may proceed to push it into payroll.
Step 1
Tick the box to select employee(s) you would like to process and click Pull to Payroll.

Step 2
Select the following:

- Payroll Period
- Pay Cycle
- Payroll Item
All payroll items listed here are Leave Encashment items created under: Settings > Payroll Item
Click Confirm.
Step 3
Wait for the status to update:
![]()
- If successful, the status will show as Success.
- If failed, the system will display the reason. You may click Retry under the Action column.
Step 4
Click Back to return to the main screen. The status for each employee will be updated to Pulled if successful.

- You may click the Audit Log icon to view the action trail.
- While the status is still Pulled, you may click the X icon to unpull the leave encashment from the employee’s payroll.
Once payroll for the selected month is processed:

- An Individual Transaction is automatically created under the Leave tab.
- The leave encashment is displayed on the employee’s payslip.
- The leave balance will be updated accordingly (you may verify this in the Leave History screen).
After payroll is processed, you will see "payslip generated" from this screen.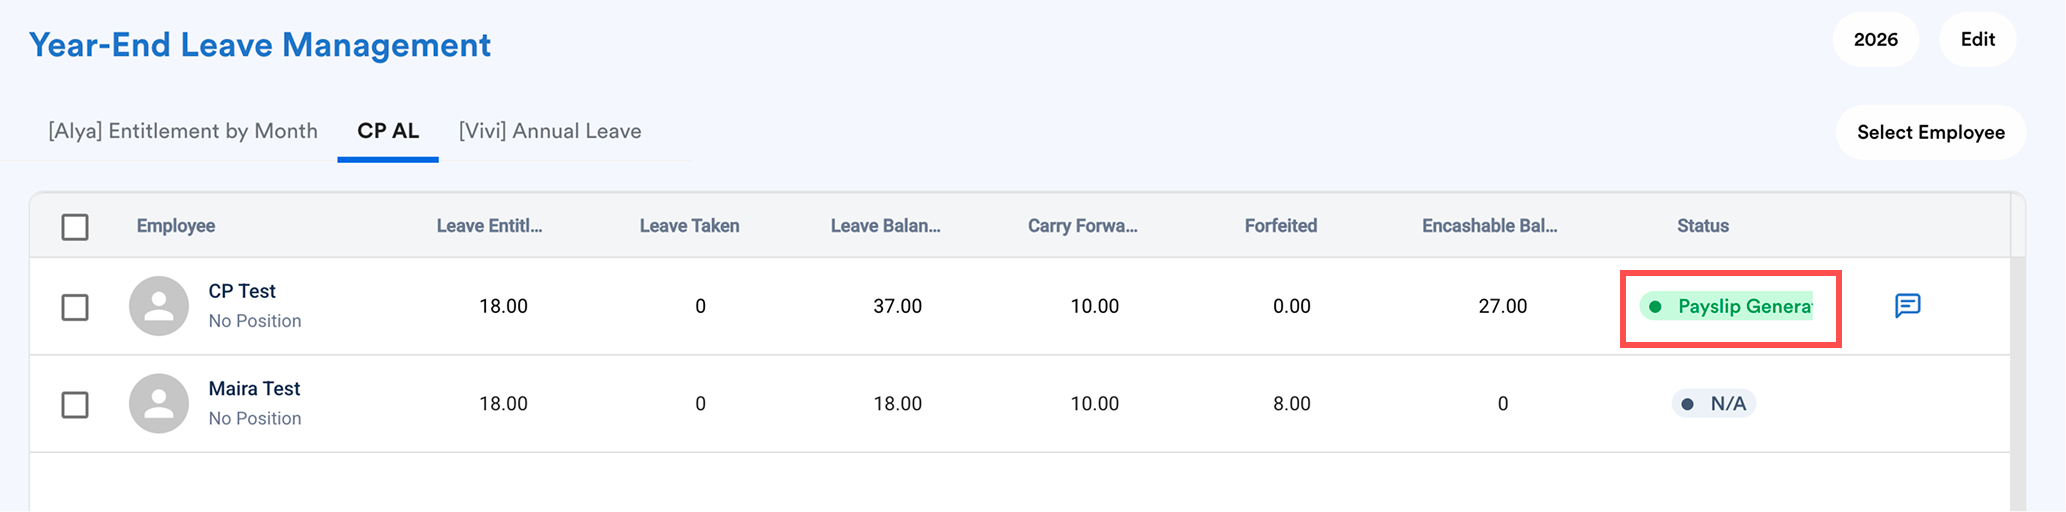
Leave encashment calculation is based on the payroll policy setting > Leave section. 
We hope this explanation clarifies the matter. If you require further assistance, please don't hesitate to contact our support team.
Was this article helpful?
That’s Great!
Thank you for your feedback
Sorry! We couldn't be helpful
Thank you for your feedback
Feedback sent
We appreciate your effort and will try to fix the article