Claim approval rules determine the approval flow, and the submitted claim is routed to the designated approvers, depending on the levels of approver setting. Claim approvers may approve or reject a claim.
Step 1
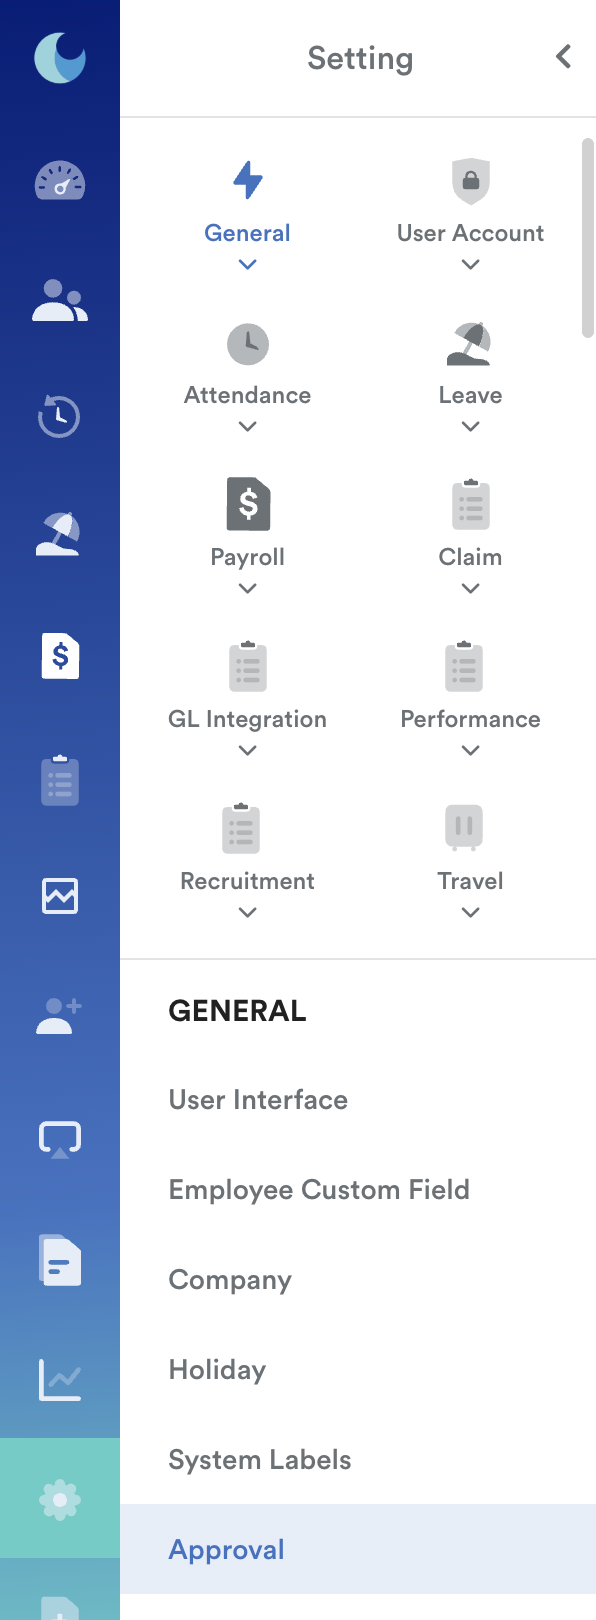
On the left menu, go to Settings. Then, under General, click Approval.
Step 2
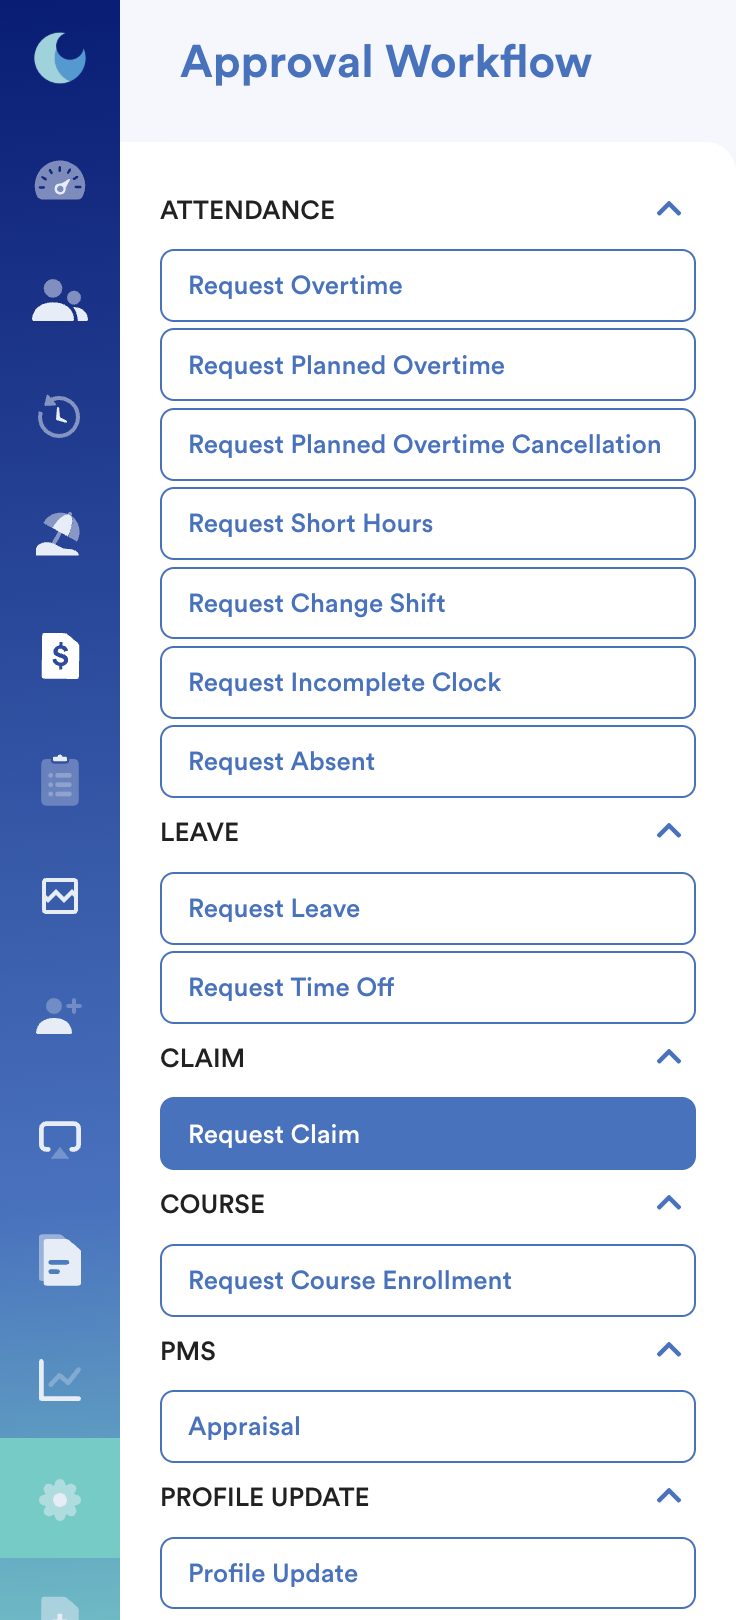
Under Claim, select Request Claim.
Step 3
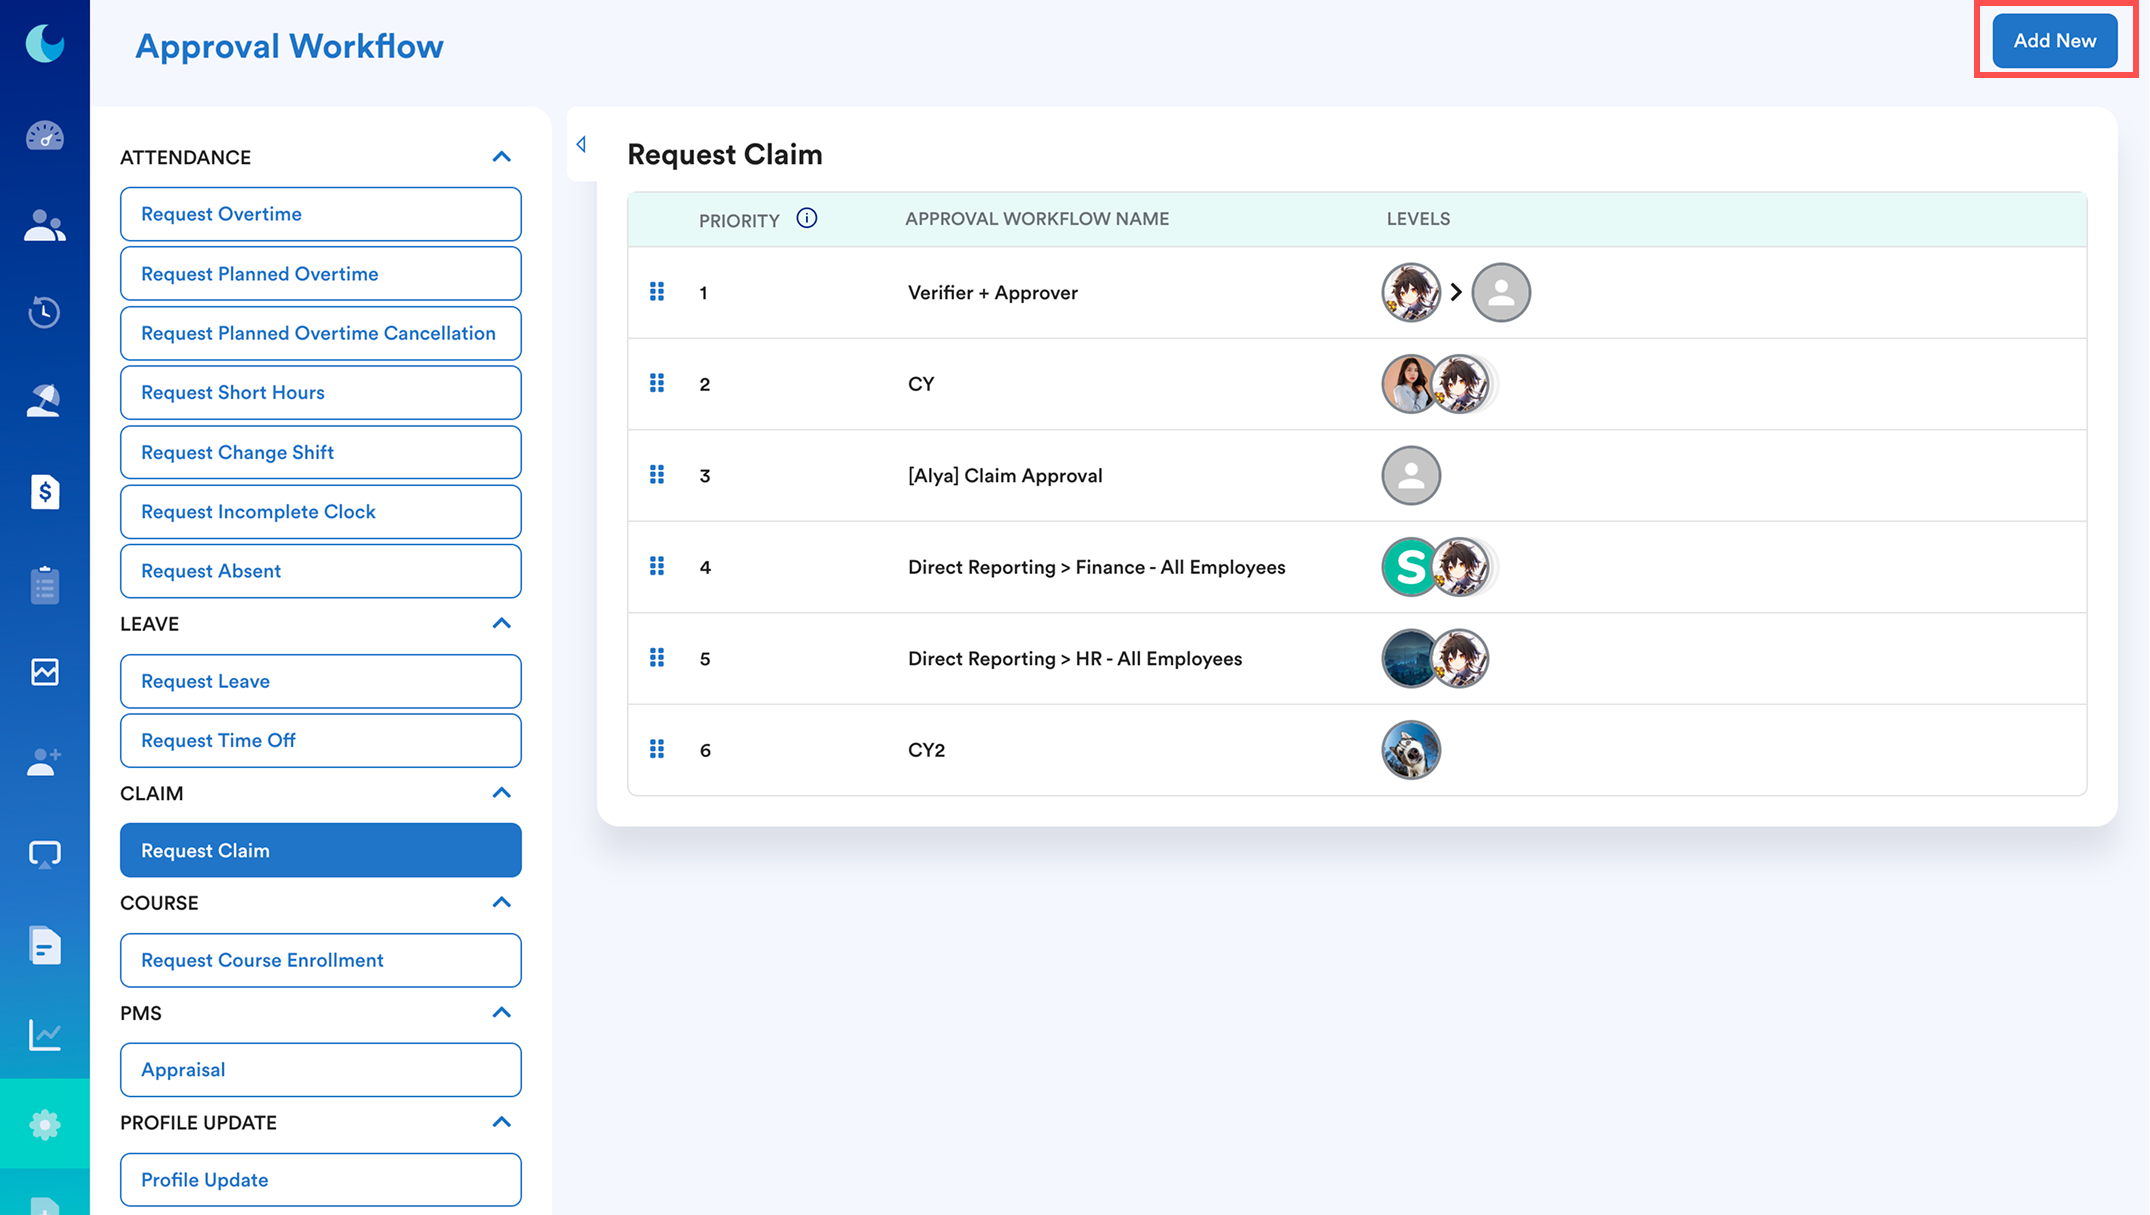
To set up a new approval workflow for a claim, click Add new.
Step 4
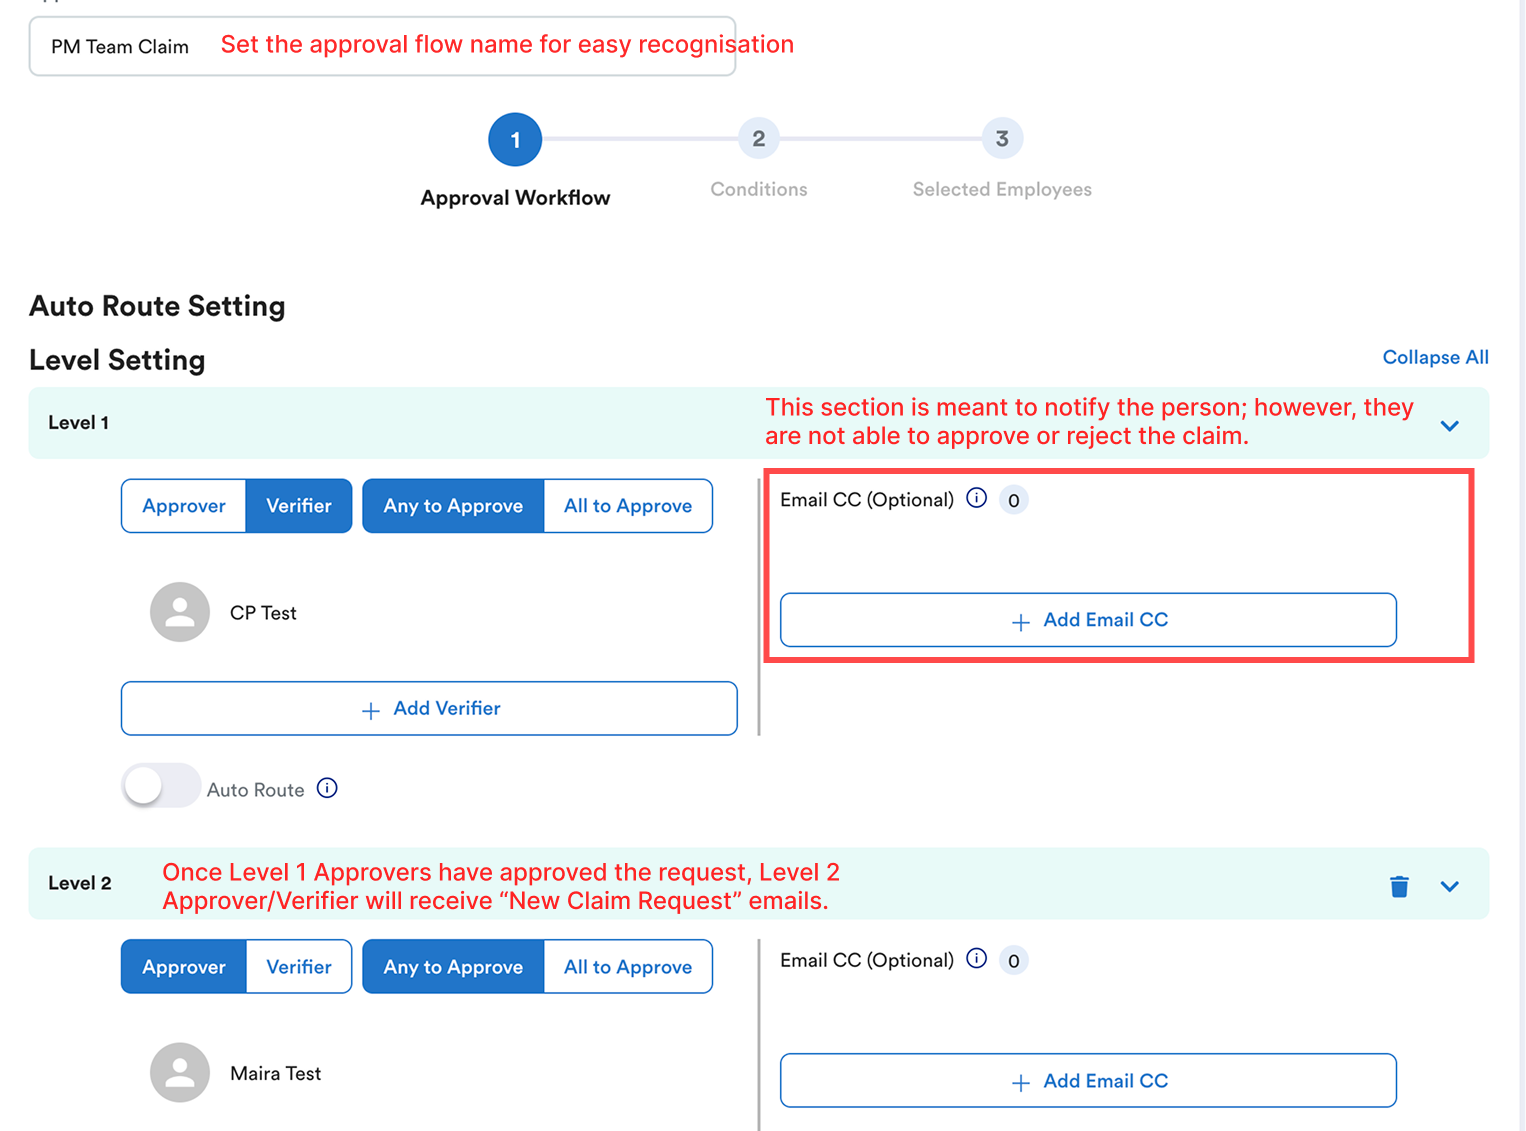
On the Approval Workflow page, fill in the Approval Name. You can add approvers or verifiers at every level based on your company policy. After that, click Next.
You may add HR/Finance team to the Email CC section to get the email notification for new claim requests and approval status (provided the setting on the business alert for the claim module is turned on). Setting up Business Alert
Level 1 Approvers/Verifiers will receive notifications for new claim requests and claim request updates (approve/reject).
Level 2 Approvers/Verifiers will receive the notification after Level 1 Approvers/Verifiers have approved, and Level 1 Approvers/Verifiers will receive the claim request update once Level 2 Approvers/Verifiers have approved.
Note: If the assigned approvers/verifiers did not receive the email, make sure the claim group did not assign a custom approval flow that will overwrite the default claim approval setting.
Step 5
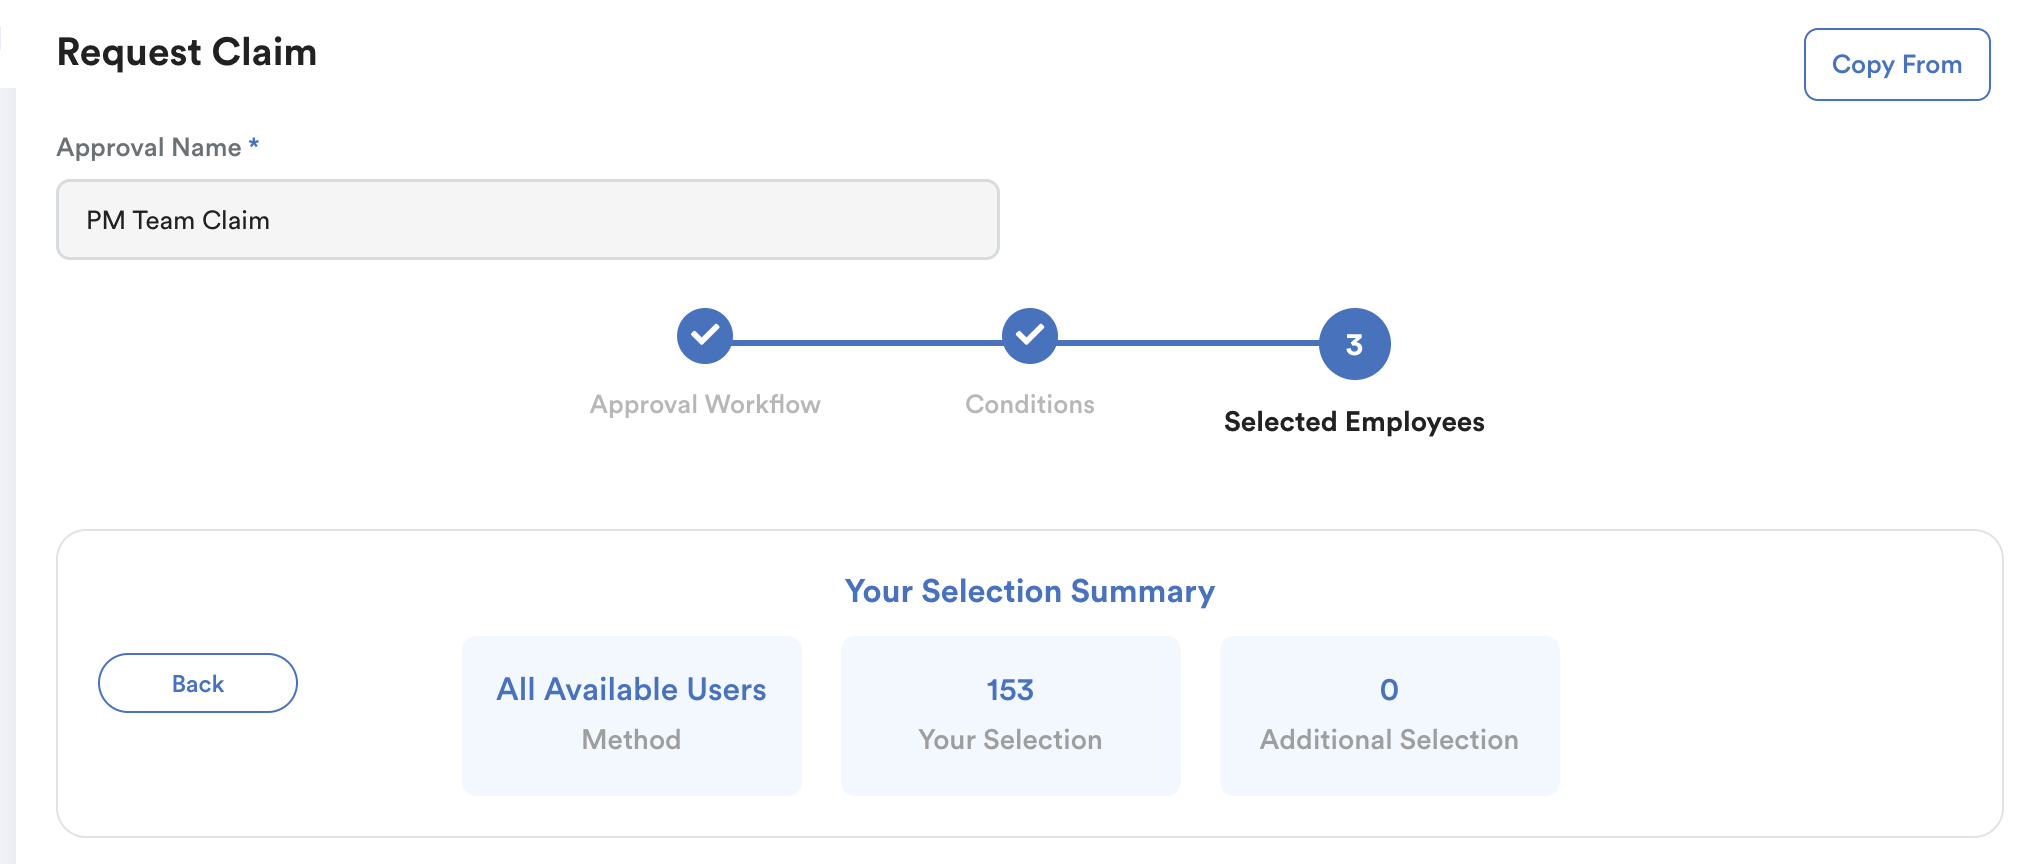
On the Conditionals page, select the conditions on how you want to filter your employees by All Active Employees or By Conditions. After that, click Next.
All Available Users = Include resigned employees.
By Conditions = Employees that only apply to selected conditions.
Step 6
On the Allocated Employees page, you will be able to see all employees that apply to the conditions that you have set in Step 5.
Note: You are able to exclude certain employees in the condition by clicking on the “Include/Exclude” button.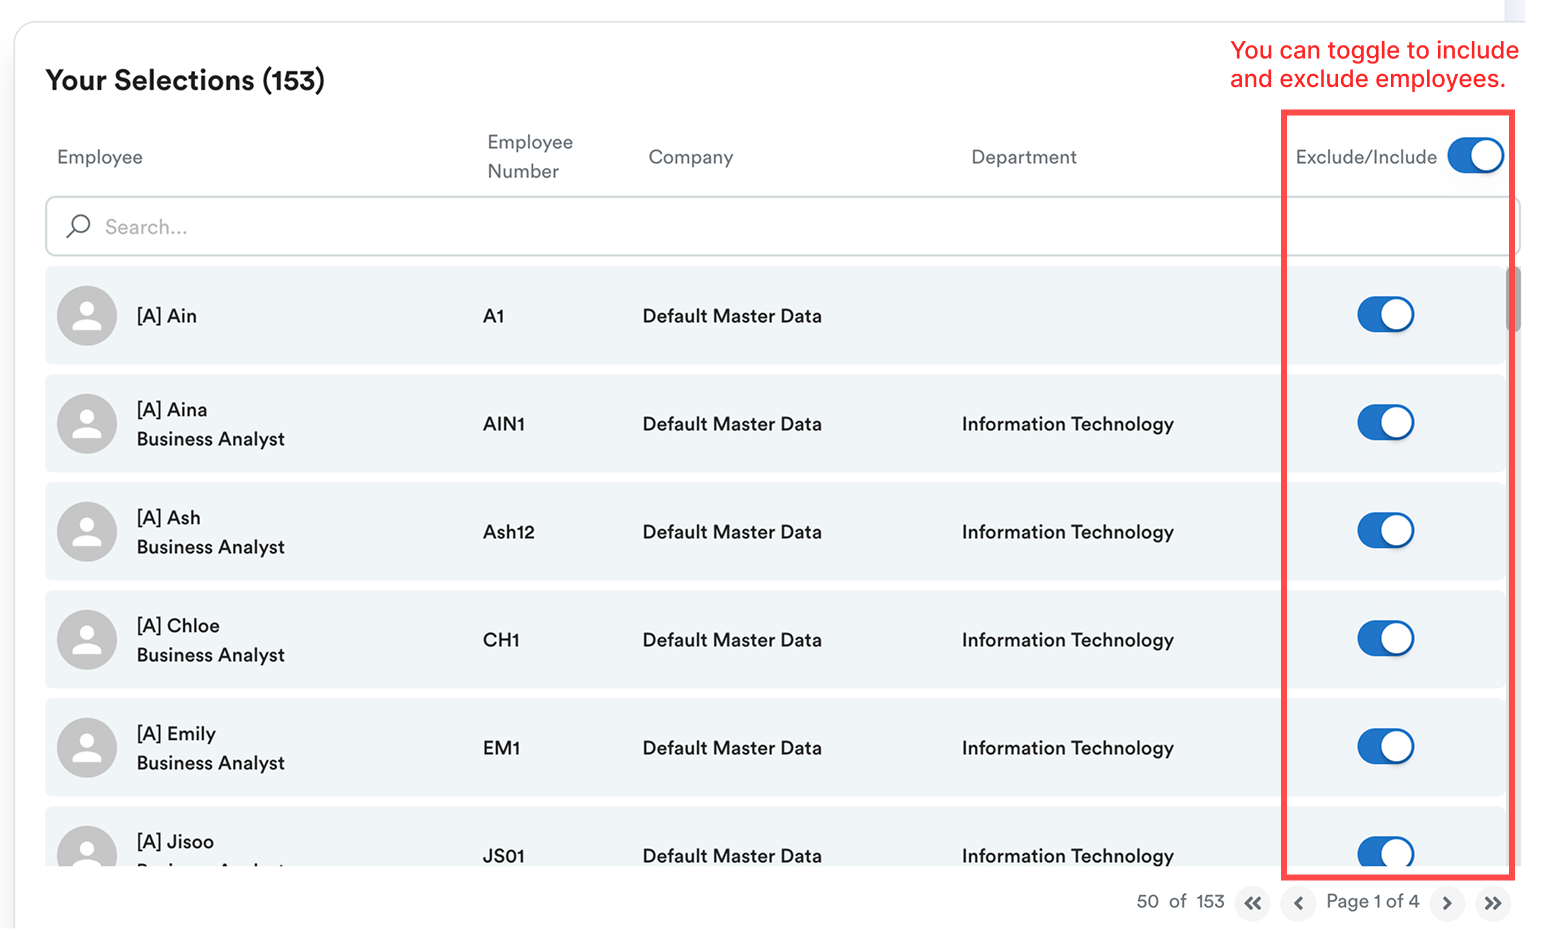
Step 7
Once you have included the employees that you wish to include, in the top right corner, click Save.
We hope this explanation clarifies the matter. If you require further assistance, please don't hesitate to contact our support team.
Was this article helpful?
That’s Great!
Thank you for your feedback
Sorry! We couldn't be helpful
Thank you for your feedback
Feedback sent
We appreciate your effort and will try to fix the article