This guide explains how to process monthly payroll for employees.
Step 1
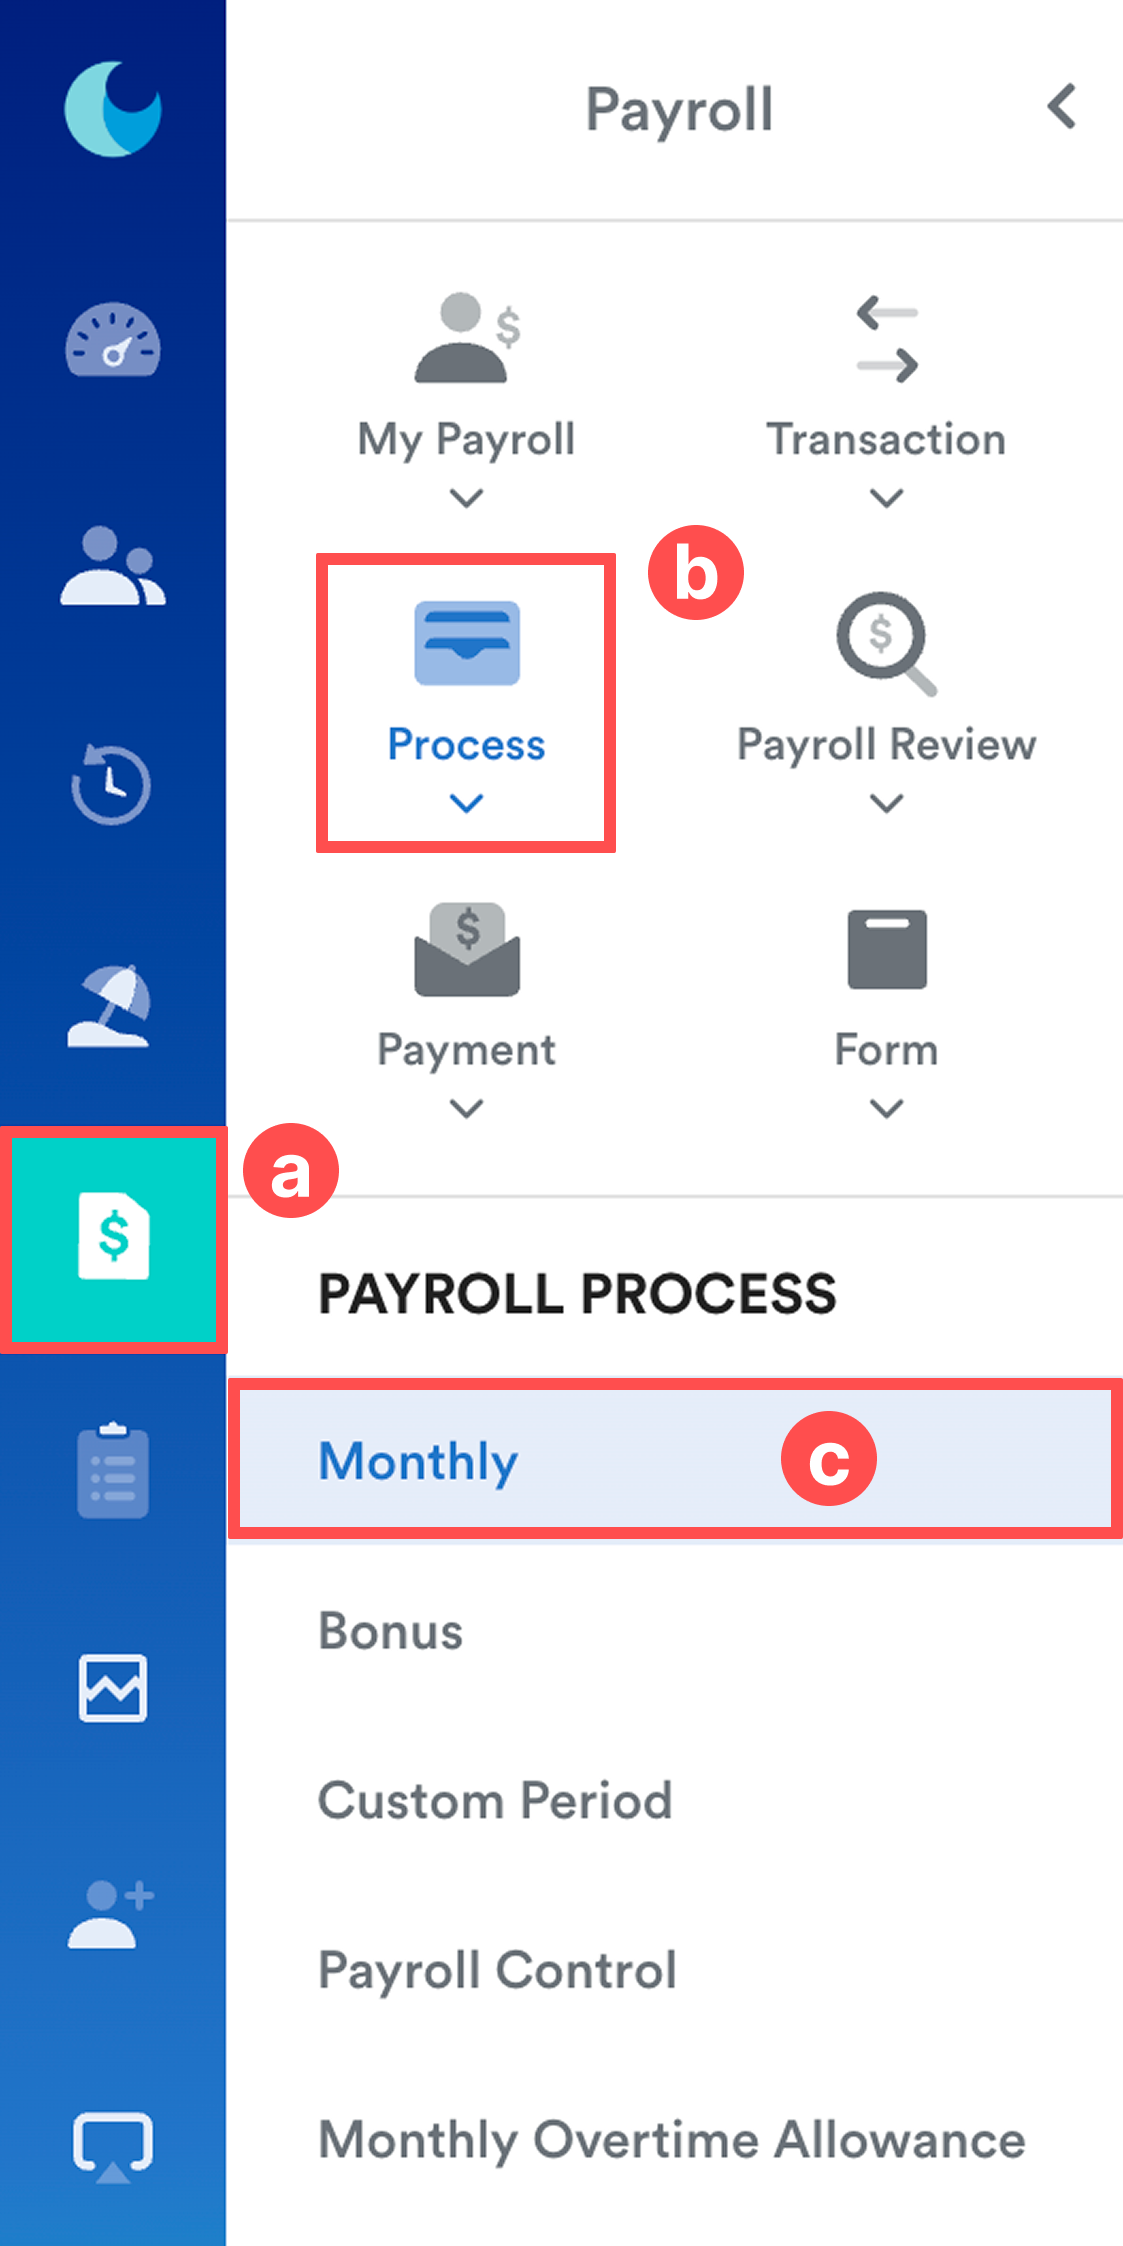
On the left menu, navigate to Payroll (a) > Process (b) > Monthly (c).
Step 2
Once selected, you will be brought to the Monthly Payroll Process screen.
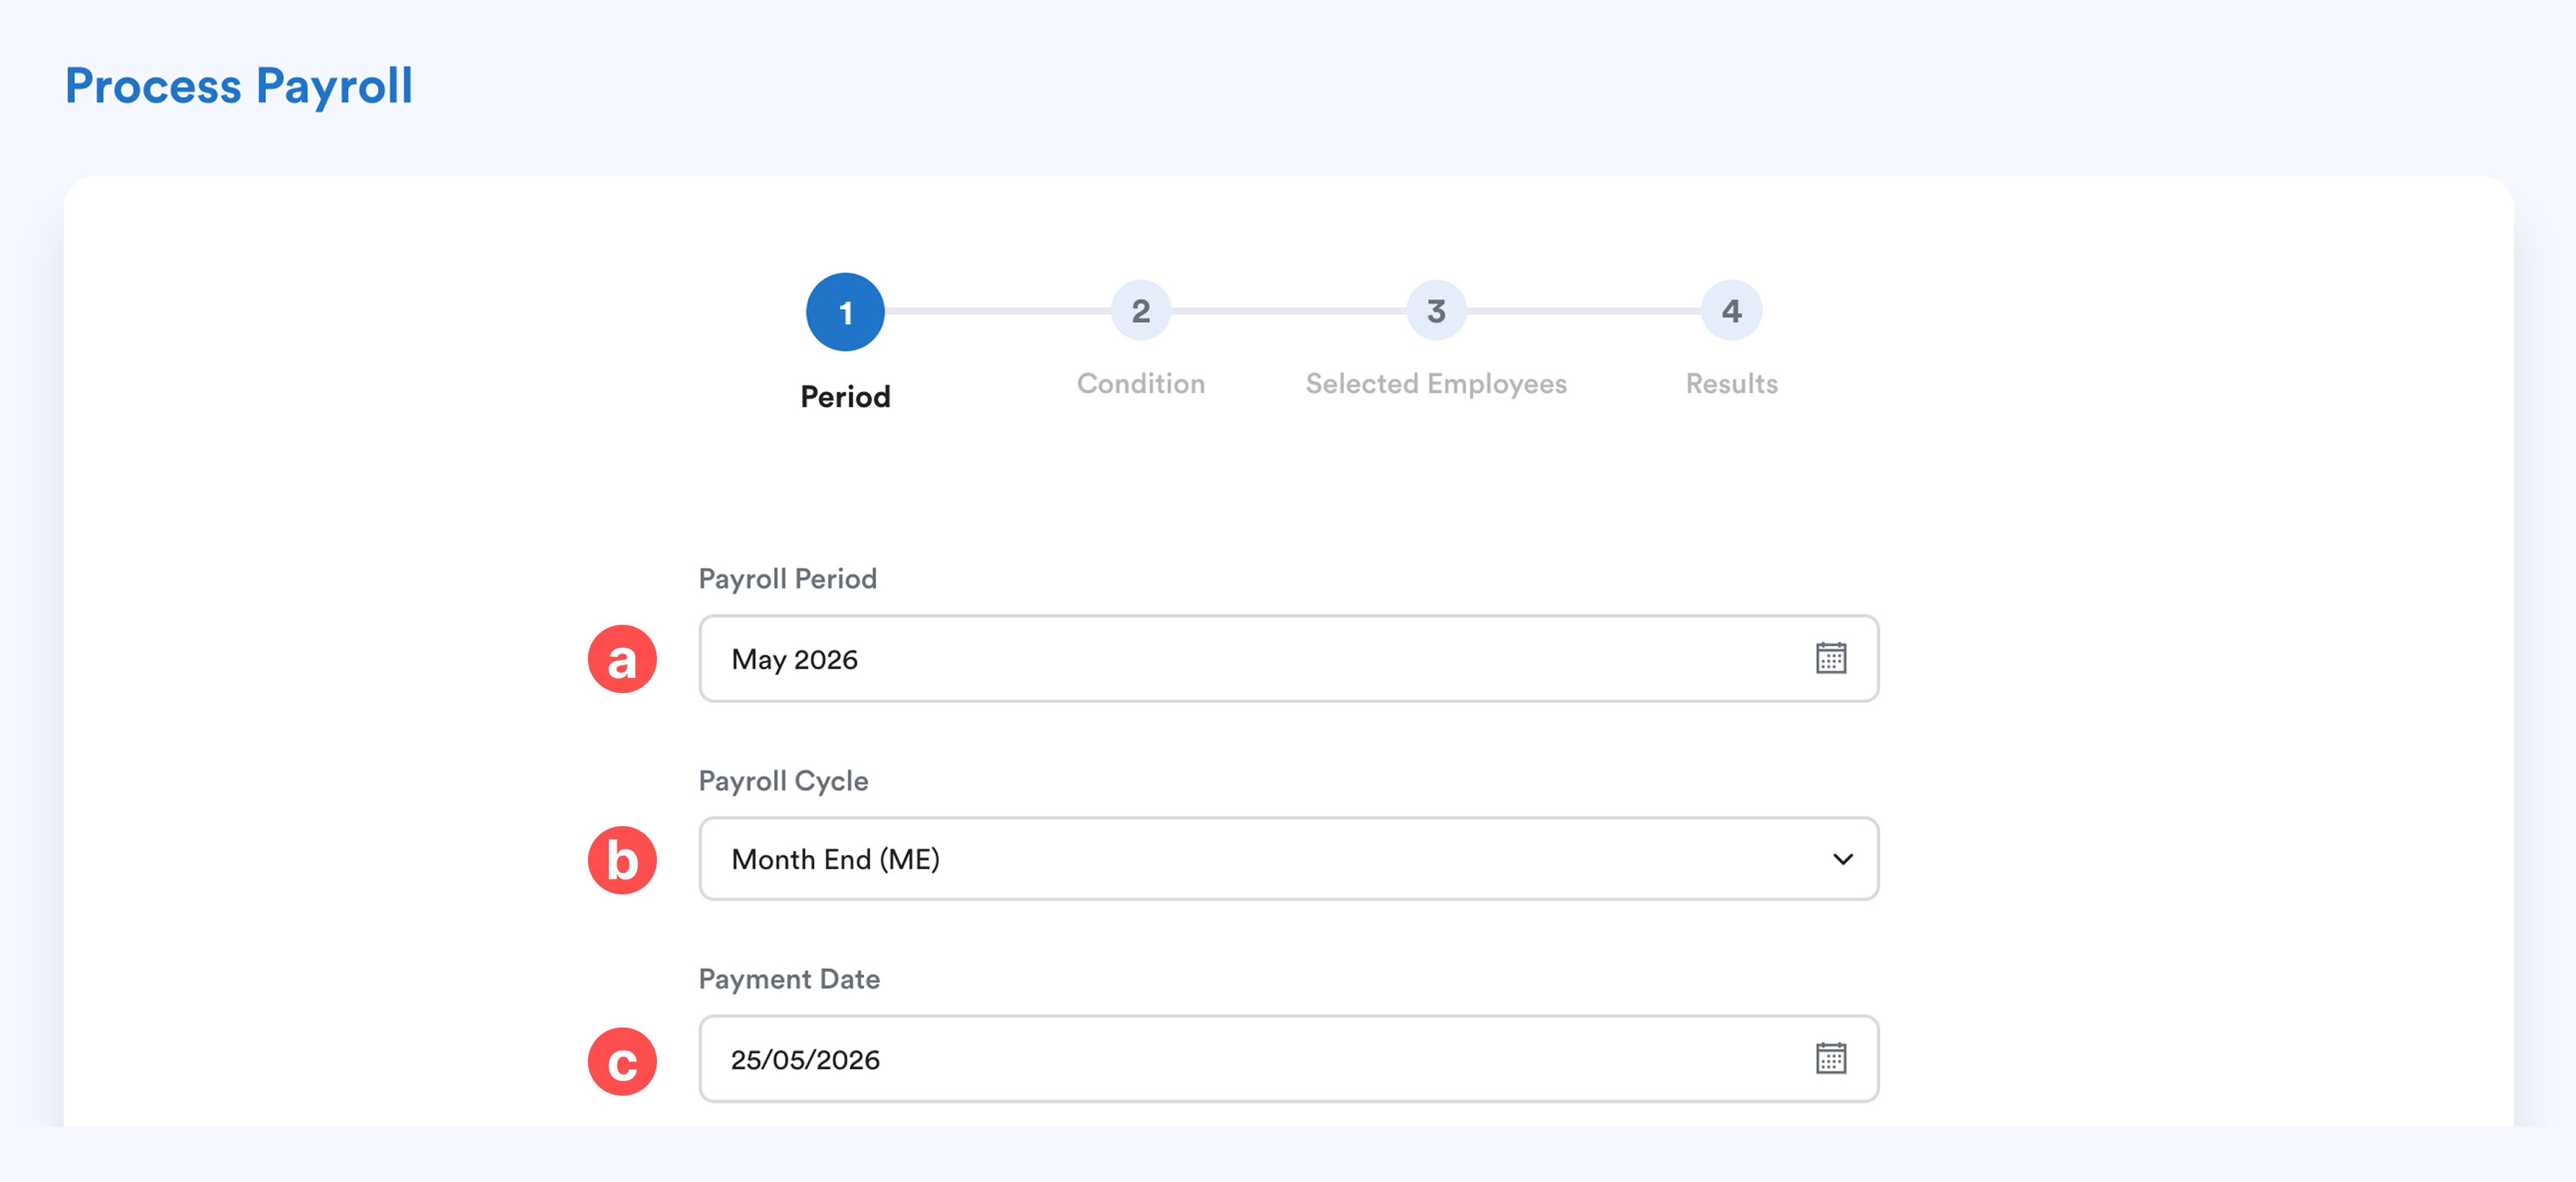
a) Payroll Period: Select the payroll month that you would like to process.
b) Payroll Cycle: Select the payroll cycle that you would like the transactions to be processed under.
The selected payroll cycle determines which payroll transactions will be consolidated into the payslip based on the cycle's cut-off period. Ensure you select the correct payroll cycle according to the payroll policy settings.
For more information, refer to: Payroll Policy - General Settings
c) Payment Date: Select the payment date for this payroll process.
Note: The payment date may affect the payslip release date based on your company profile settings.
d) Processing Options
You may select one or more of the following options to automatically pull payroll-related transactions into the payroll process:
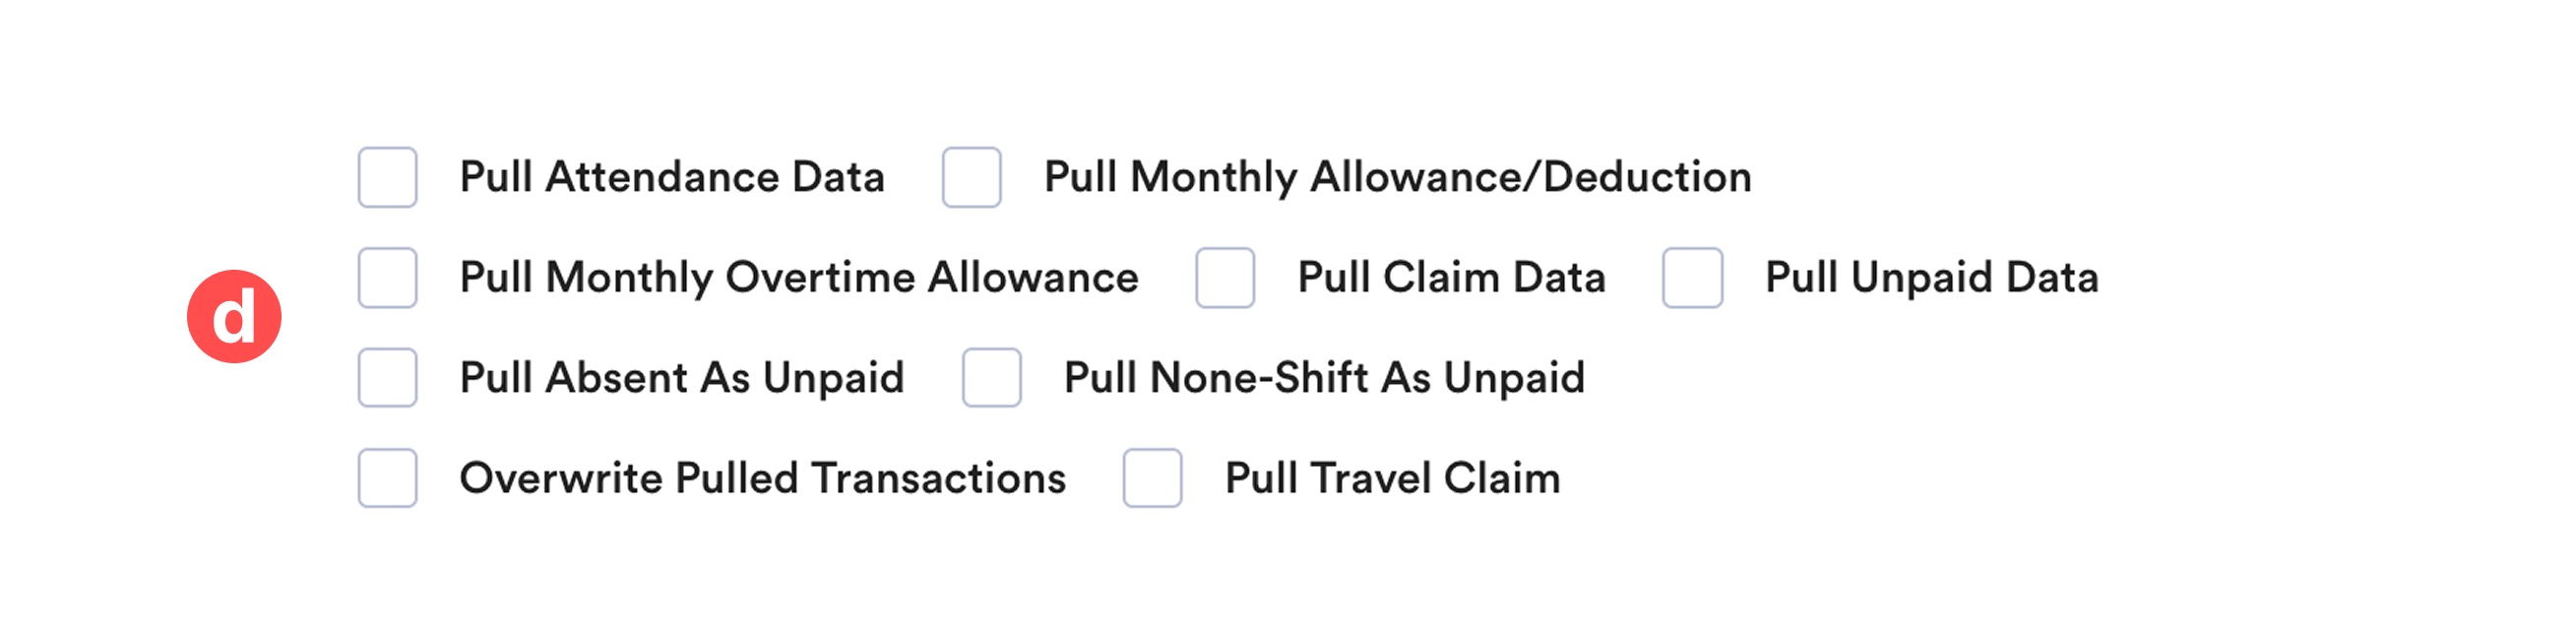
- Pull Attendance Data: Imports attendance-related earnings such as overtime, shift allowances, and other attendance-based transactions.
Important: Ensure attendance records are locked before processing payroll.
- Pull Monthly Allowance/Deduction: Imports recurring monthly allowances and deductions configured in the employee settings.
- Pull Monthly Overtime Allowance: Calculates overtime based on the employee's total accumulated overtime hours for the month, instead of calculating overtime on a daily basis.
- Pull Claim Data: Includes approved claim transactions (e.g Medical claims) into the payroll process.
- Pull Unpaid Data: extracts unpaid leaves into the payslip as deduction.
- Pull Absent As Unpaid: Processes absences without approved leave applications as unpaid leave deductions.
- Pull None-Shift As Unpaid: Processes attendance records with a None shift status as unpaid leave deductions.
- Overwrite Pulled Transactions: Removes existing payroll transactions generated from previous payroll processes and replaces them with the latest data.
For more information, refer to: Overwrite Pulled Transactions in Payroll Process
- Pull Travel Claim: Imports approved travel claims into payroll (applicable if the Travel module is enabled).
e) Payroll Policies: Select the payroll policies to be included in this payroll process.
Important: Only select payroll policies that use the same payroll cycle. Selecting policies with different payroll cycles may cause the payroll process to fail.
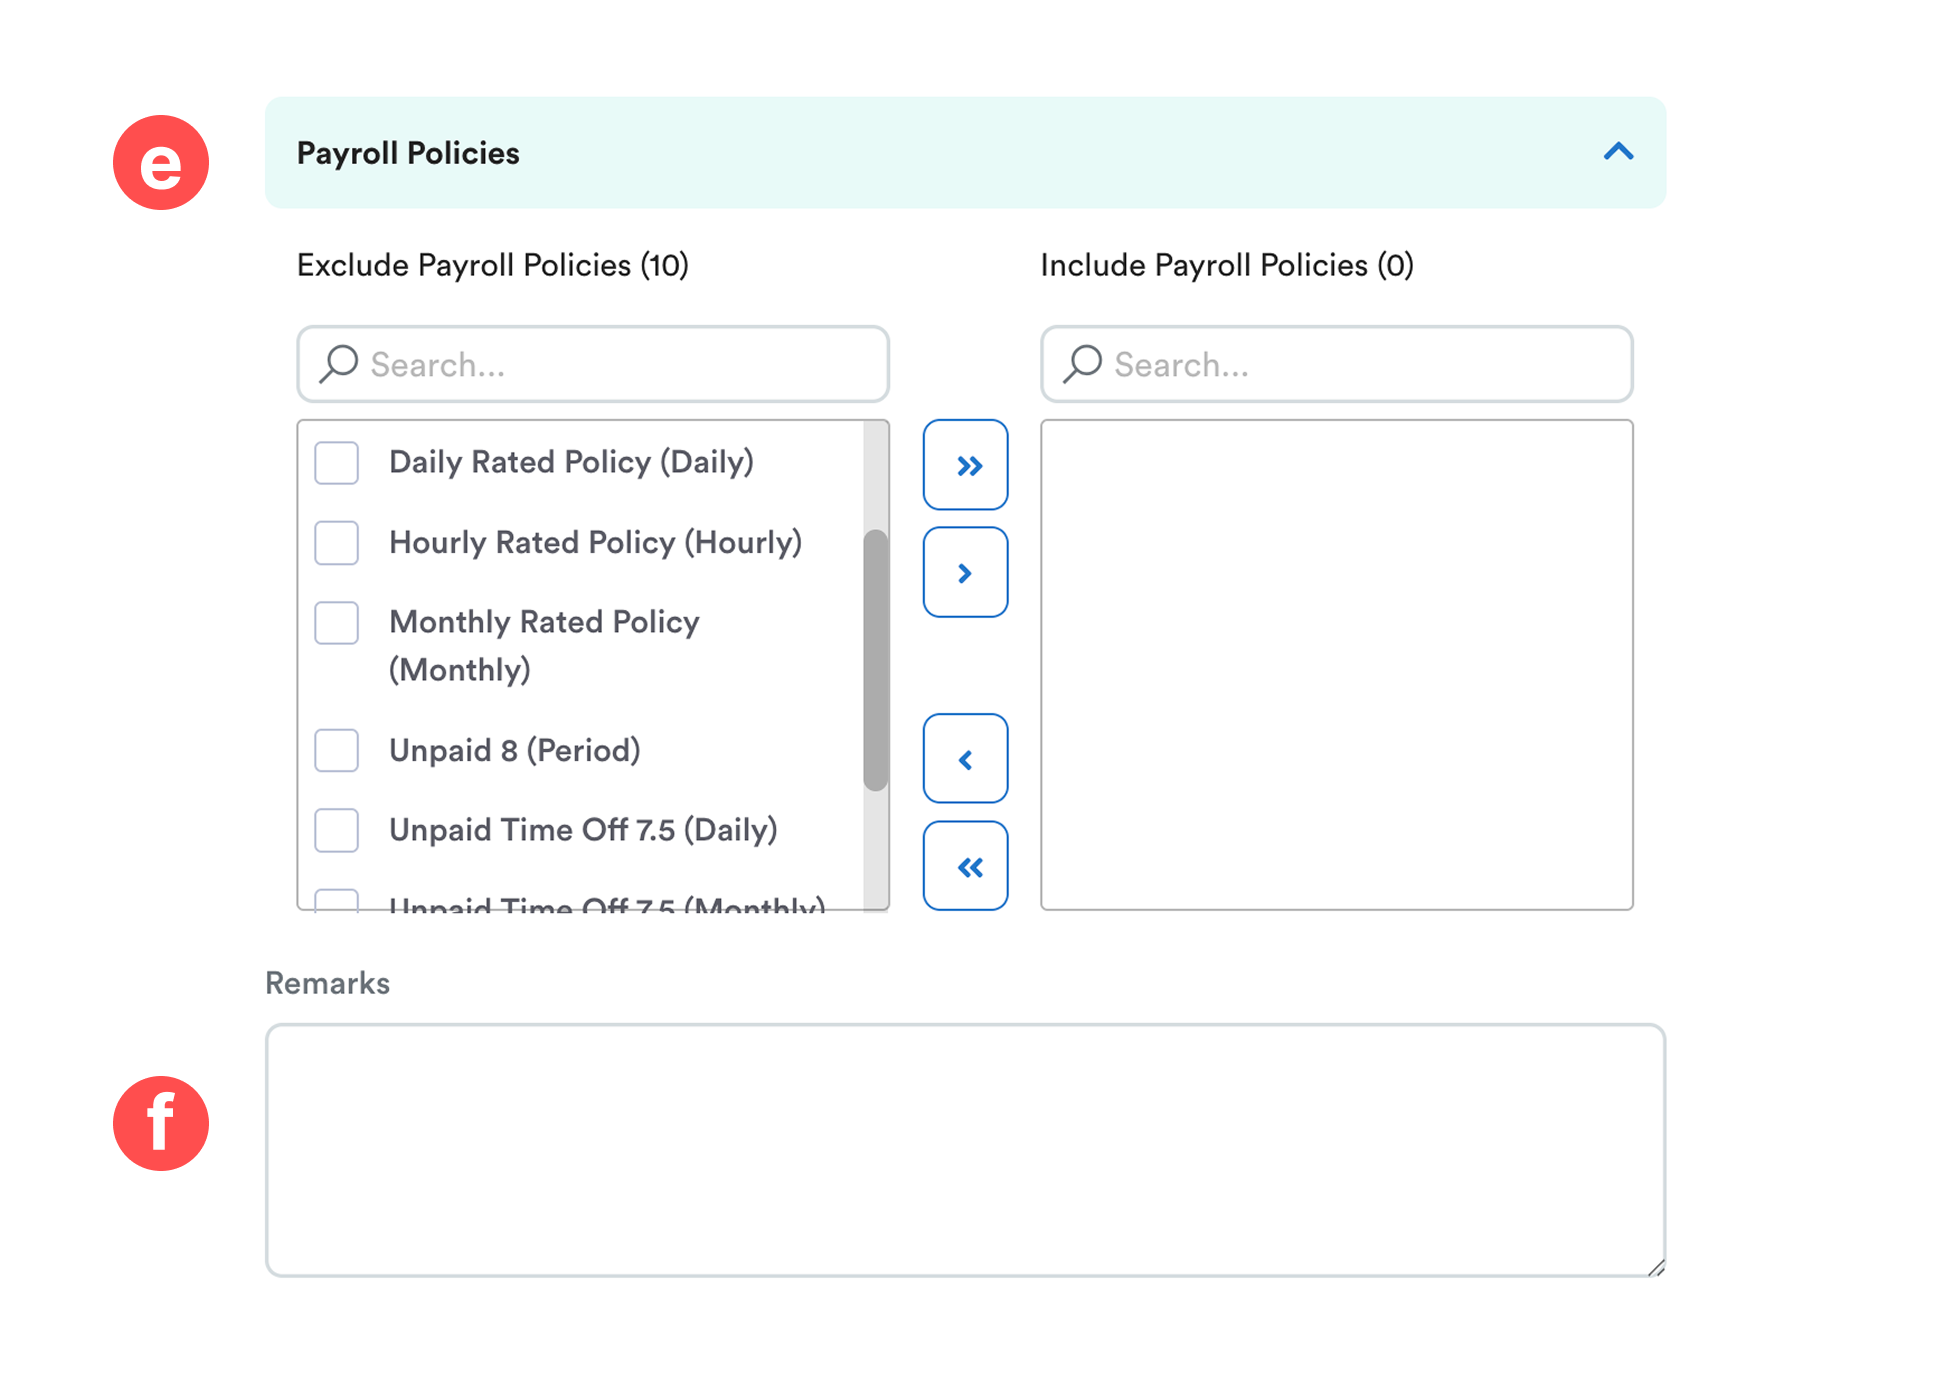
f) Remarks: Enter remarks if you would like them to appear on employees' payslips.
For more information, refer to: Adding Remarks on Employees' Payslip
Click Next to proceed to the Condition tab.
Step 3
Select the employees to be included in the payroll process using one of the four methods:
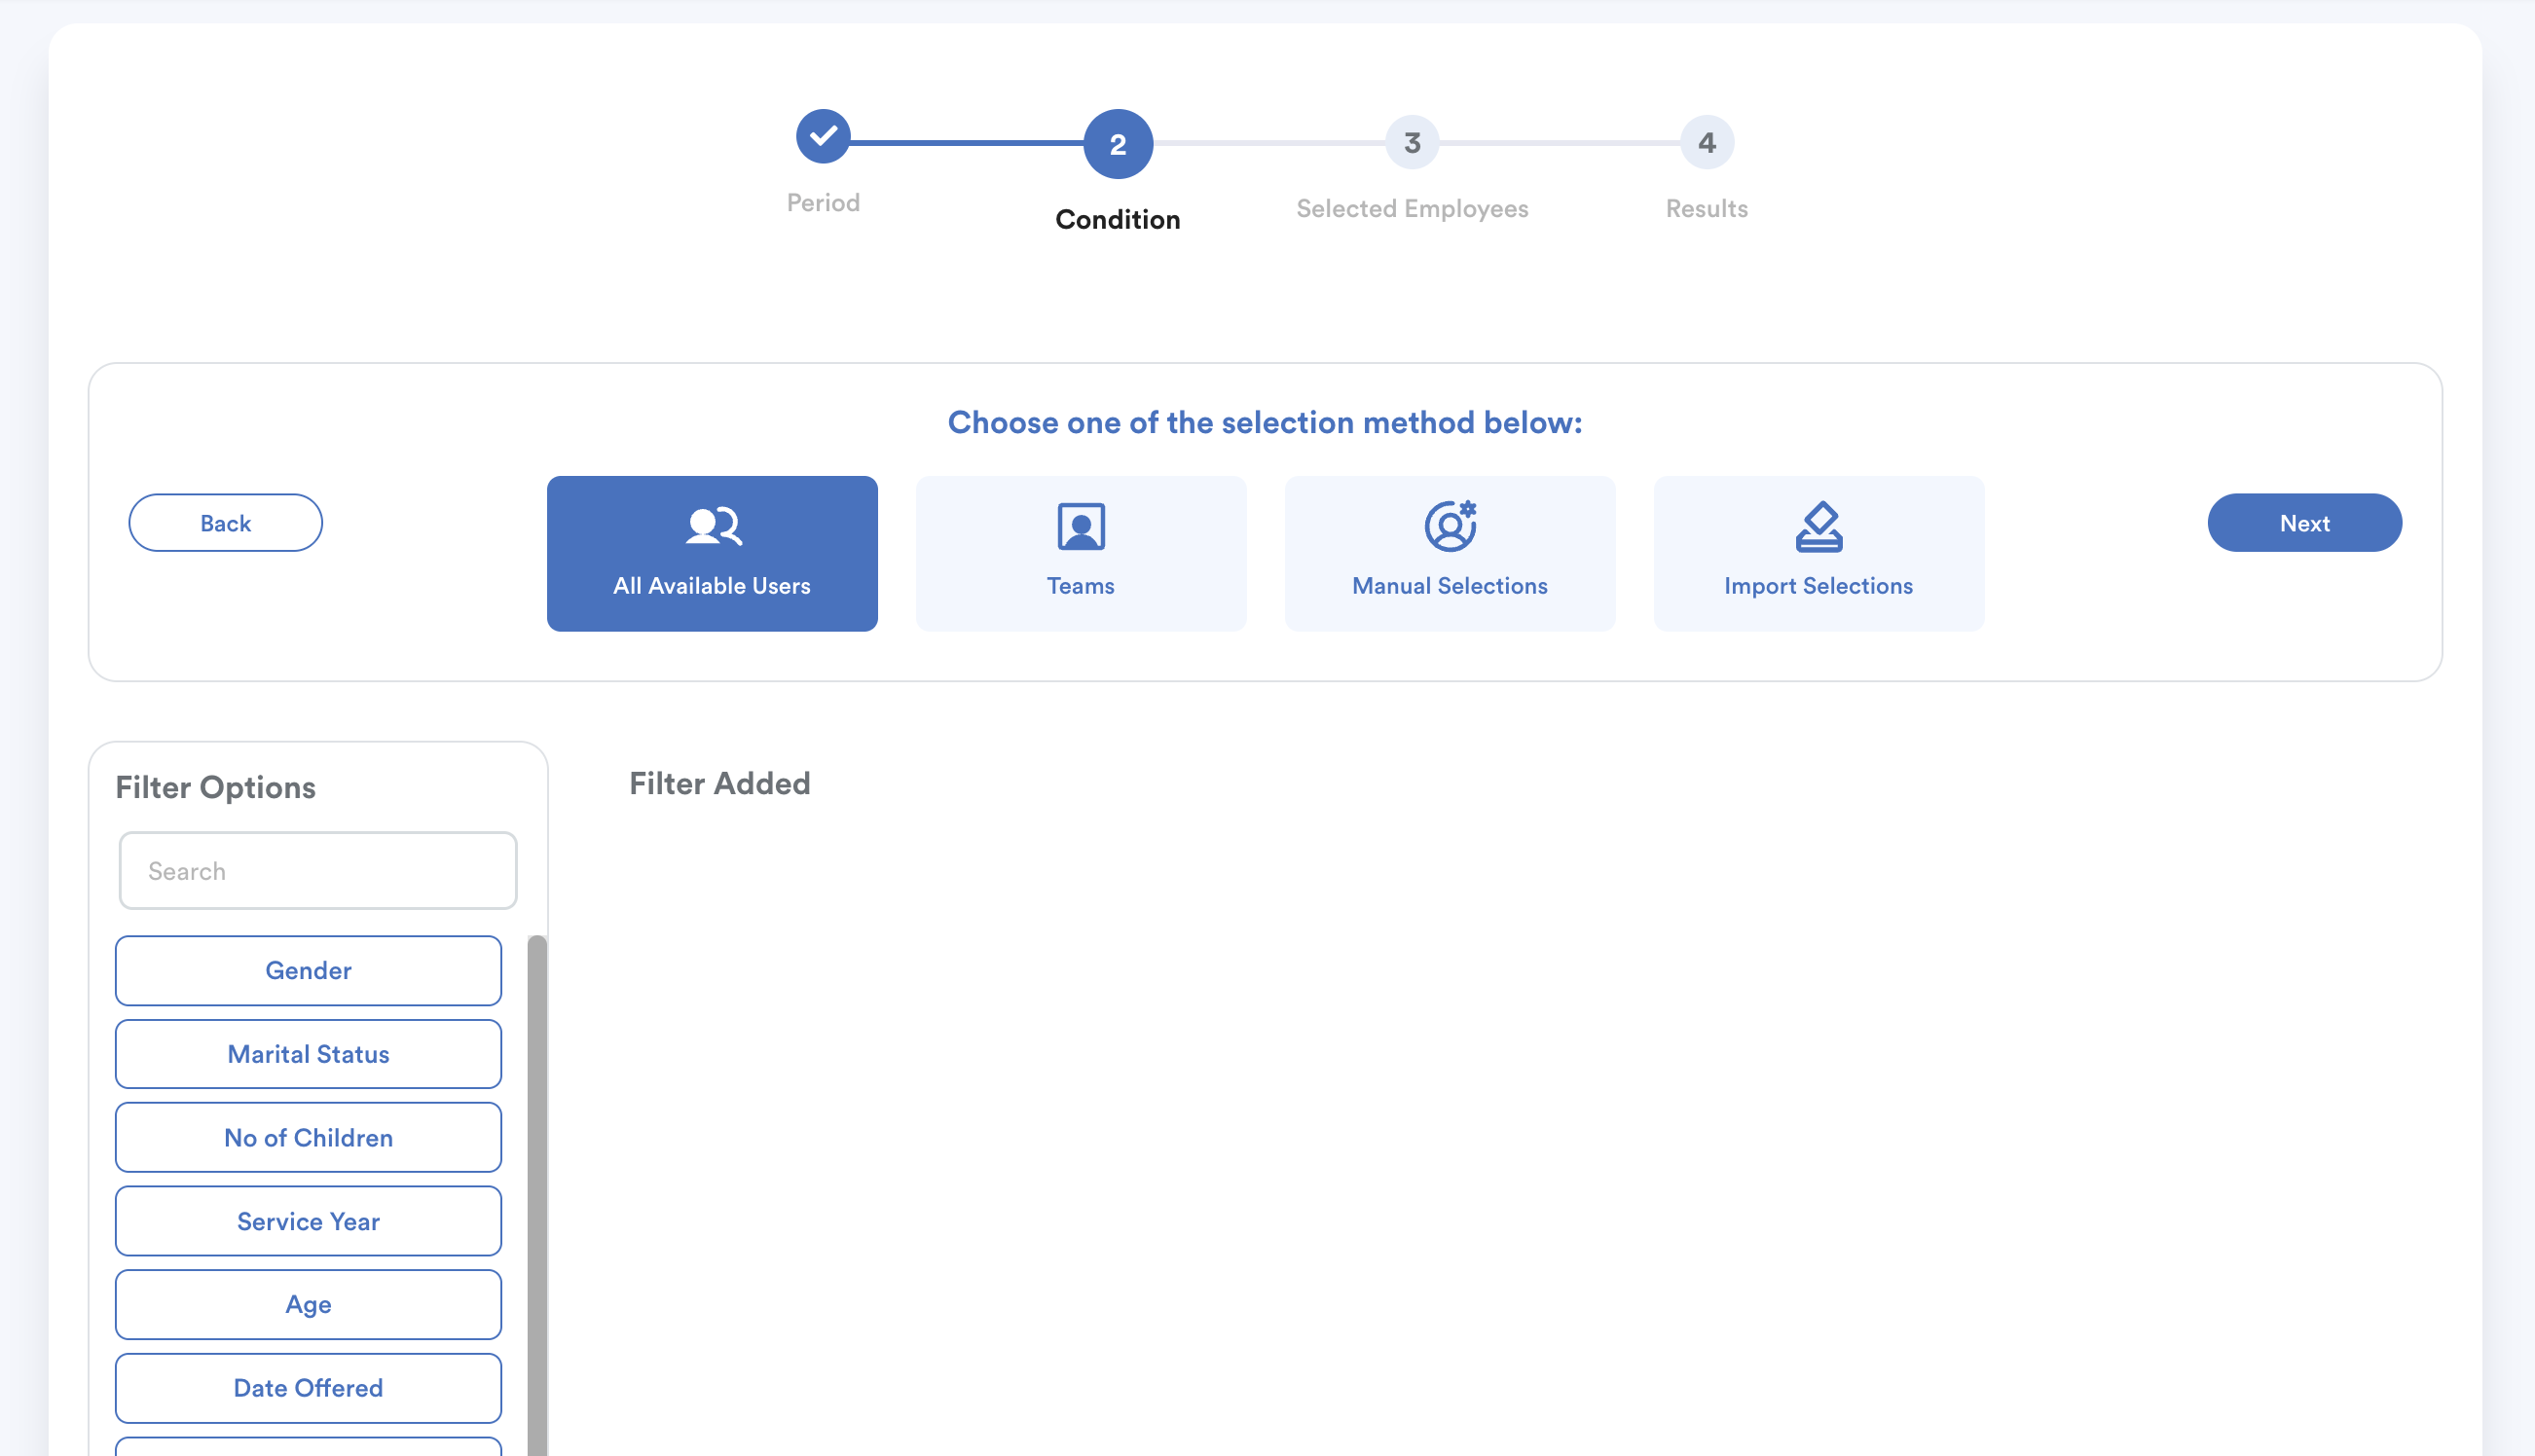
- All Available Users: Includes all active employees in the company.
- Teams: Select employees based on selected teams.
- Manual Selection: Select specific employees manually.
- Import Selections: Import a list of employees by pasting your records in the empty field or click on the upload button to upload your selection.
For more information, refer to: Navigating User/Criteria Selection Screen
Click Next to view selection summary before finalizing the payroll process.
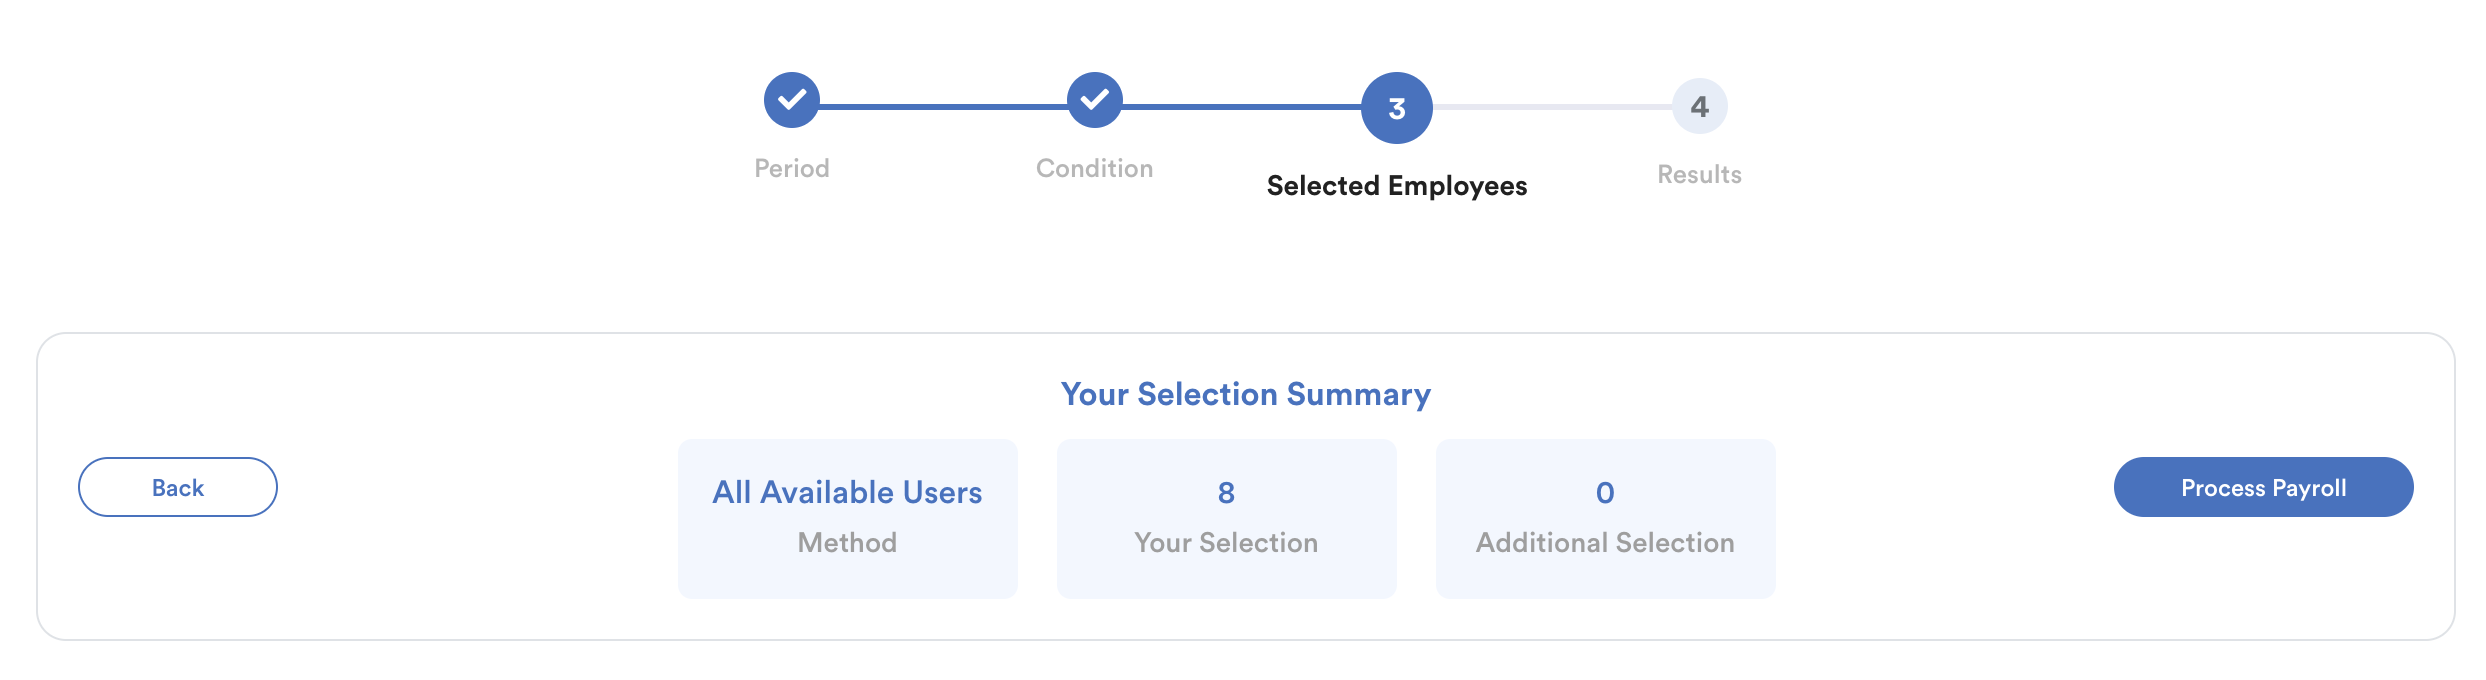
Step 4
Once you have completed the employee selection, review the selected employees. Once confirmed, click Process Payroll.
Step 5
The system will begin processing payroll. Once the process is completed, a summary screen will appear displaying the total number of successfully and unsuccessfully processed payroll records.
Note: Do not close, refresh, or navigate away from the page until the payroll process is fully completed to avoid duplicate payslips.
If there are employees skipped or has error, refer to the Message tab to identify the cause.

We hope this explanation clarifies the matter. If you require additional assistance, do not hesitate to contact our support team.
Related
Was this article helpful?
That’s Great!
Thank you for your feedback
Sorry! We couldn't be helpful
Thank you for your feedback
Feedback sent
We appreciate your effort and will try to fix the article