The purpose of Business Alert is to serve as a central interface for you to manage all the notifications that are sent out from the system itself. You will also have the ability to create custom notifications based on defined conditions.
How to access Business Alerts?
To access Business Alerts, follow steps 1-2 as shown below.

How to navigate Business Alerts?
Once you open Business Alert, your screen will look like the one below.
Business Alerts are categorized by Modules, these modules are displayed on the left side of the screen, titled Module(3), the modules displayed here will be based on your current subscription.
On the right, you will find the available Alerts for the selected modules. Alerts are grouped into two types:
- Custom(4): This is custom alert created by the user.
- Preset(5): This is the system's default notification

How to create new alerts?
Step 1
From the Business Alert listing page, click on the Add New Button located at the top right corner. Once clicked, you will be brought to the page as shown below. Start by filling in the basic information about this alert in 1-3
- 1. Alert Name: Display the Name for this alert
- 2. Label: Short Name to be used for Report Display Purpose
- 3. Alert Description: Optional field, an entry space for purpose of this alert.

Step 2
After filling in the base field, next, you will need to decide how this alert will be triggered, by choosing the condition that needs to be met for the notification to be sent out. Click on Insert Criteria as shown below.

Step 3
Once clicked, the criteria will open up from the right, and you will be prompted to choose the criteria you would like to insert. The Criteria available will vary, depending on which module you are setting up an alert for.
Click on '+' icon to add the criteria.

For birthday email notifications, refer to Birthday Email AlertsStep 4
Once inserted, you will be able to customize the condition as shown below. You may add as many criteria for the trigger in this row.

Step 5
Next, you will create alerts that will be sent out from the system, if the condition is met. Start by clicking on 'New Alert' Button as shown below.

Step 6
Once clicked, a drawer will appear from the right as shown below. There are a few components that need to be completed in this drawer:
- 1. Type of Alert: This is where you decide how this alert will be sent out. Email Notification means the alert will be sent out by email; Push Notification means this will only be displayed as a System Notification.
Note: Push notification might not work for all the cases.
- 2. Alert Name: This is just a name for this alert for easy reference
- 3. Content Type:
Choose Individual, if this is meant to send to the specific recipient.
If Group is selected, it will send out a list of all individuals that meet the trigger conditions. - 4. Recipient: This is where you define who will receive this Alert.
- 5. Alert Content: This is where you define the email title & content.
When you are done with the content, click on Save on the top right corner.

Step 7
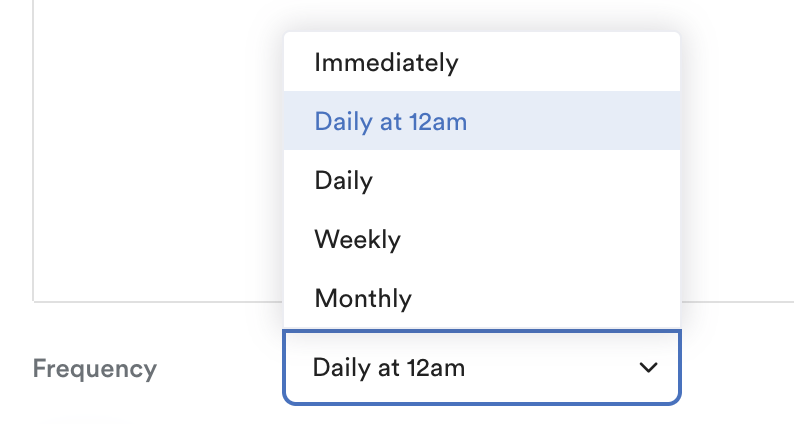
Frequency: You can set your preferred frequency and time. 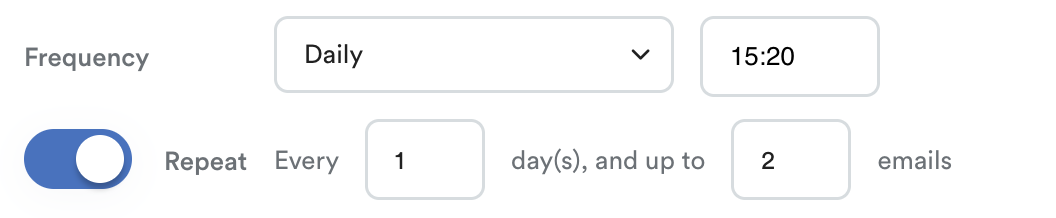
Repeat: You can toggle this on to receive repeating emails.
As the above setting, you will expect:
- email will be received daily 3:20 pm
- This email will be received continuously up to 2 days
Step 8
The last step is to define who will be able to trigger this alert, you will be able to define the user by using the default selection interface as shown below.
Once done, click on Save button on the top right corner, to save this alert template.
Note: When an alert is saved, the alert is automatically set to active.

How to toggle notifications on or off?
There are two ways to toggle notifications off:
1. Turn off an Alert entirely: You can do this by clicking on the blue toggle button as shown below in the Business Alert listing page. Blue indicates it's Active, and Grey means it's been deactivated.

2. Turn off Notifications within an Alert: This method will require you to click inside a single alert, to view the available notifications that have been set as shown below. Start by clicking on the Edit button on the top corner, followed by clicking on the specified notification you would like to turn off by clicking on the blue toggle button as shown below. Blue indicates it's Active, and Grey means it's been deactivated.

Was this article helpful?
That’s Great!
Thank you for your feedback
Sorry! We couldn't be helpful
Thank you for your feedback
Feedback sent
We appreciate your effort and will try to fix the article