This guide explains how to configure overtime settings for a schedule, including overtime eligibility, approval methods, overtime allowance, rounding rules, and overtime rates for different day types.
Quick link: go to Step 6 for overtime allowance setting
Step 1
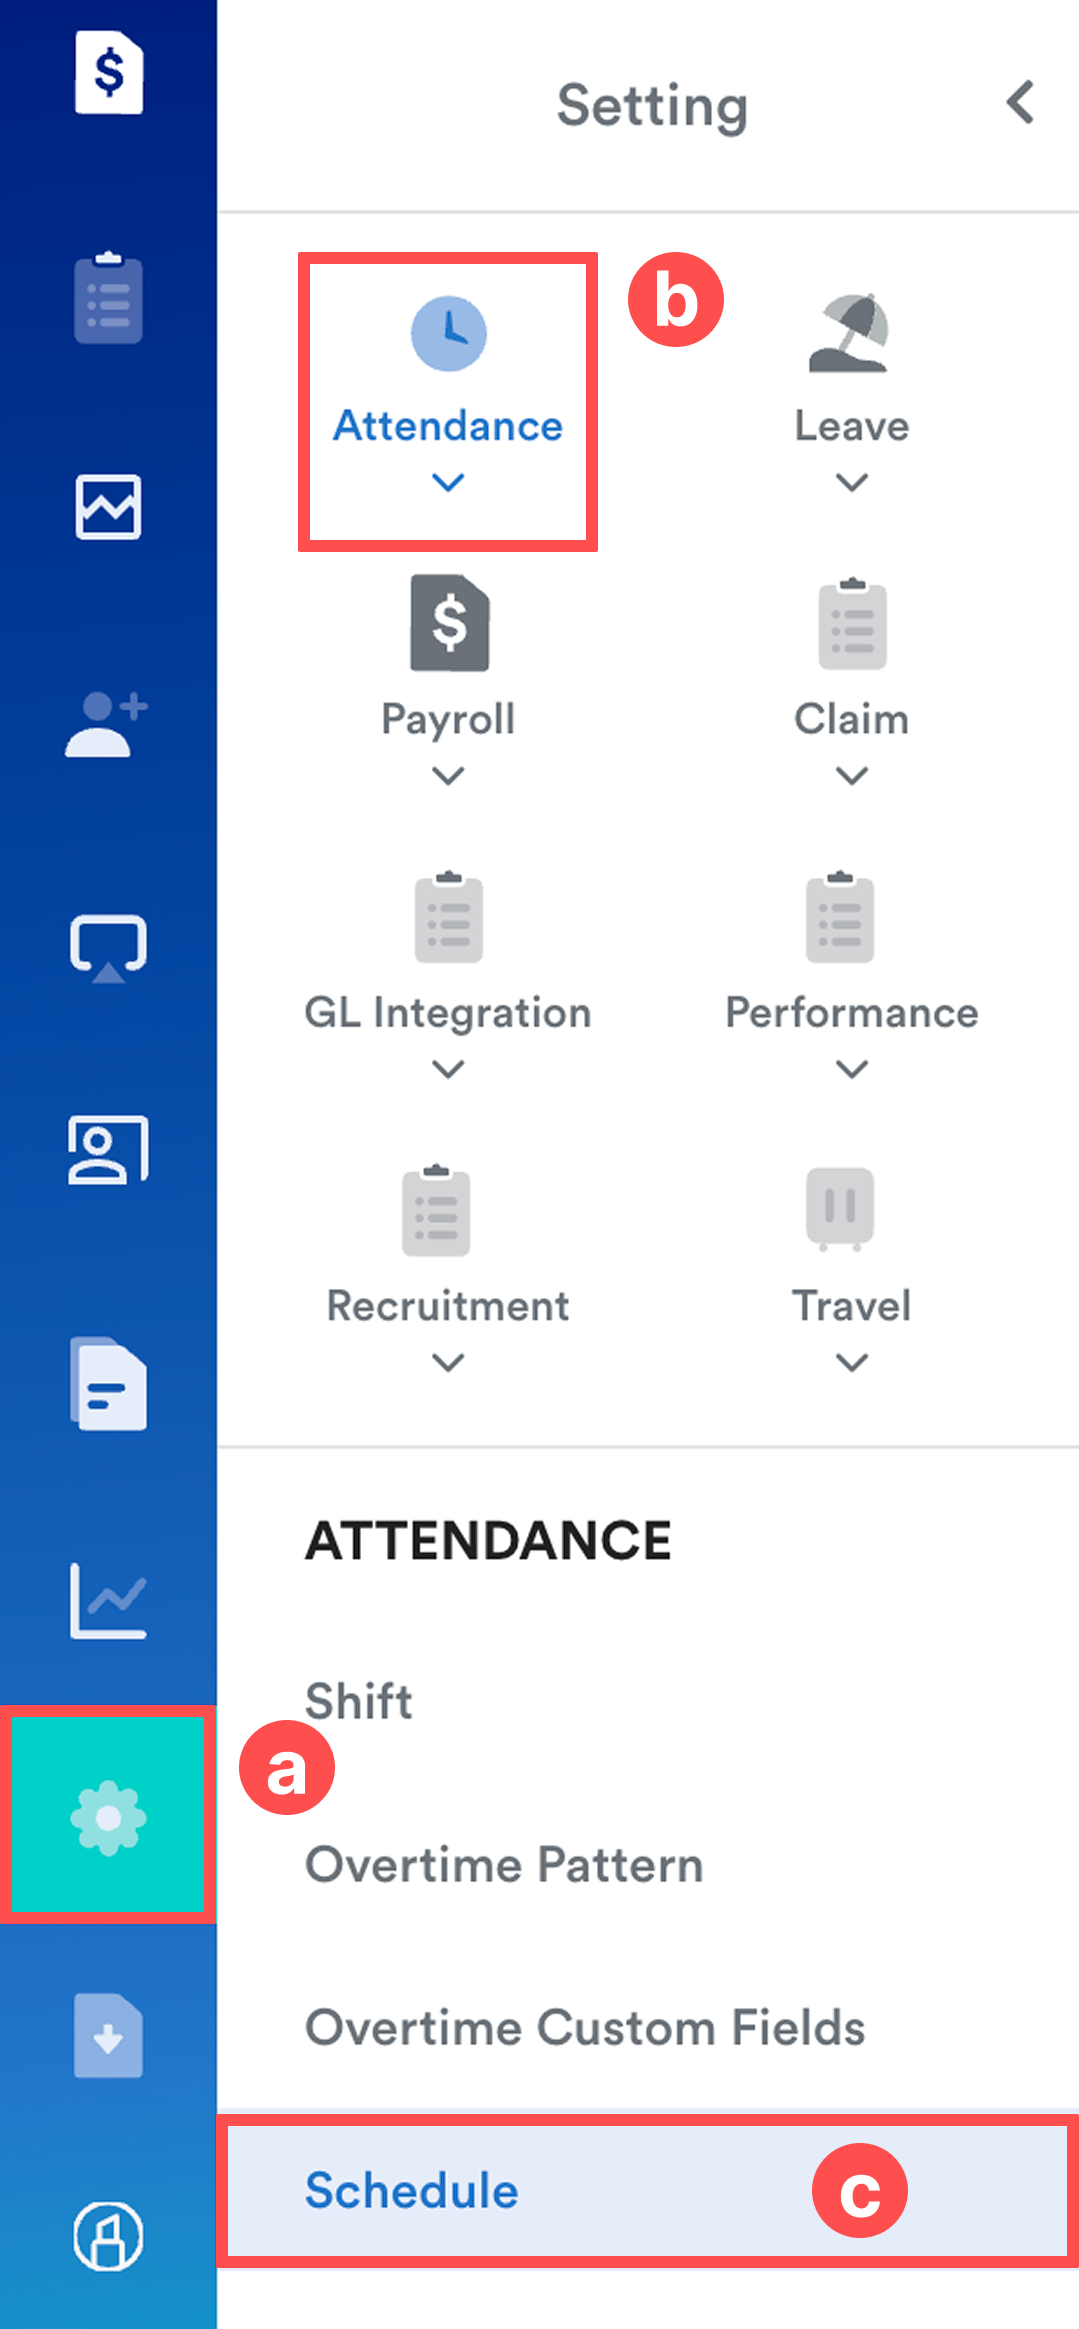
On the left menu, go to Settings (a) > Attendance (b) > Schedule (c).
Step 2
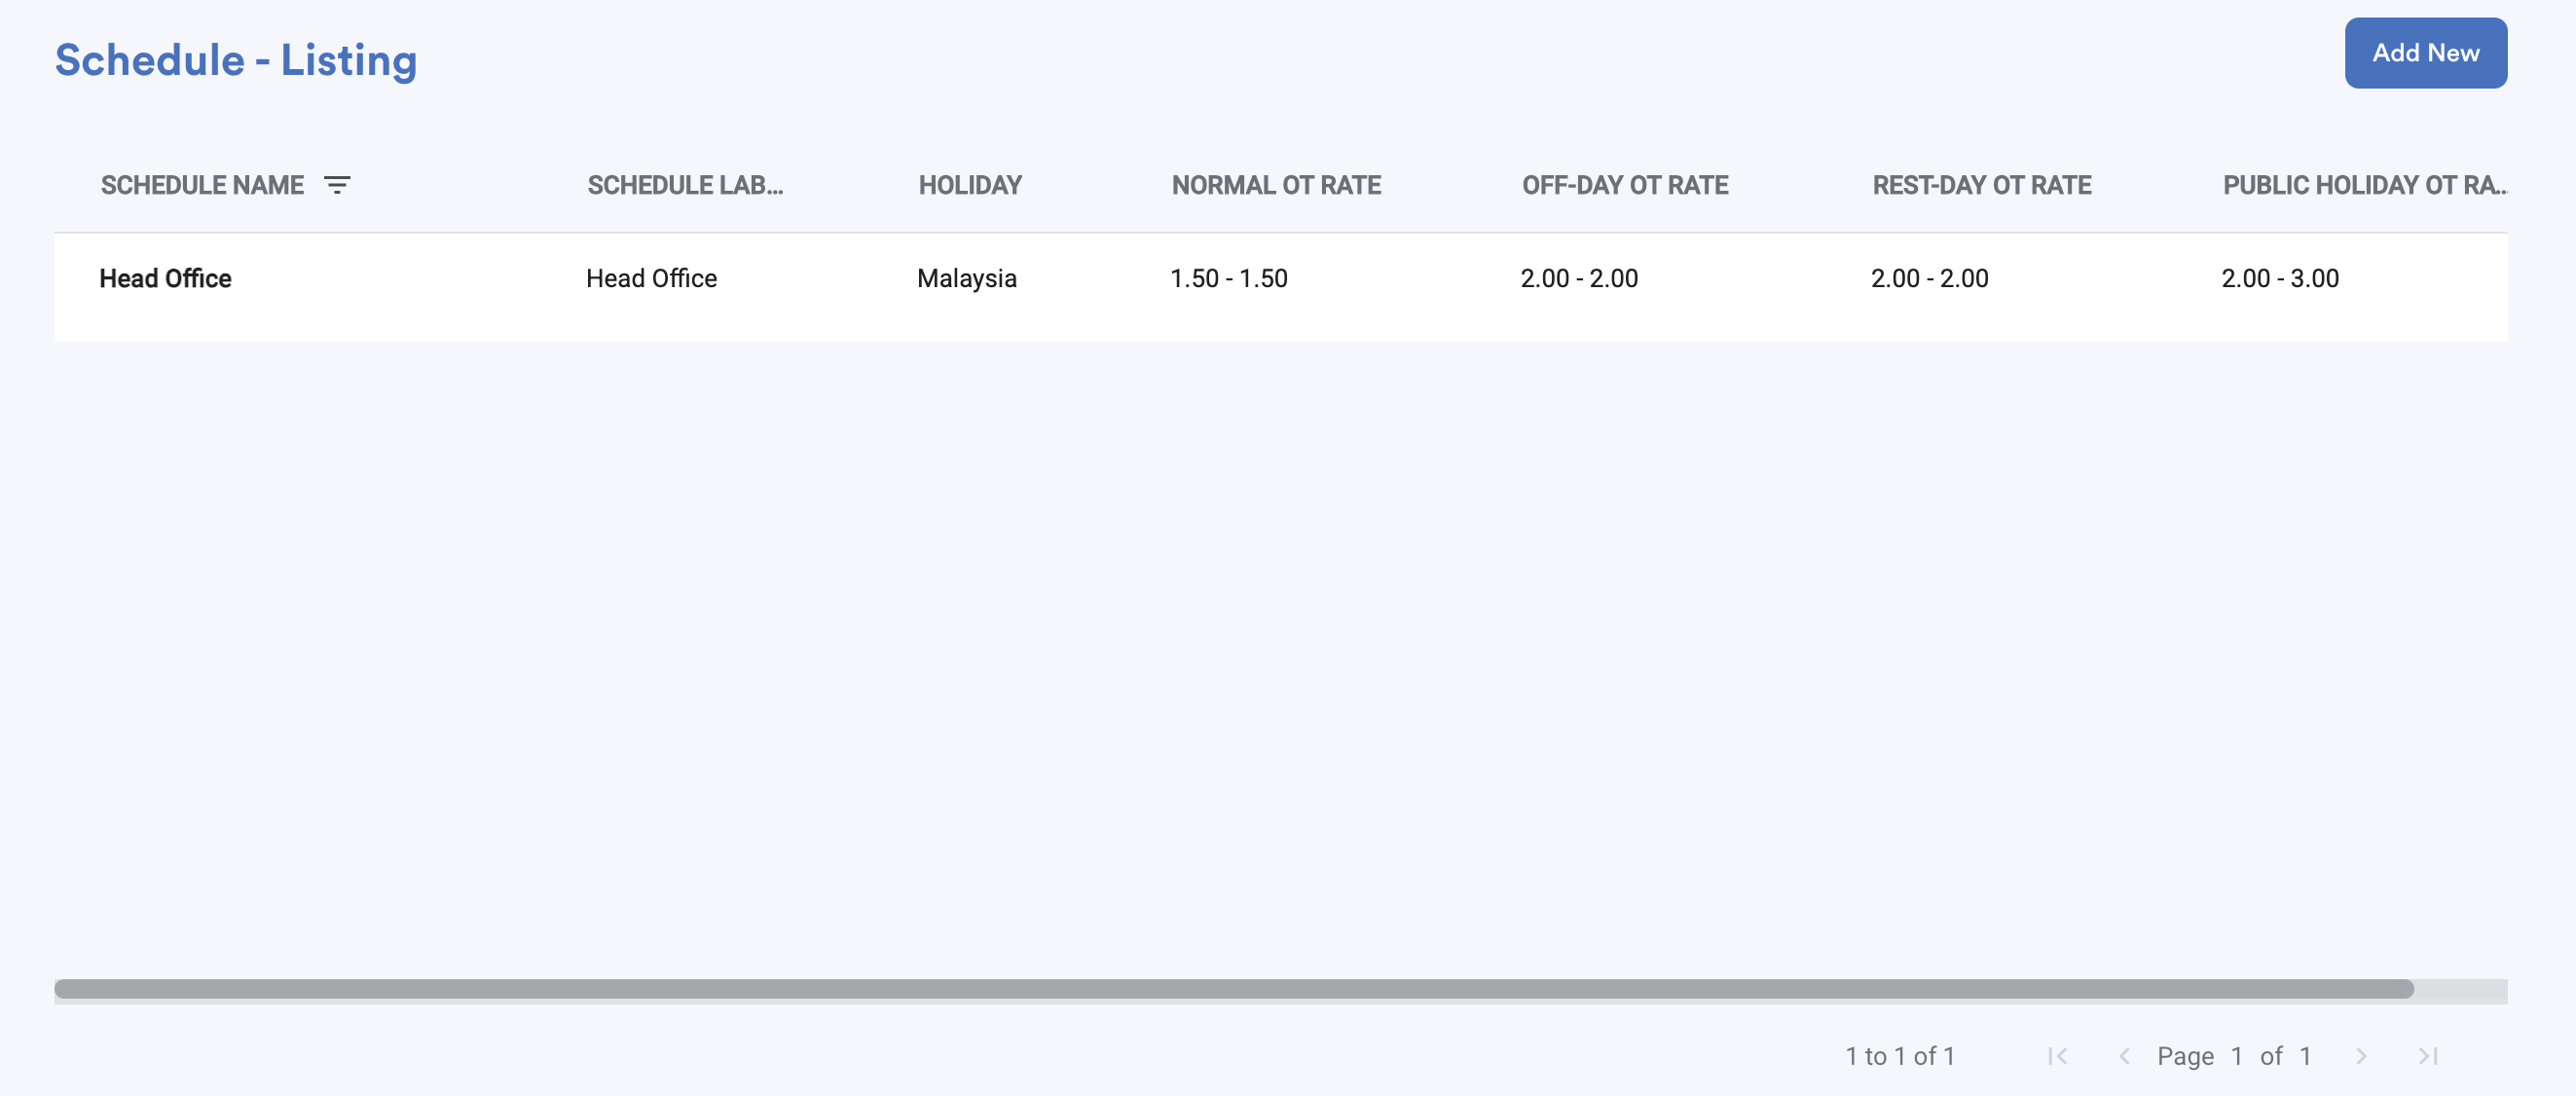
Select the schedule that you want to configure for overtime or Add New.
Step 3
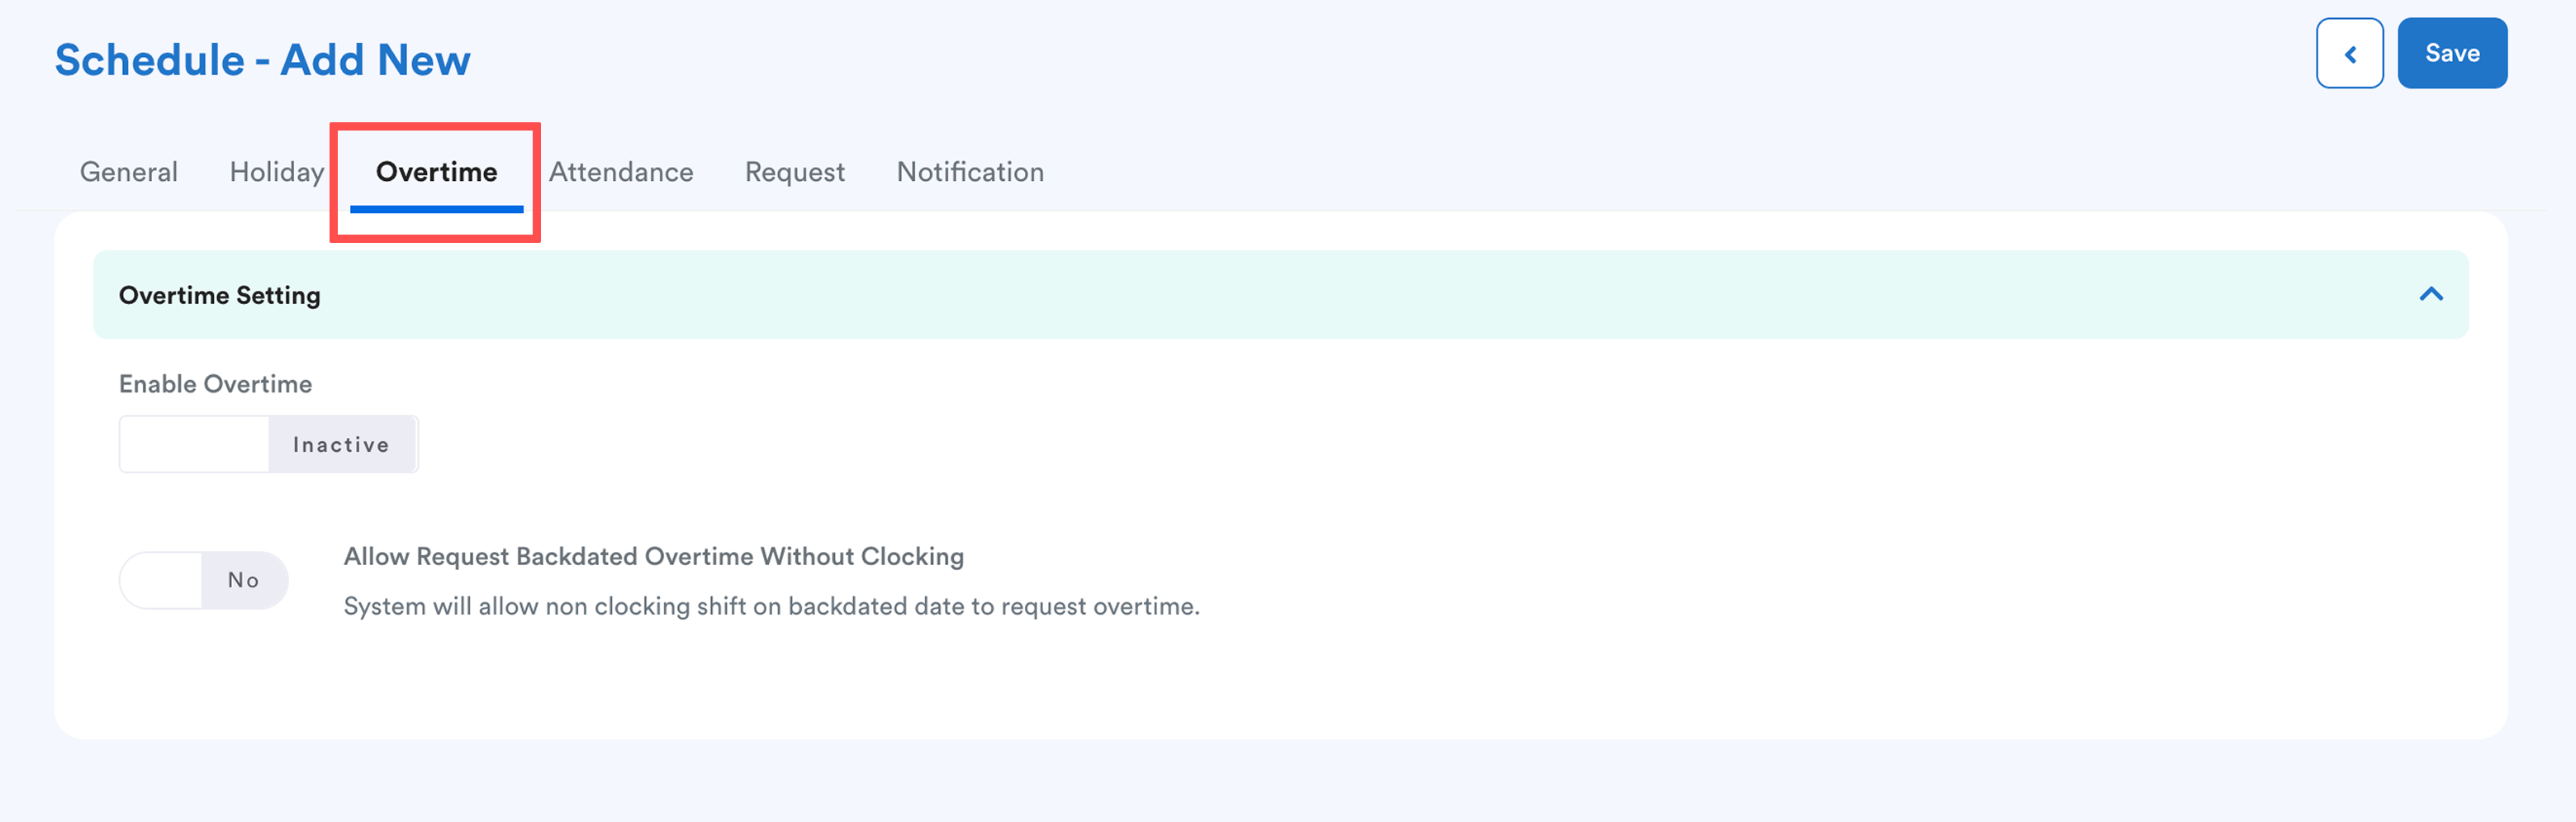
You will be redirected to the Schedule Details page.
Click the Overtime tab.
Step 4
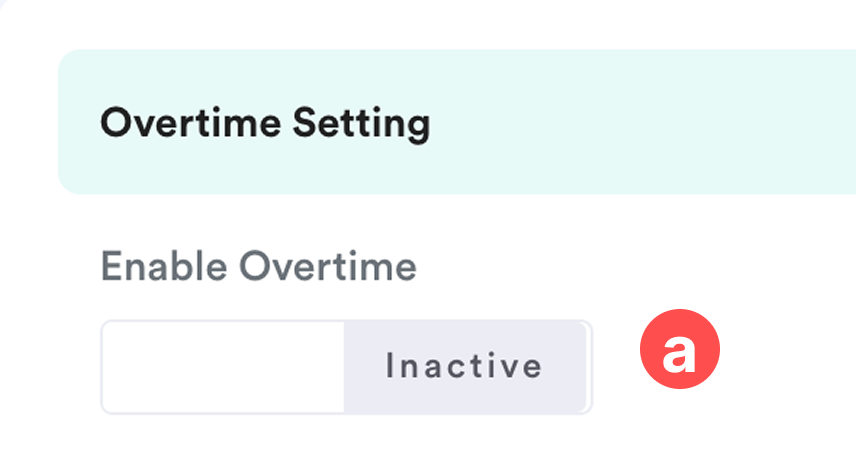
Click Edit, then enable Enable Overtime (a) to activate overtime settings.
b) Enable Early Overtime: Allow employees to perform overtime before their scheduled shift starts.
c) Enable Late Overtime: Allow employees to perform overtime after their scheduled shift ends.
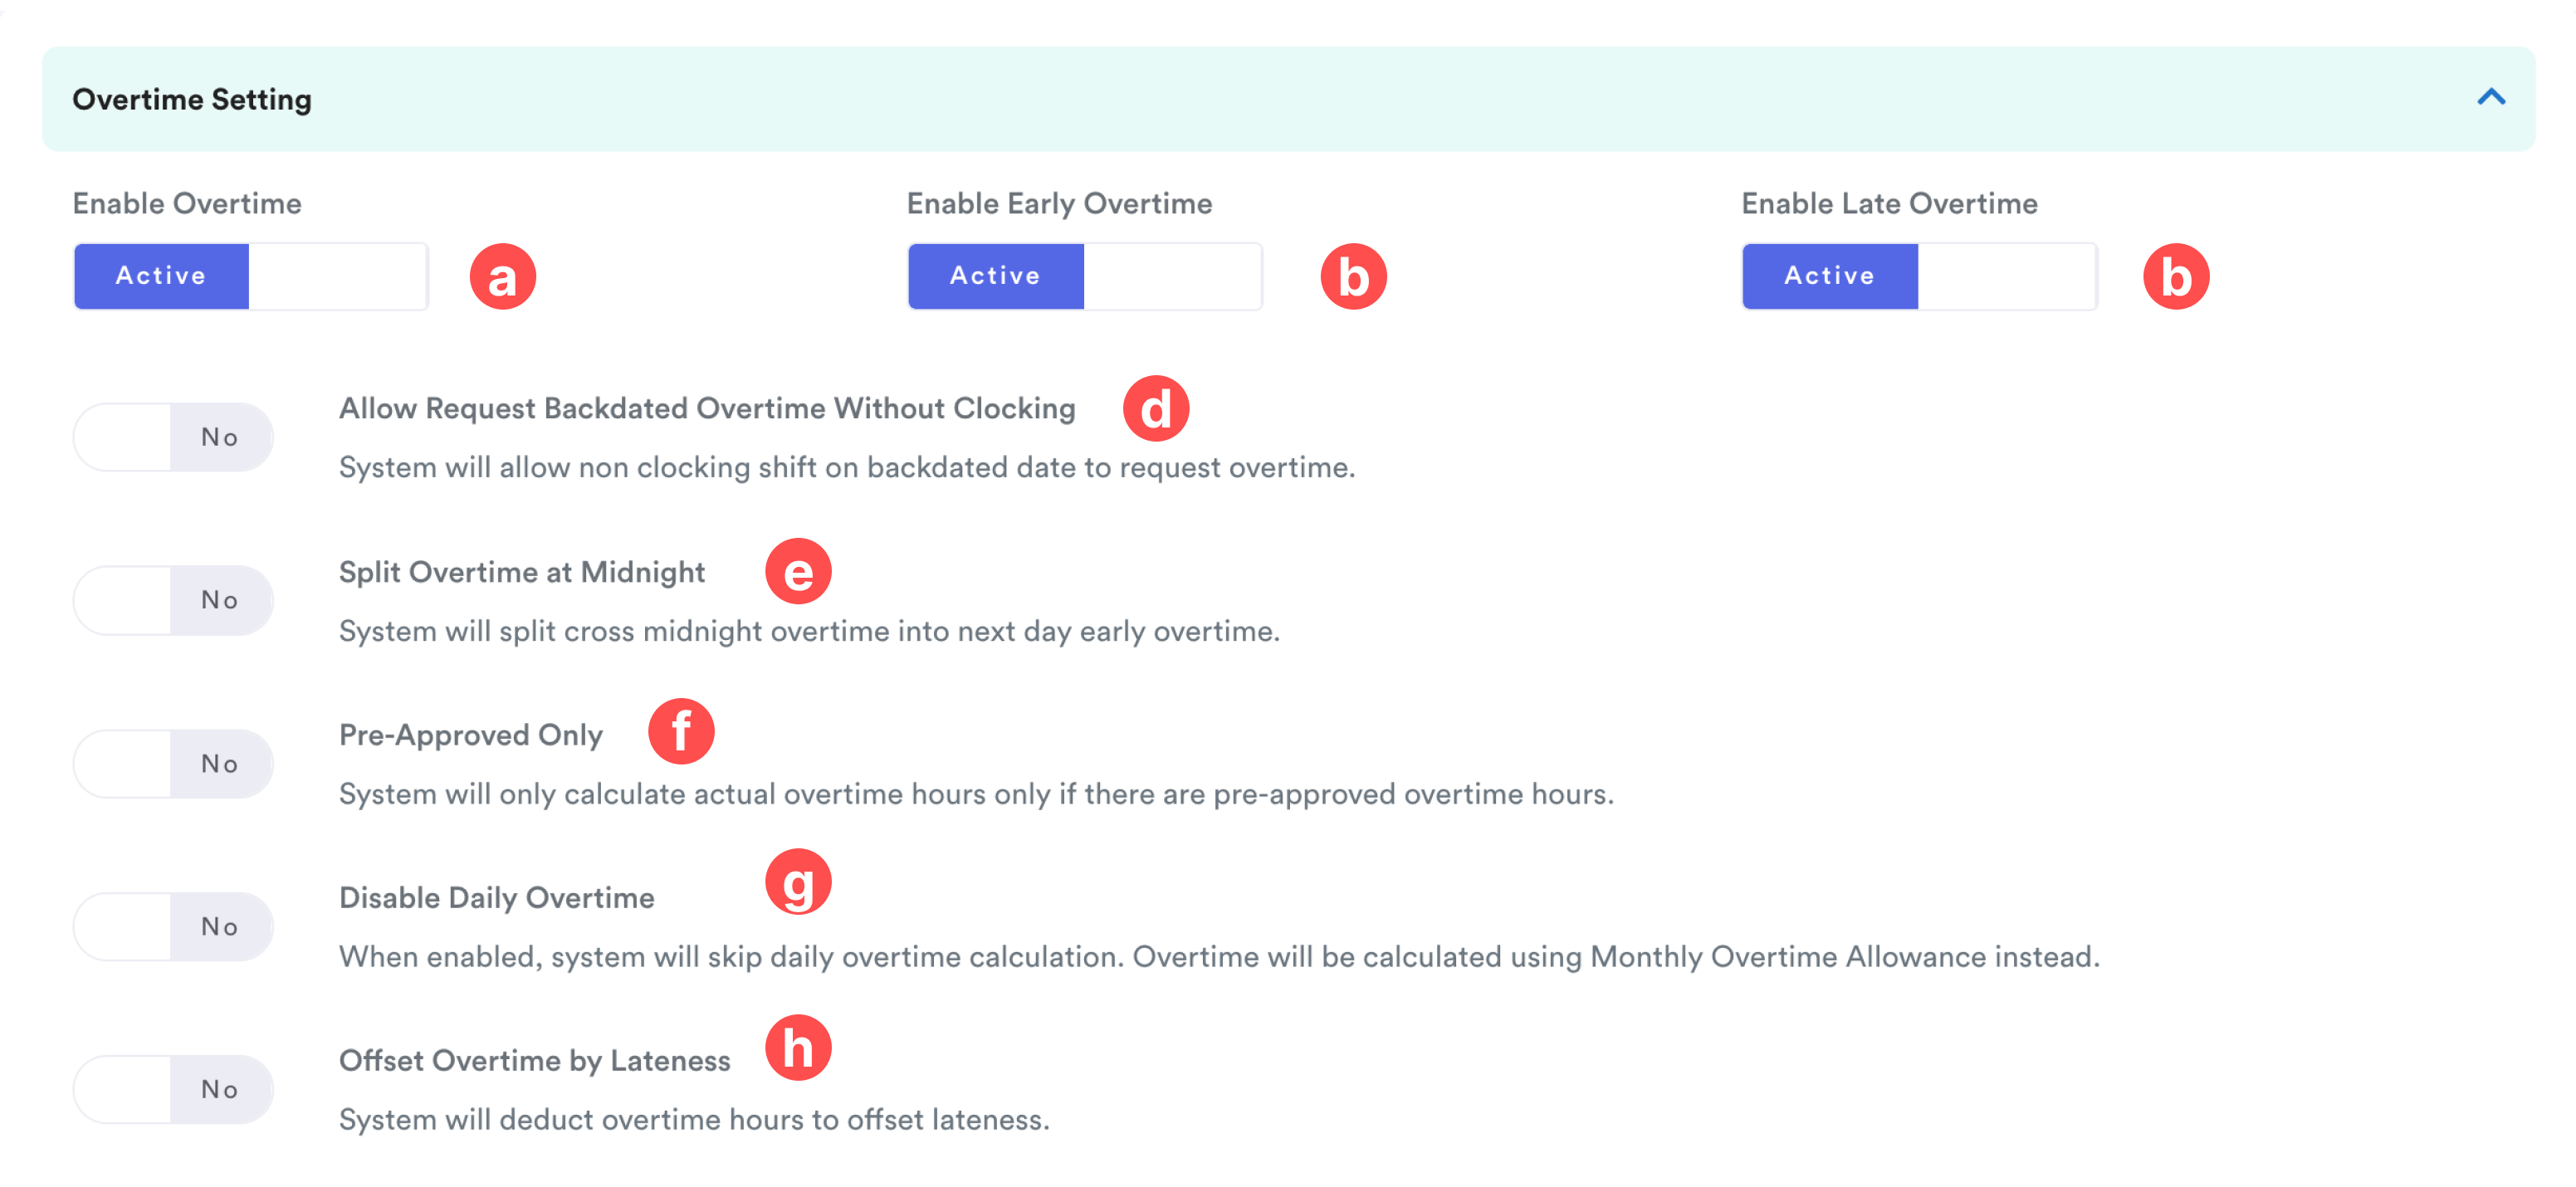
d) Allow Request Backdated Overtime Without Clocking: Allow employees to submit backdated overtime requests even if there are no clocking records for the shift.
e) Split Overtime Midnight: Split overtime that crosses midnight into the next day's early overtime.
f) Pre-Approved Only: Only calculate actual overtime hours if the employee has pre-approved overtime. Read more here: How to Get Pre-Approved Overtime?
g) Disable Daily Overtime: Skip daily overtime calculation and calculate overtime using the Monthly Overtime Allowance instead.
h) Offset Overtime by Lateness: Deduct overtime hours to compensate employee lateness.
Step 5
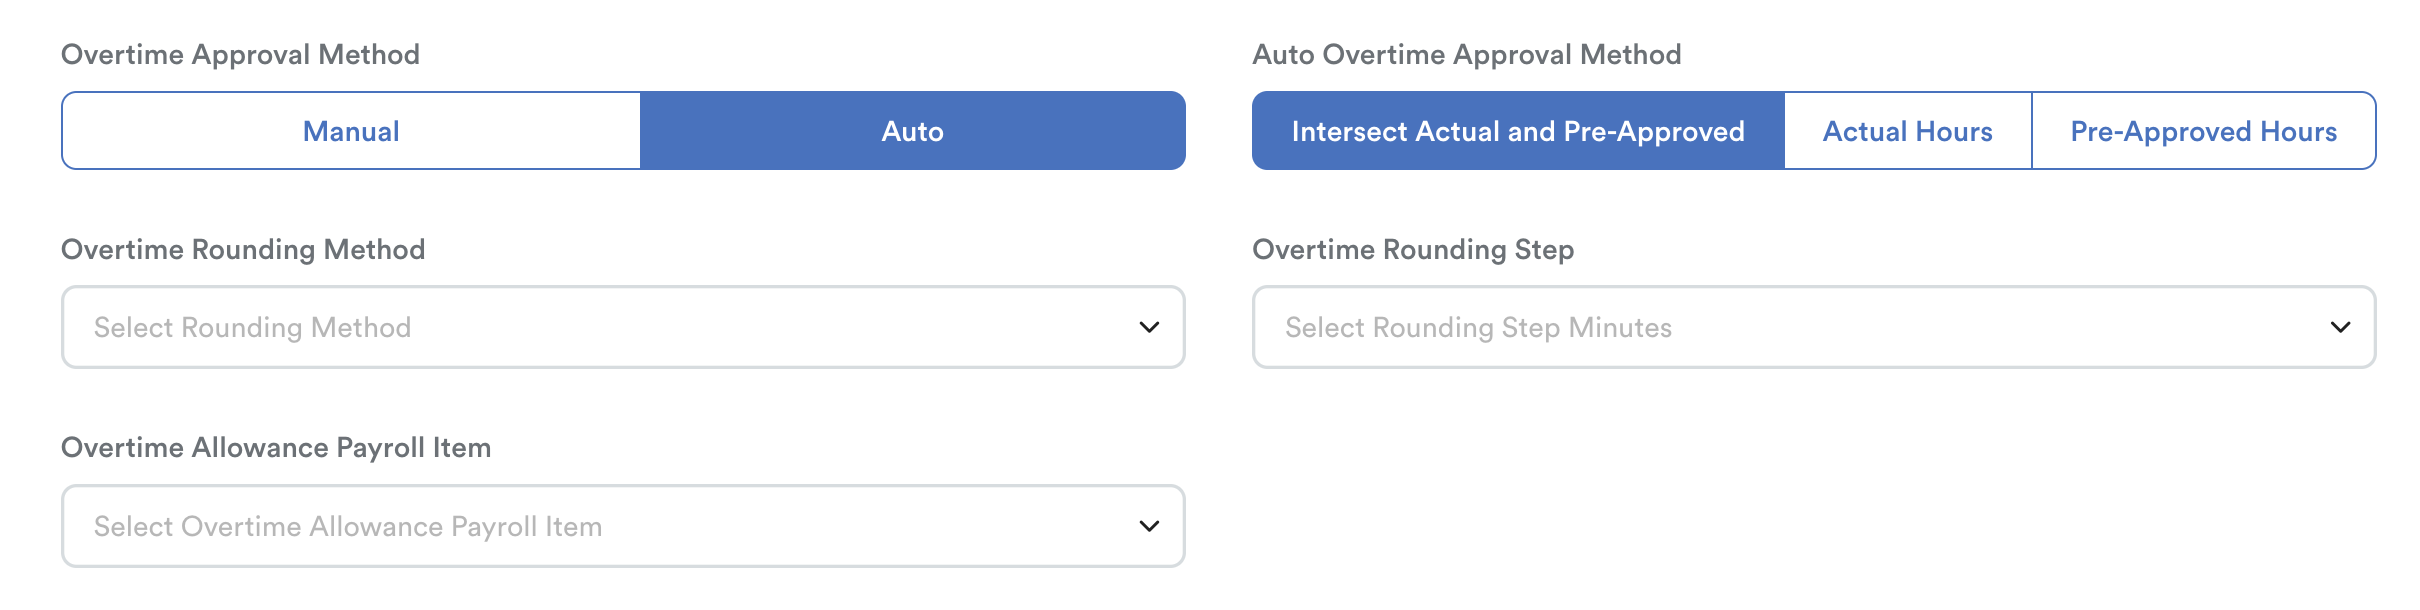
Configure the Overtime Approval and Rounding settings.
Overtime Approval
Choose one of the following approval methods:
- Manual – Overtime requires manual approval.
- Auto – Overtime is approved automatically.
If Auto is selected, choose one of the following Auto Overtime Approval Methods:
- Intersect Actual and Pre-Approved Hours
- Actual Hours
- Pre-Approved Hours
Refer here for more detailed explanation about each methods: Auto Overtime Approval Methods
Overtime Rounding
Configure the following settings:
- Overtime Rounding Method – Choose Up or Down.
- Overtime Rounding Step – Select the rounding interval in minutes.
Lastly, select the Overtime Allowance Payroll Item.
Note: If you have not created a payroll item, refer to Creating/Edit Payroll Items before proceeding.
Step 6
Scroll down to configure overtime settings for each day type:
- During Work Day
- During Off Day
- During Rest Day
- During Public Holiday
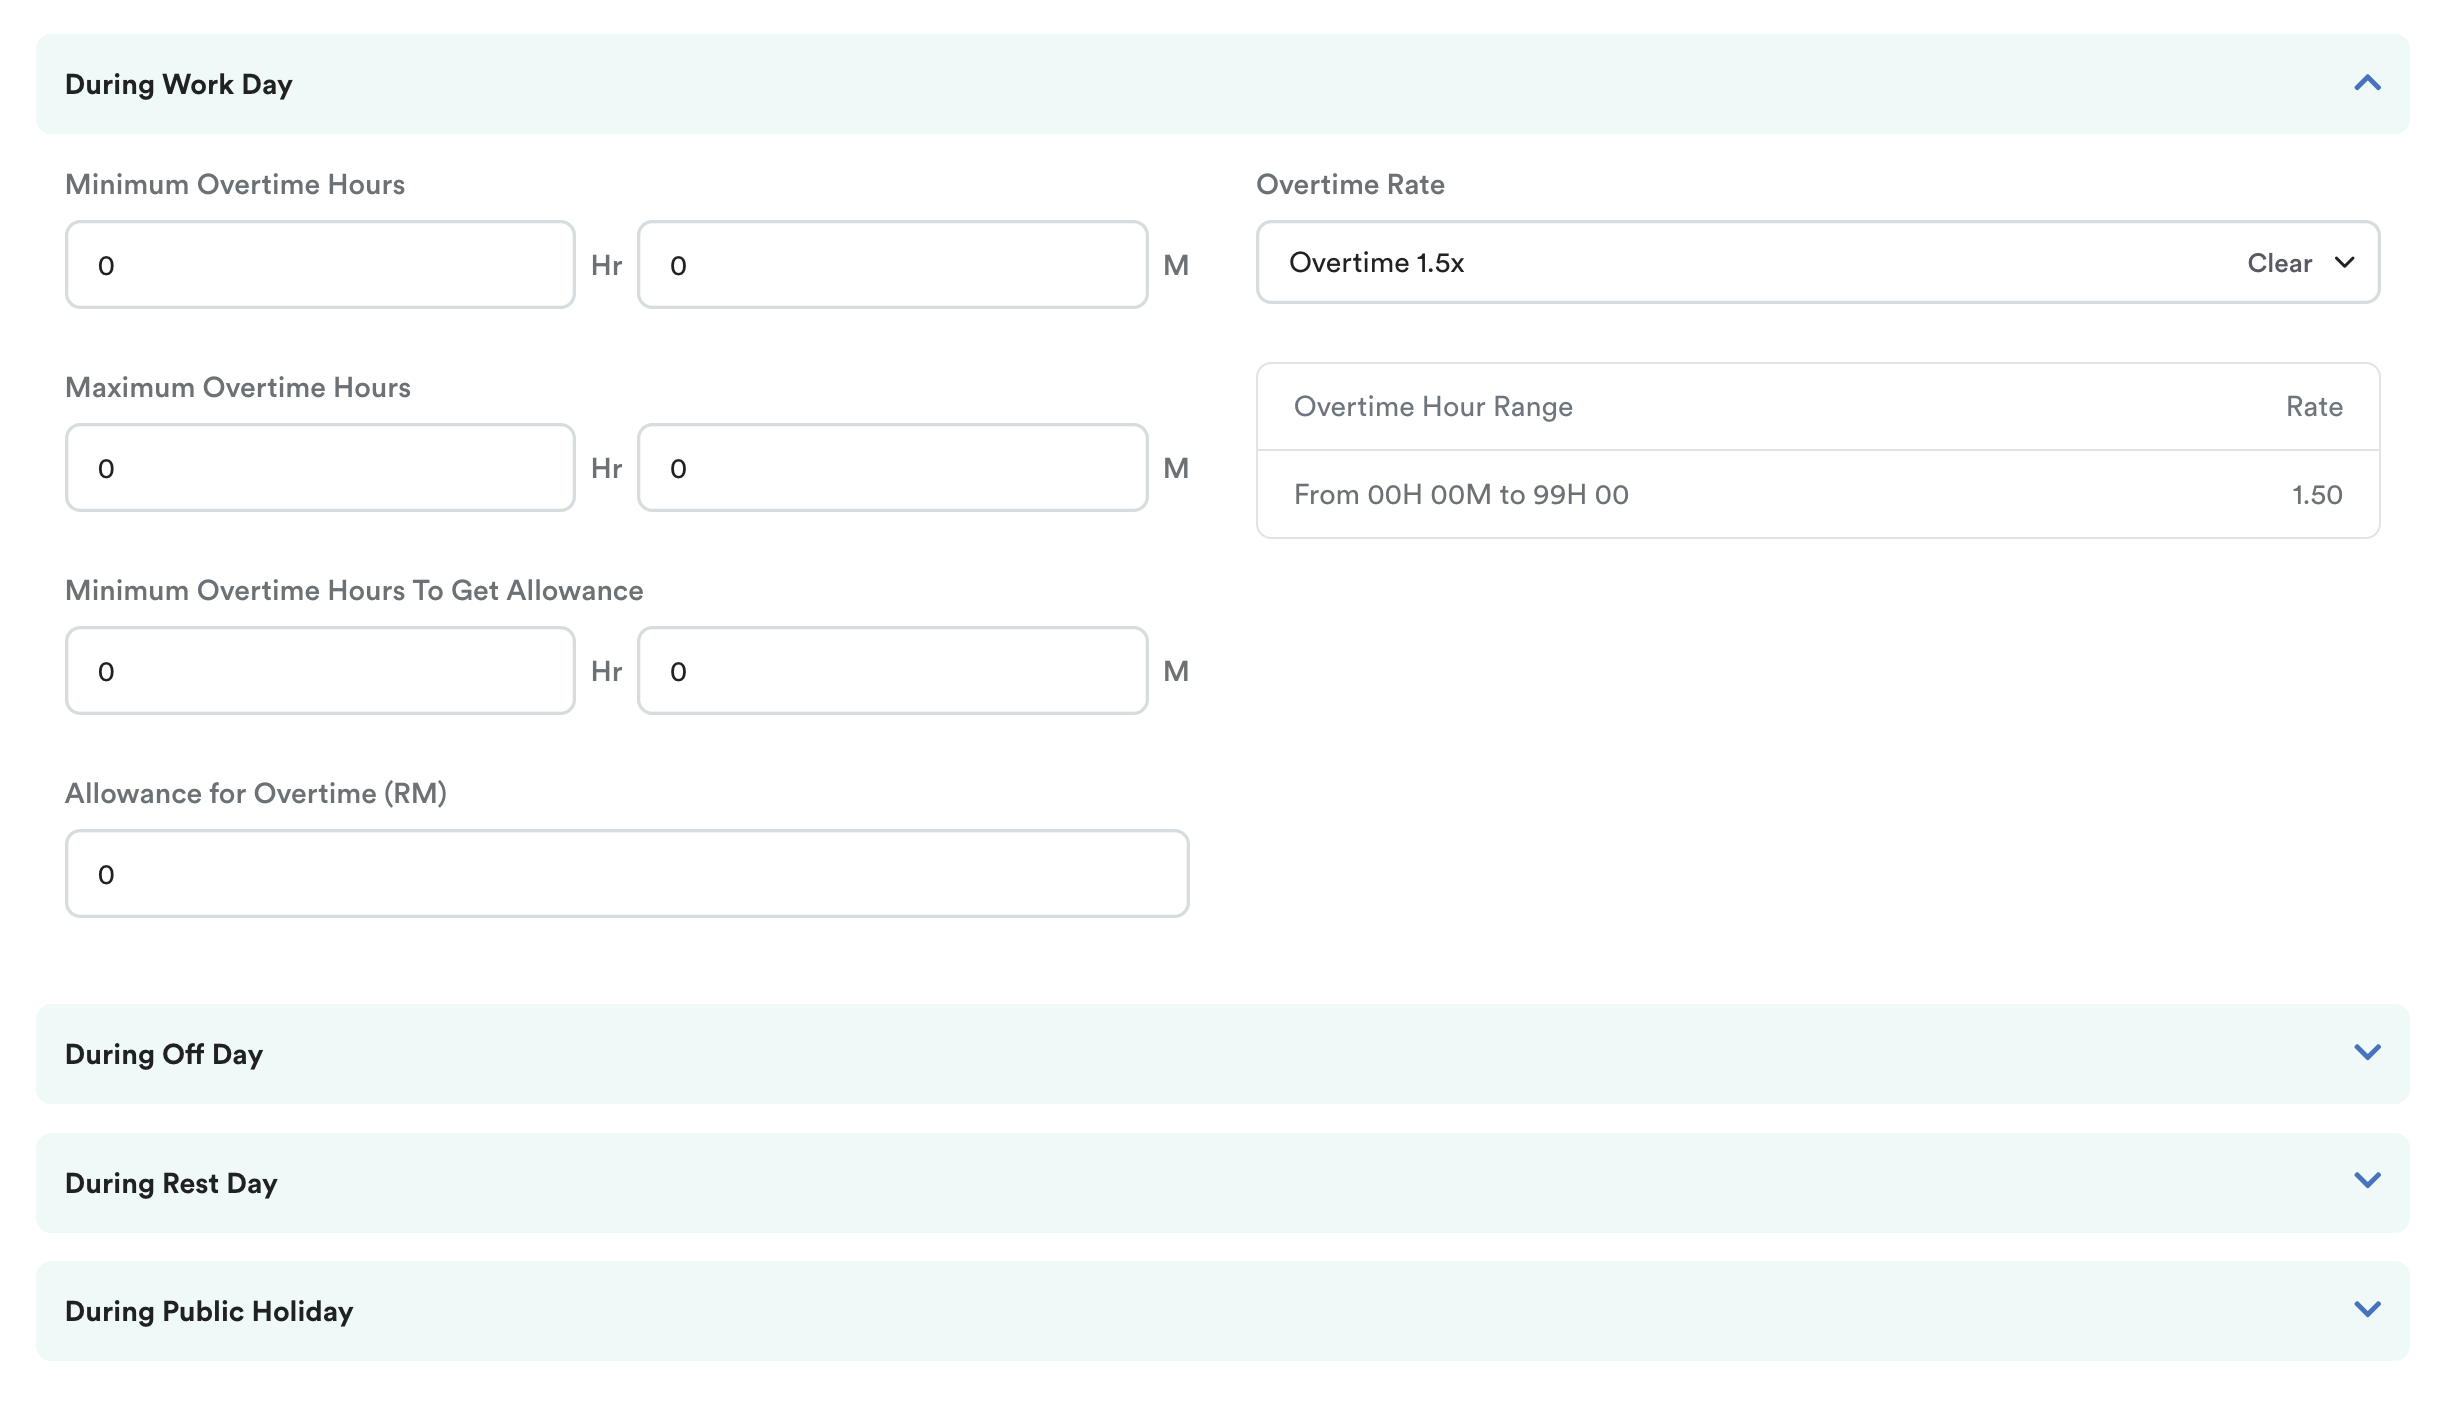
For each day type, configure the following:
a) Minimum Overtime Hours: Set the minimum overtime duration (hours and minutes) required before overtime is eligible for payment.
b) Maximum Overtime Hours: Set the maximum overtime duration (hours and minutes) that is eligible for overtime payment or allowance.
c) Minimum Overtime Hours to Get Allowance: Set the minimum overtime duration required before the employee becomes eligible to receive the overtime allowance.
d) Allowance for Overtime (RM): Enter the fixed allowance amount to be paid once the employee meets the minimum overtime hours for that day type.
e) Overtime Rate: Select the applicable overtime rate from the available Overtime Pattern list.
Note: The overtime rate must be configured beforehand. Refer to Set Overtime Rate in Overtime Pattern.
After selecting an overtime rate, the system automatically displays the applicable overtime hour ranges based on the selected pattern.
Important: Repeat these configurations for Off Day, Rest Day, and Public Holiday to ensure overtime is calculated correctly for each day type.
We hope this article helps clarify the issues. If you require additional assistance, do not hesitate to contact our support team.
Related:
Was this article helpful?
That’s Great!
Thank you for your feedback
Sorry! We couldn't be helpful
Thank you for your feedback
Feedback sent
We appreciate your effort and will try to fix the article