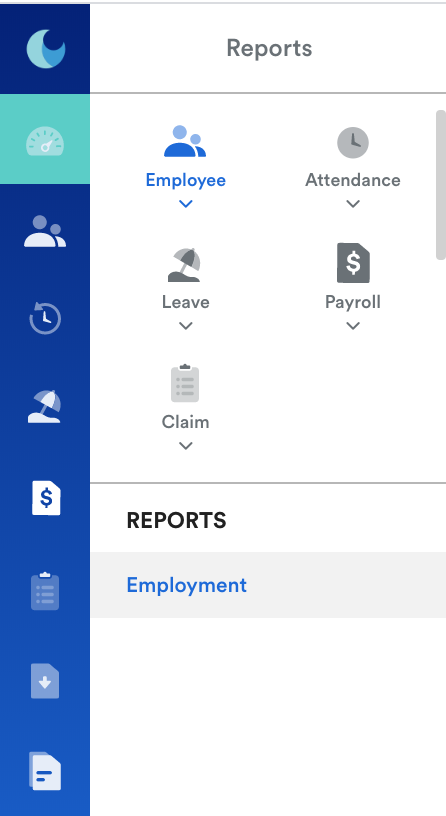
Step 1
On your dashboard, go to your left menu and click on the Reports button, then click the employee category and then click on the Employment button that pops up below.

Step 2
You will be directed to this page shown below, it is a list of all employees in the system. The data is separated by the columns at the top of the page. Eg. First name, Last name, Gender, Employee Number, Status, Employment Type, etc.

There are a lot of features you can customize in this spreadsheet to make your user experience more efficient. The list down below will give a brief description of each feature.
- Move Columns around
- Checking Columns On & Off
- Group by Columns
- Filter by name etc
- Pin columns to the left or right (hover over the burger menu)
- Export to Excel then Print
Feature 1: Moving Columns Around
Each individual column on this spreadsheet can be moved around to suit your needs. For example, you could click on "Employee Number" and drag it to the first column so it would be the first thing you would see instead of "First Name". Just click, hold, and drag a column to your preferred spot.

Feature 2: Checking Columns On & Off
This menu is located on the right side of your spreadsheet, you can customize and check which columns you want to add or remove from your spreadsheet. You can adjust if you want to see more data or less. Just click on the box to choose what you prefer.

Feature 3: Group By Columns
In every column there is an icon with 3 horizontal lines, we call that the Hamburger Menu, you can click on this icon to group employees by either gender, status, or even their last names. Once clicked, the category that you have selected will show up.

Feature 4: Filter by Name etc
On the right side of your spreadsheet, you can see the filter button located below the column button. You can click on it and search for a specific employee. This could be filtered by Name, Gender, Marital Status or even Date of Birth. Once you have a specific filter on, then only employees in that criteria will show up.

Feature 5: Pin Columns to the left or right
In each column, there is a 3 horizontal line icon that we call the Hamburger Menu, you can click on this hamburger menu and a list of options will show up. For example, you can pin columns to the left or right so that they won't change their positions when you move the page. These options are shown in the picture below.

Feature 6: Export to Excel then Print
On the top right corner of your page, you will see a vertical 3-dot icon. When you click on this, it will give you the option to export this spreadsheet into Excel, and then you can print it from there. This is useful for employee reports or any presentations that you may need to do in the future.

Was this article helpful?
That’s Great!
Thank you for your feedback
Sorry! We couldn't be helpful
Thank you for your feedback
Feedback sent
We appreciate your effort and will try to fix the article