Prerequisites
Ensure the user role has access to "Shift Group". Refer to Managing User Role & Access Rights

- Go to Settings > Access Rights > Menu Permissions: Settings > TMS Settings
- Enable Shift Group (View/Edit) permission for the relevant role
Before assigning a shift group to a schedule, ensure the following have been configured:
Step 1
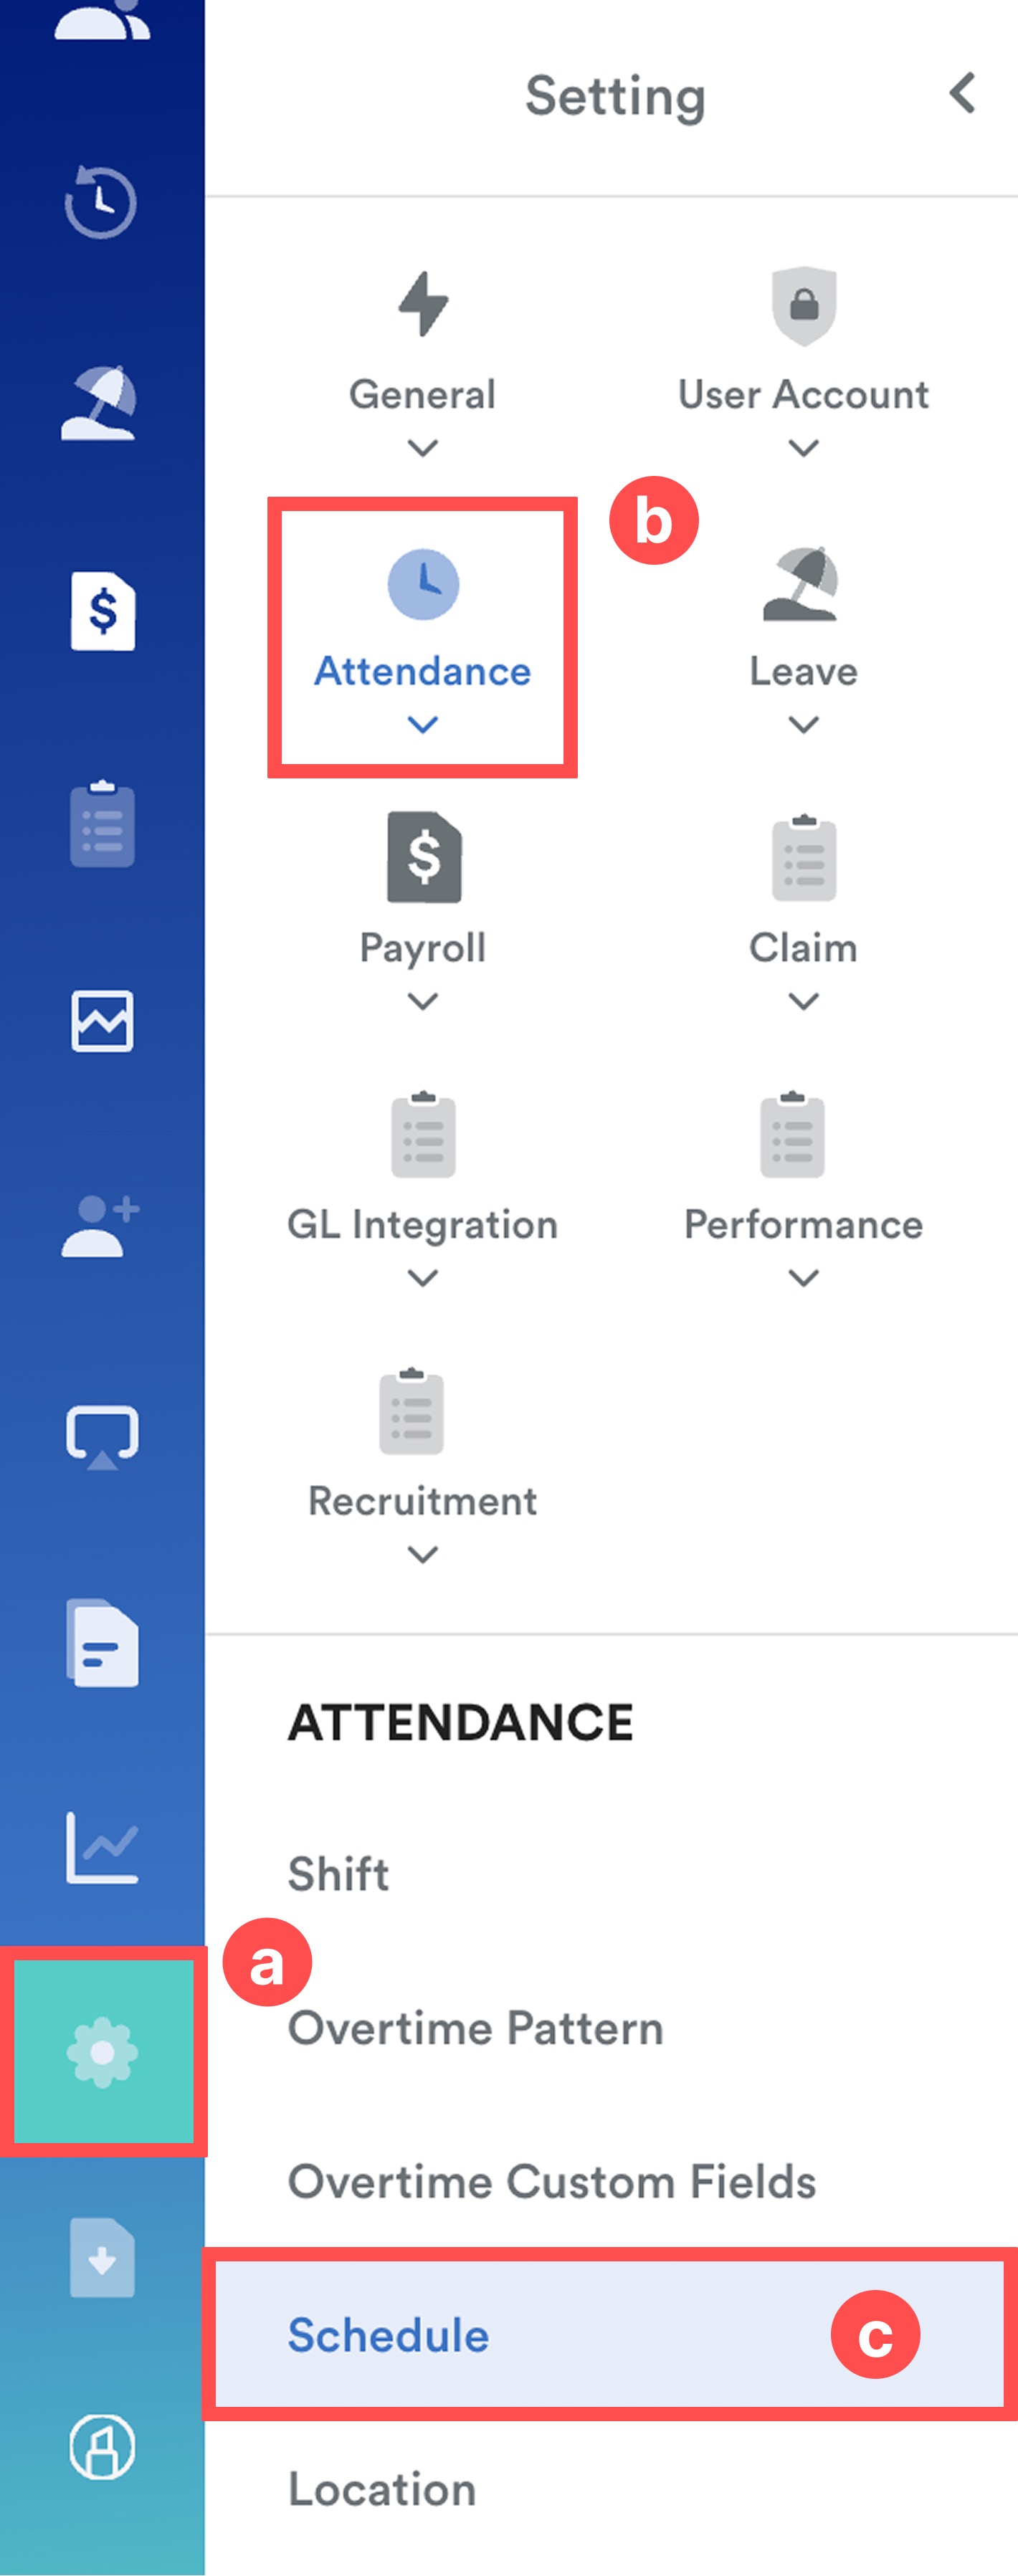
On the left menu, go to Settings (a) > Attendance (b) > Schedule (c).
Step 2
Select the schedule that you want to configure.

Step 3
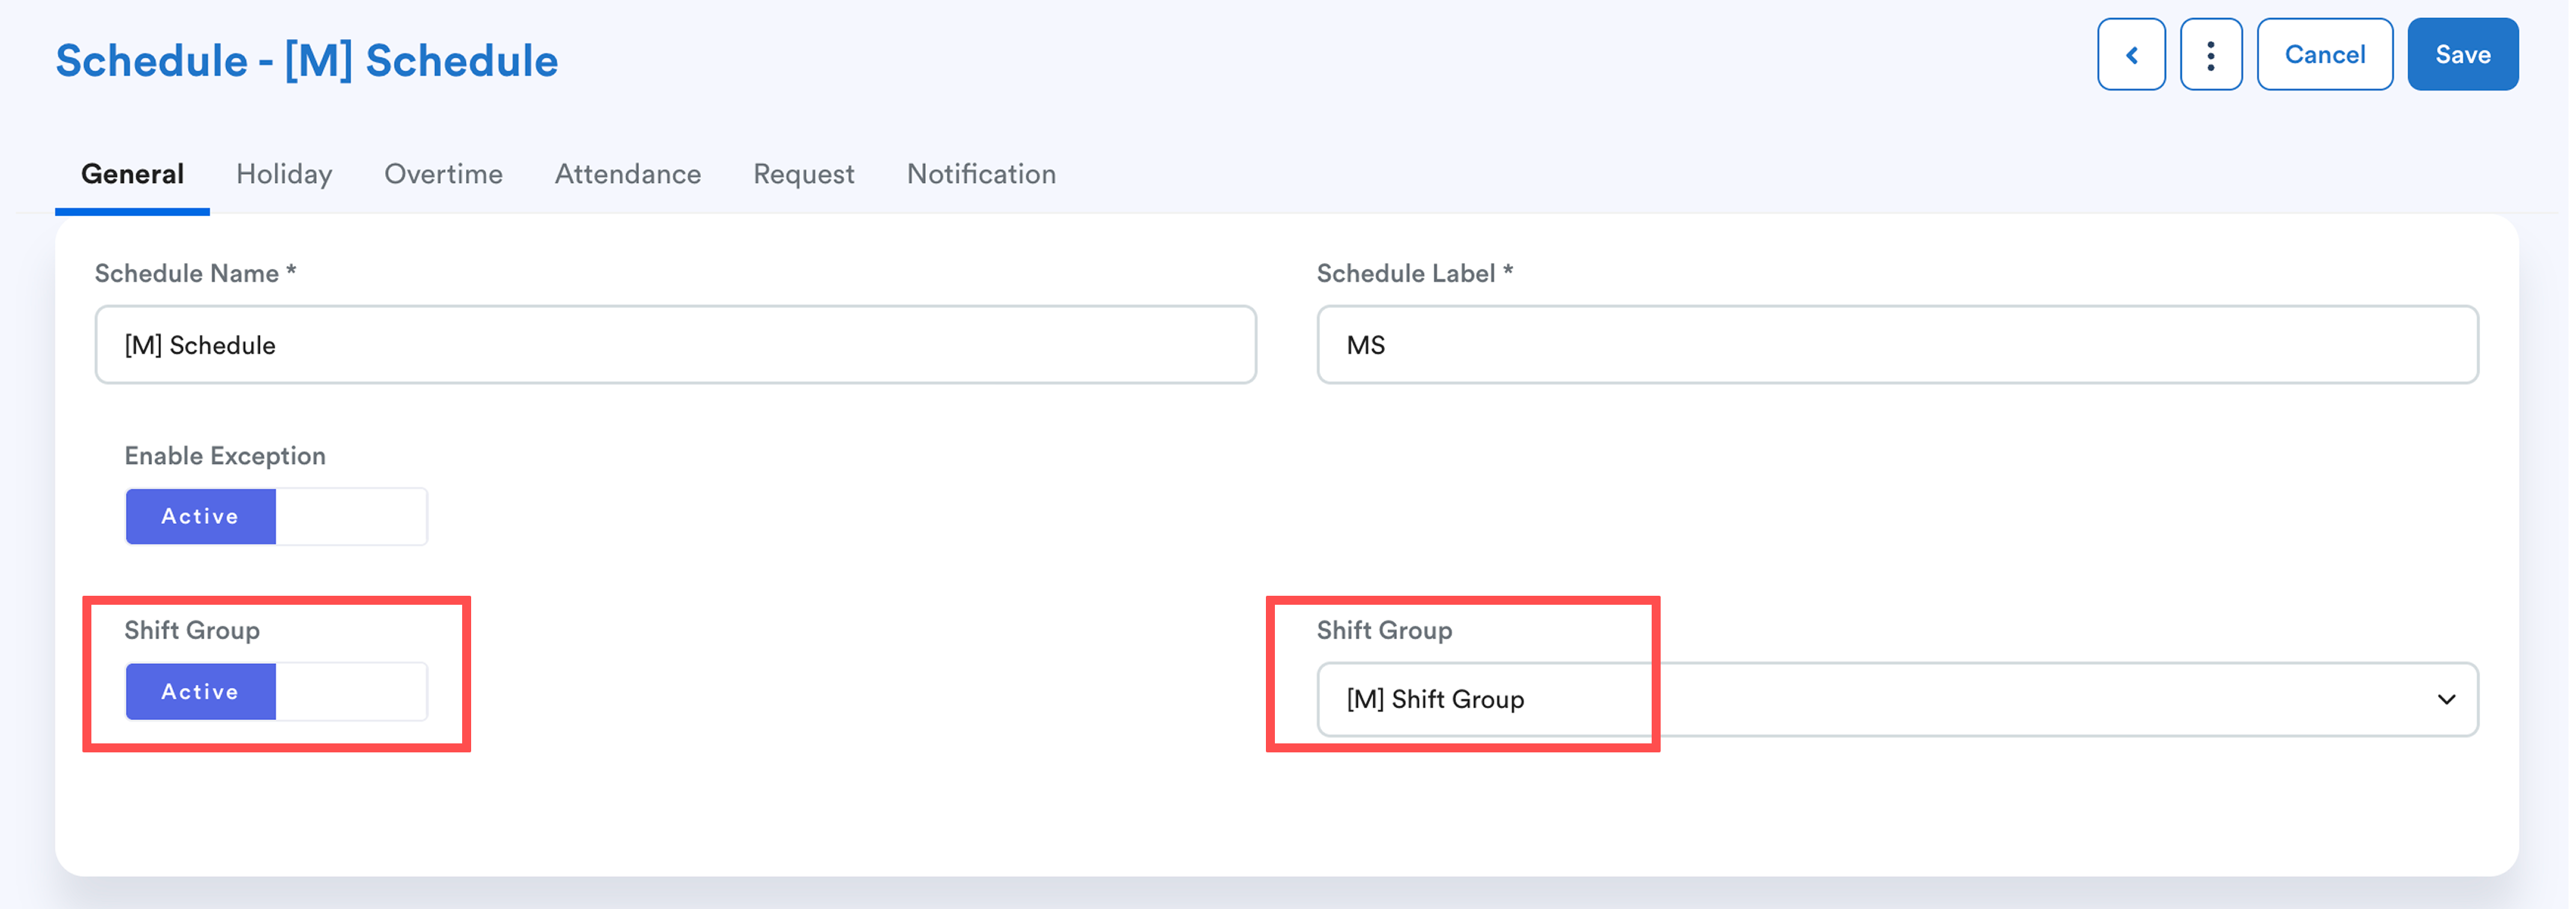
Under the General tab, toggle Shift Group to Active and select a Shift Group.
Note:
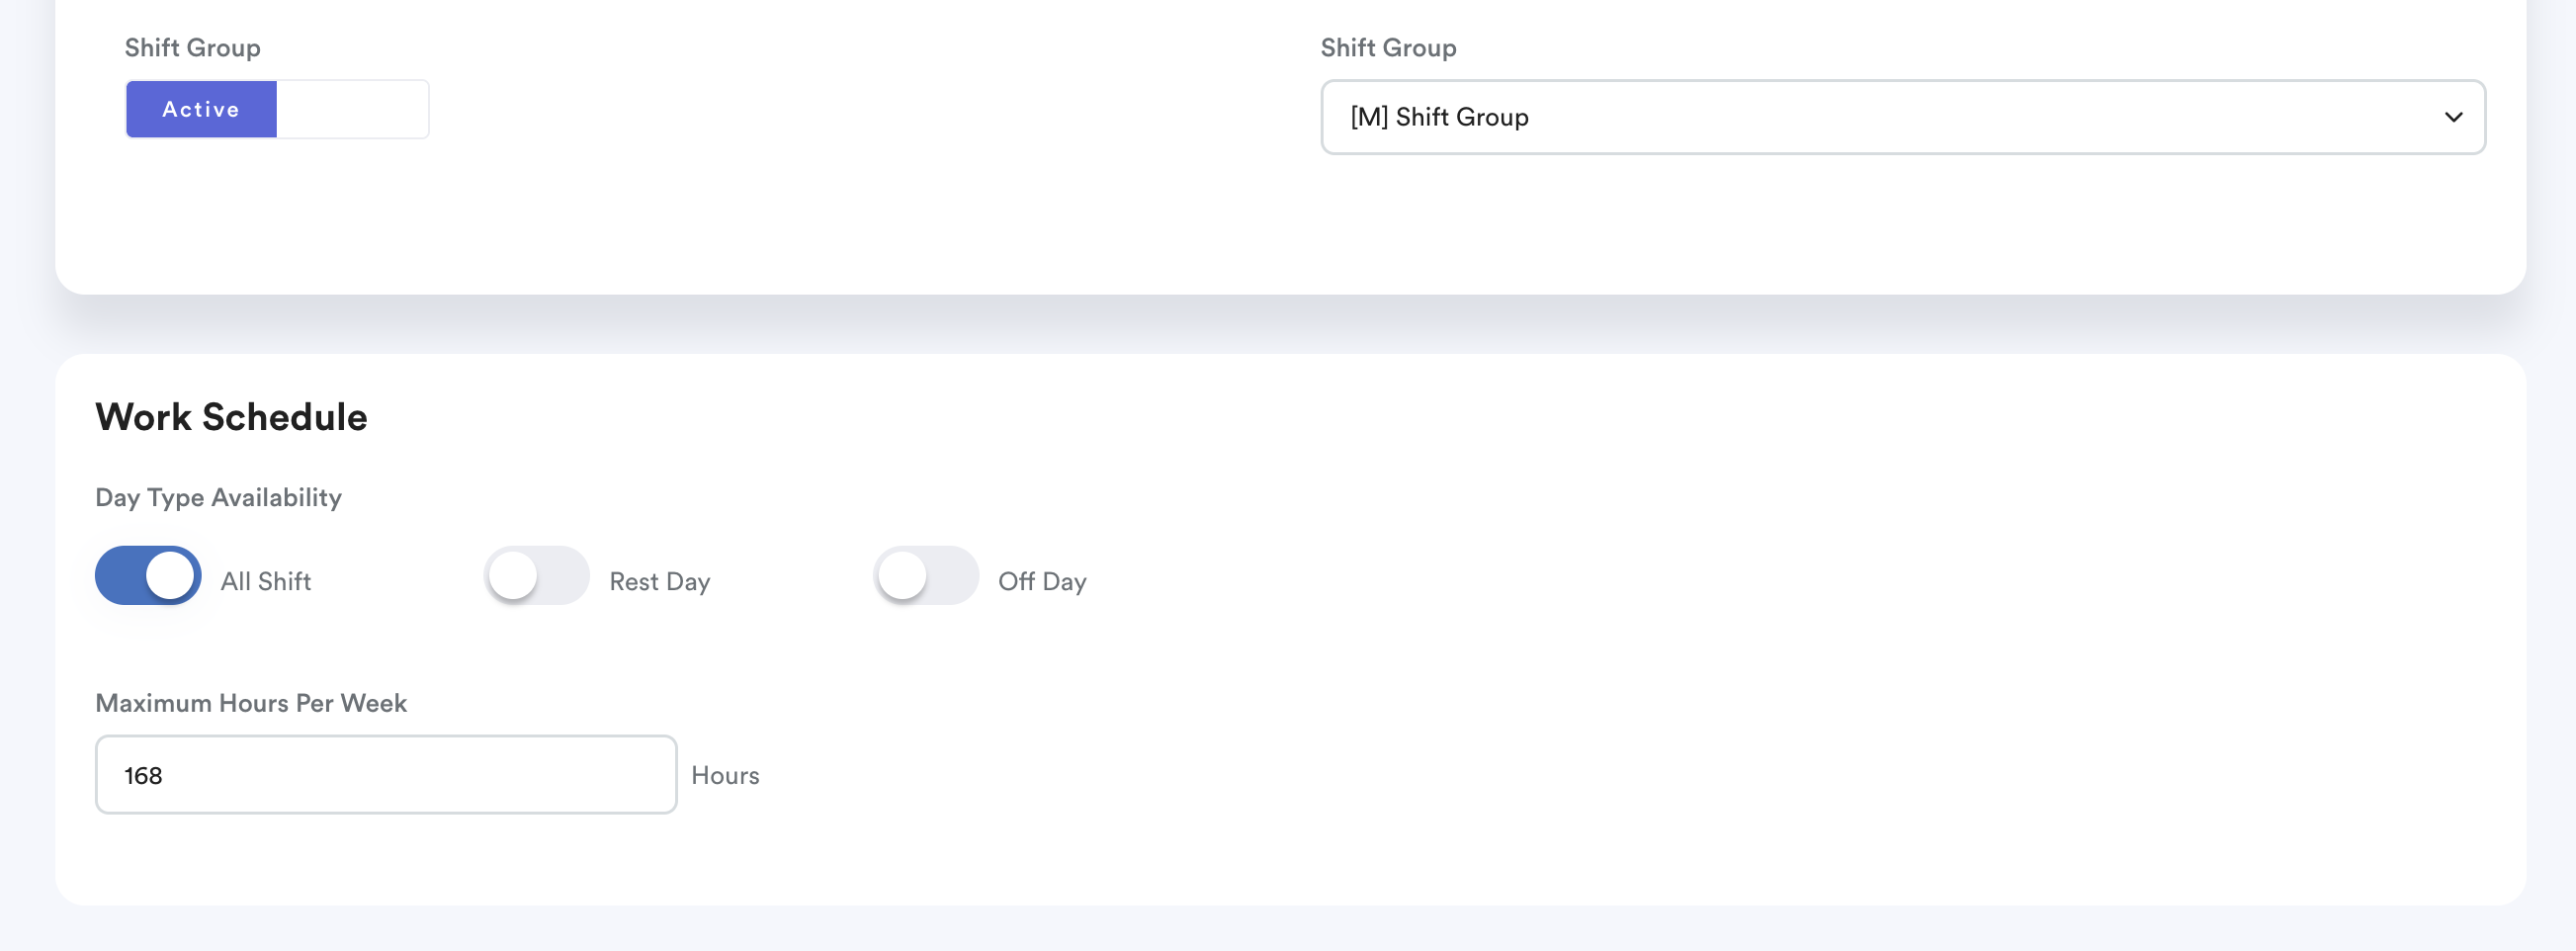
When Shift Group is enabled, the following options under Work Schedule will become unavailable:
- Schedule rotate
- Work scheduling pattern
This prevents conflicts between the schedule settings and the shift patterns configured in the selected shift group.
Once completed, click Save to confirm the changes.
Important
- Changes only apply to future attendance records with N/A status.
Existing attendance records for current and past dates remain unchanged when a shift group is enabled, disabled, or updated. - To update existing attendance records, a batch process is required.
- HR and Supervisors can still manually adjust shifts for specific dates through the Individual Attendance or Duty Roster screens without affecting the overall shift pattern rotation.
- If the shift group is later disabled in the schedule settings, future attendance records will revert to the original shift configuration in the Schedule settings.
We hope this explanation clarifies the matter. If you require additional assistance, do not hesitate to contact our support team.
Was this article helpful?
That’s Great!
Thank you for your feedback
Sorry! We couldn't be helpful
Thank you for your feedback
Feedback sent
We appreciate your effort and will try to fix the article