This article provides a step-by-step guide to setting up Maternity Leave, with a focus on two key settings:
- Frequency – controls how many times an employee can take maternity leave based on the limits set per employment and per year.
- Allow Cross Year – allows a maternity leave request to cross into the following year, with the leave days deducted from the entitlement of the respective year.
The recommended setup is based on the maternity leave provisions under Malaysia's Employment Act 1955.
Under the Employment Act 1955:
- Female employees are entitled to 98 consecutive days of maternity leave for each confinement, regardless of salary.
- Maternity leave may begin up to 30 days before the expected date of confinement.
- Statutory paid maternity leave applies to the first five surviving children.
- To qualify for maternity leave, the employee must have worked for the employer for at least 90 days within the 9 months before the confinement.
- 98days include all day types and weekend, it will not pause and no replacement.
Note: The settings below are recommended based on the statutory requirements. You may adjust other leave settings according to your company's leave policy.
Step 1
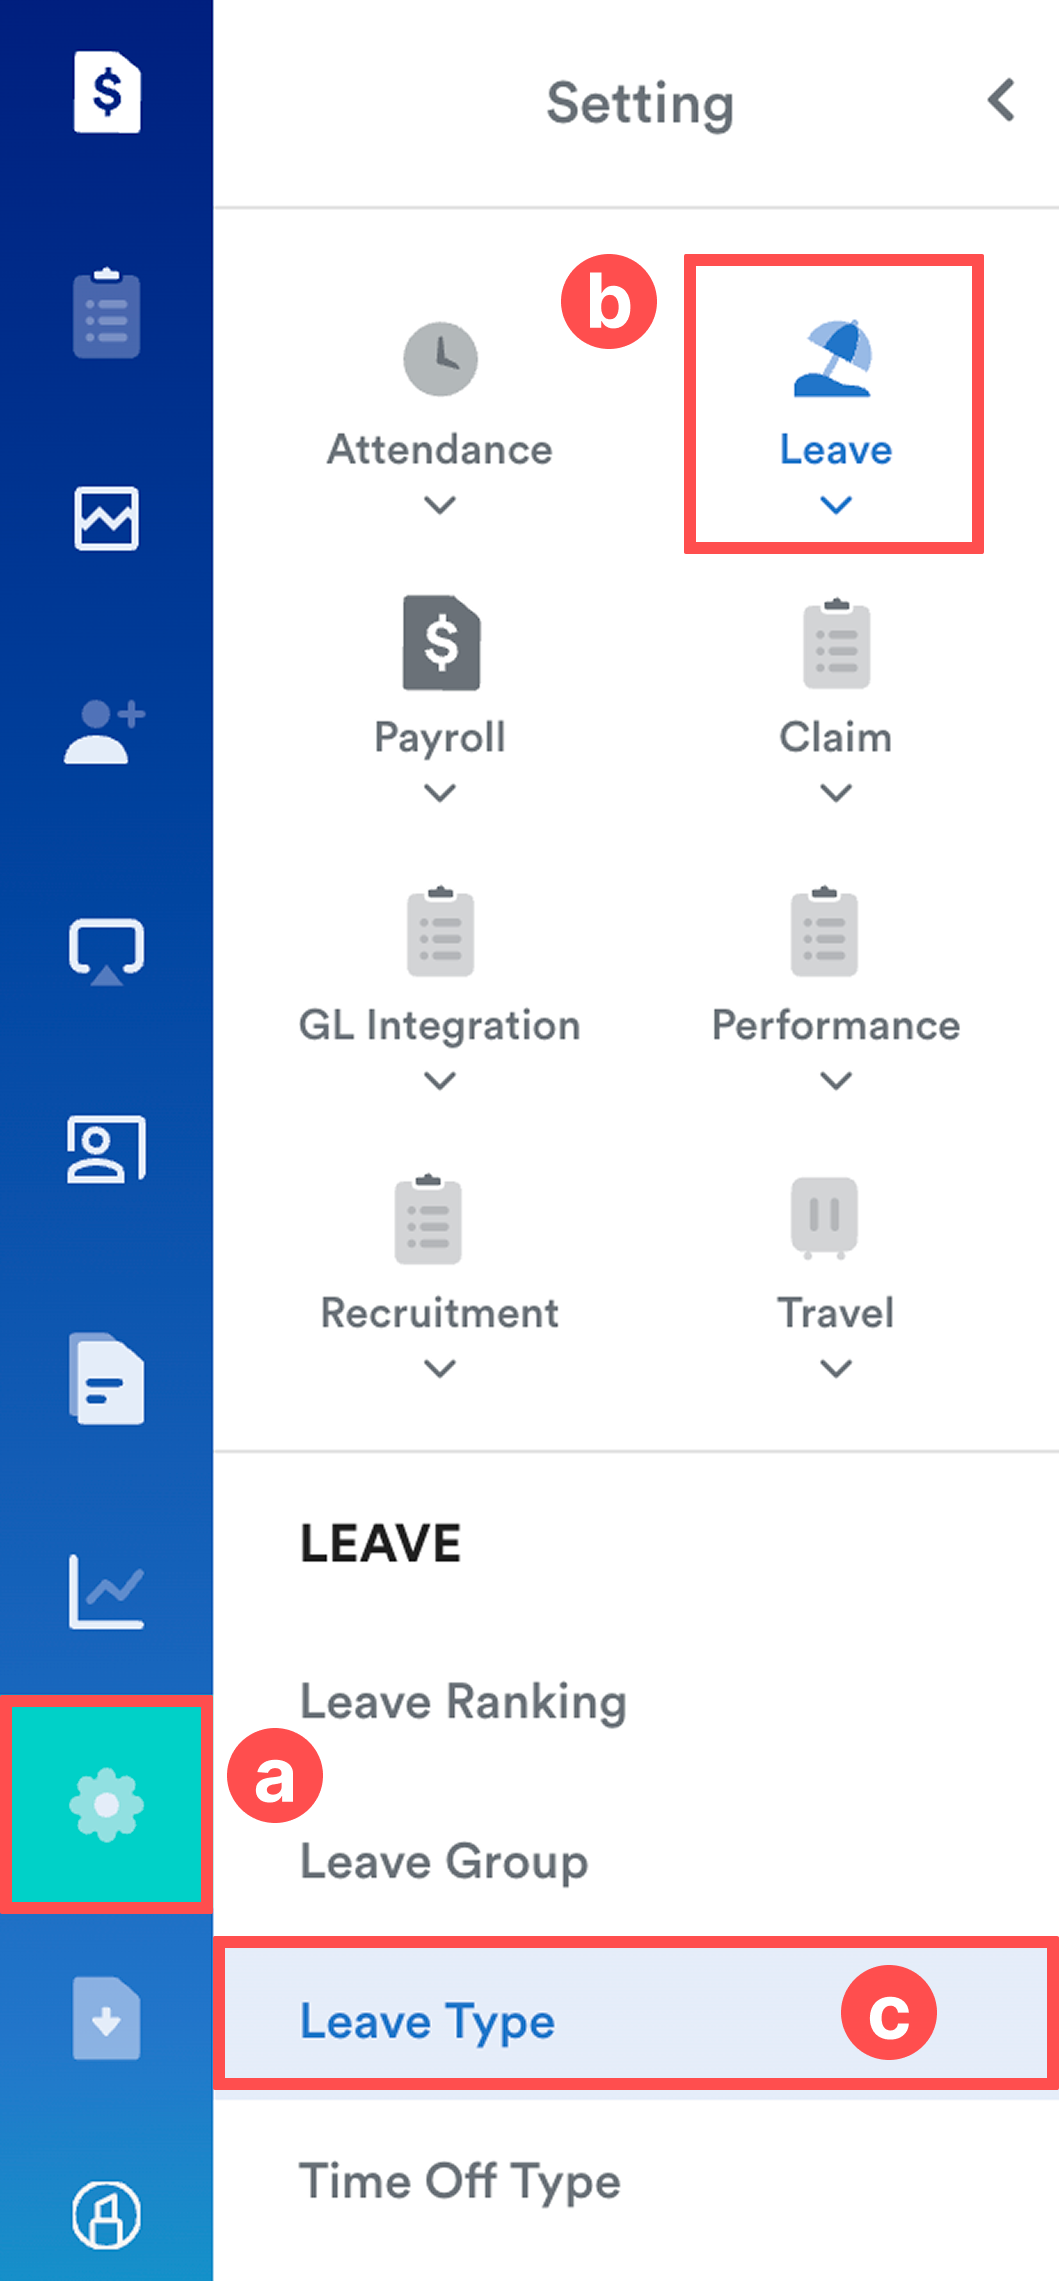
On the left menu, go to Setting (a) > Leave (b) > Leave Type (c).
Step 2
Click Add New on the top right corner of the page.

Step 3
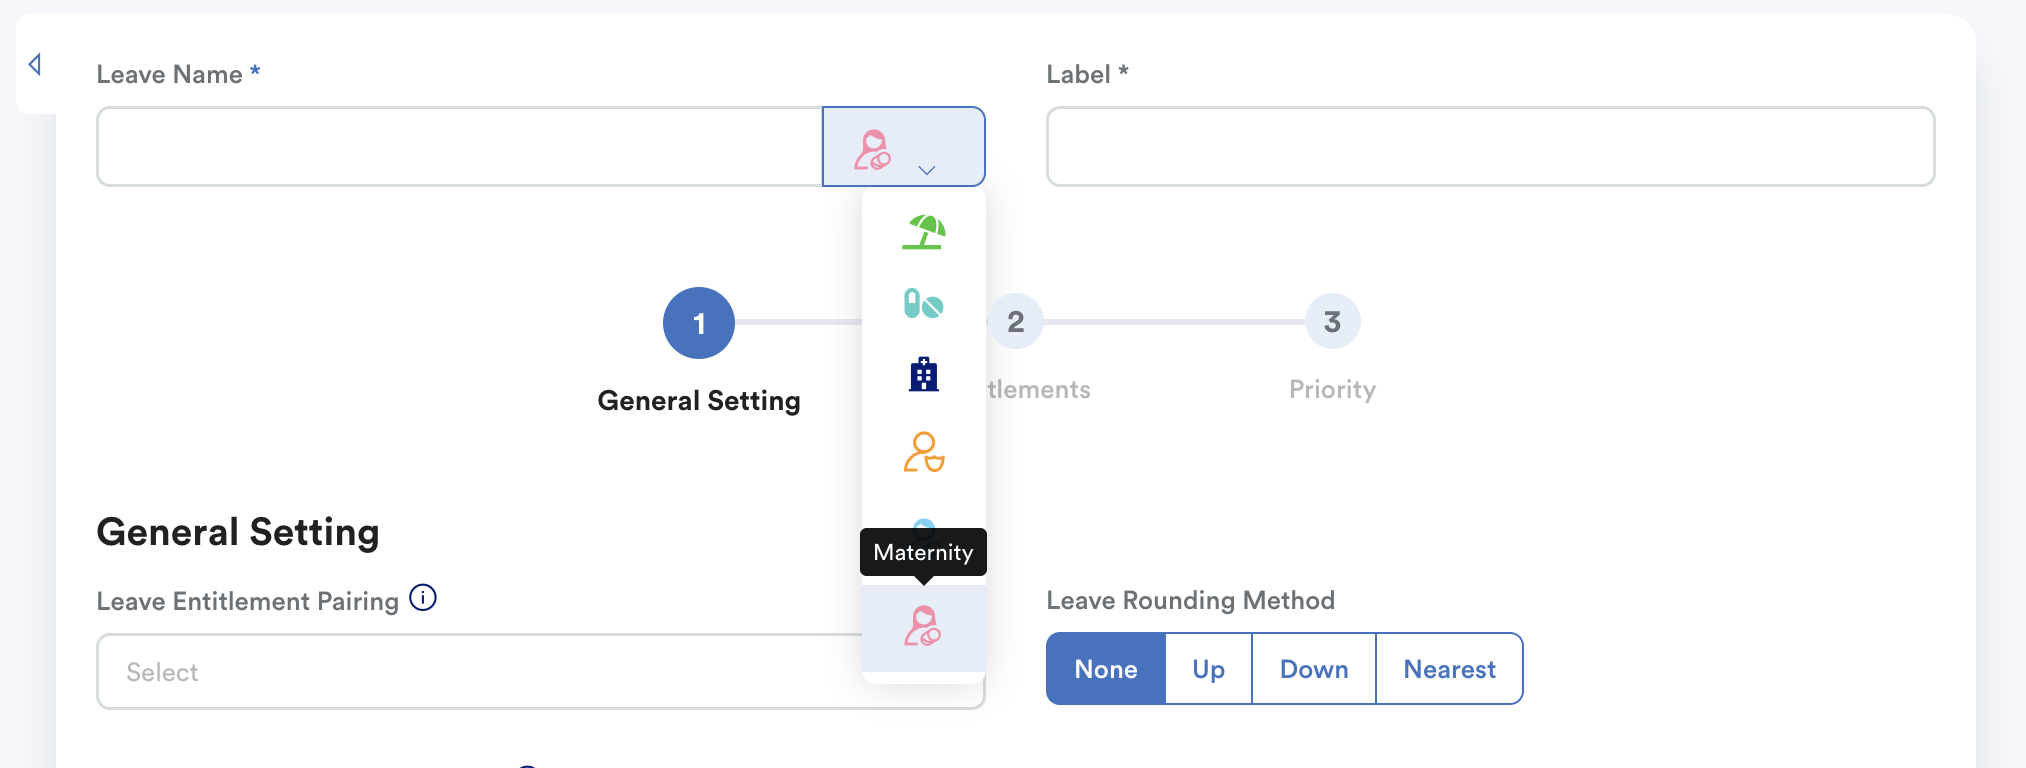
Fill in the basic details.
- Leave Name: Enter Maternity Leave.
- Label: Enter a short label, such as ML.
- Click the icon next to Leave Name and select the Maternity Leave icon (pink).
Step 4
Under General Setting, configure the settings based on your company's leave policy. Tick all day types according to Employment Law 1955.
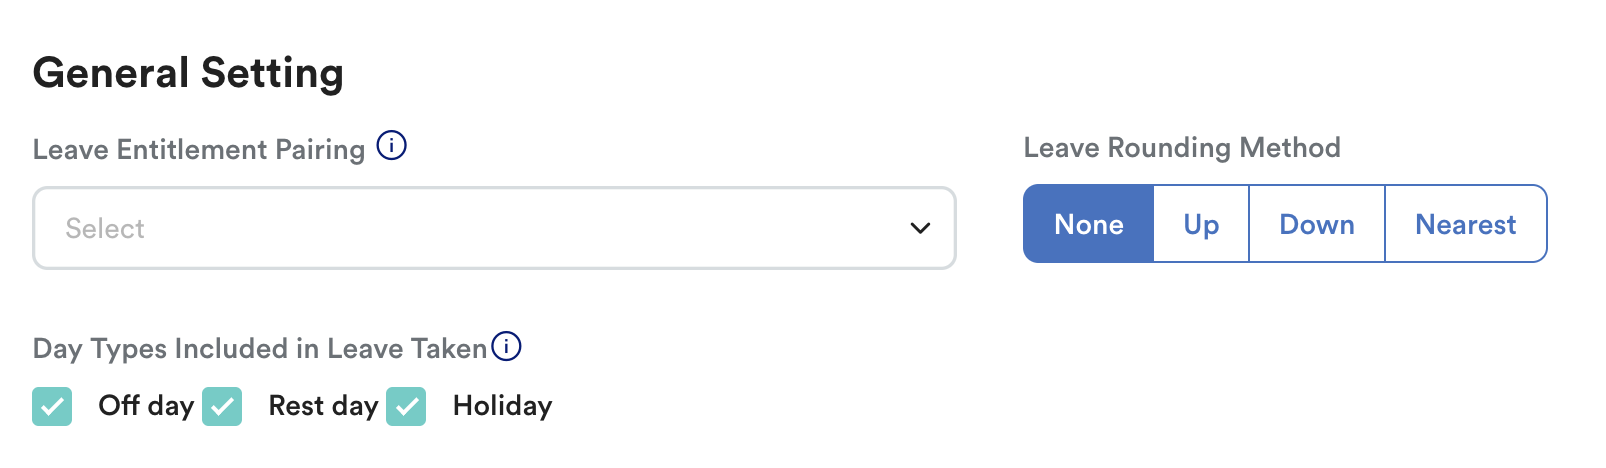
Refer to Setting Up Leave Type for an explanation of each setting.
Step 5
Under Employee Self Service Policy, configure the leave application rules based on your company's policy.
The following settings are particularly important for Maternity Leave:
a) Minimum Days required for Leave Request: Set the minimum number of days employees can request at one time. For maternity leave, we recommend setting this to 98 days or according to employment law.

b) Maximum Days allowed for Leave Request: Set the maximum number of days employees can request in one application. For maternity leave, you may set this to 98 days.
c) Entitlement Type: Select Frequency to limit how many times an employee can use this leave type.

You can set the limit based on:
- Per Employment: The maximum number of times the employee can take the leave throughout their employment.
- Per Year: The maximum number of times the employee can take the leave within a year.
The system will stop the employee from submitting a new leave request when either limit is reached first.
Example:
If the settings are:
- Max time(s) per Employment: 5 times
- Max time(s) per Year: 2 times
The employee can take the leave up to 2 times per year, with a maximum of 5 times throughout their employment.
If the employee has already reached 5 times throughout their employment, the system will stop them from submitting another request, even if the yearly limit has not been reached.
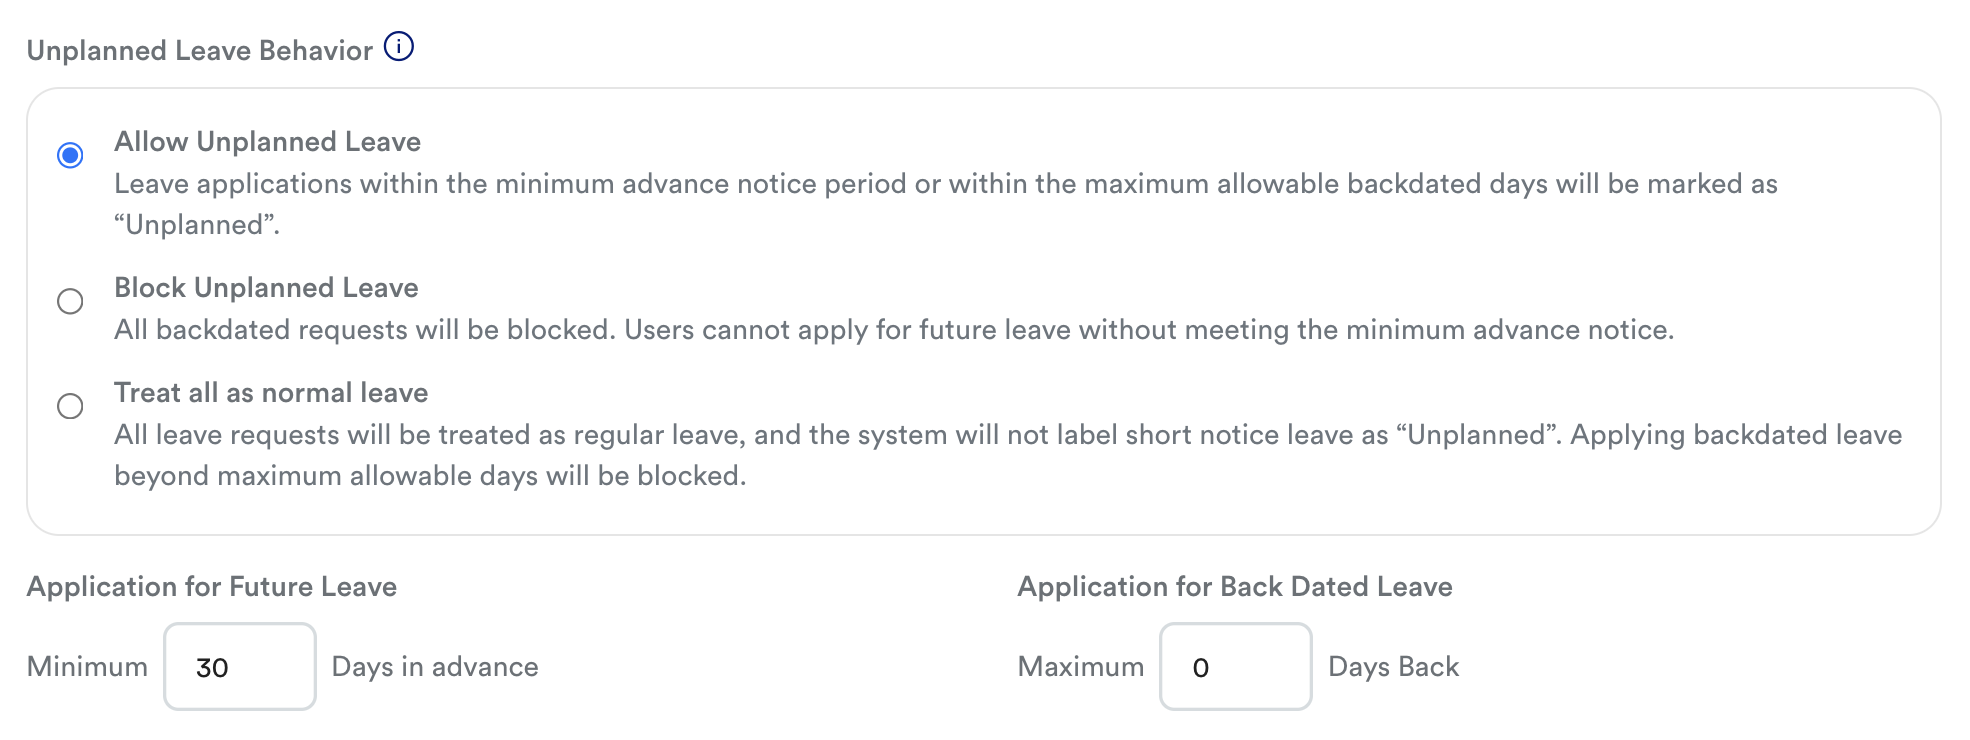
d) Unplanned Leave Behavior: Configure based on your company's policy; refer to Worksy Unplanned Leave Behavior.
e) Application for Future Leave: Set the minimum number of days in advance employees must apply before the leave date; set 30 days according to employment law.
f) Application for Backdated Leave: Set how far back employees can submit a maternity leave request, 30 days is according to Employment Act 1955.
g) Attachment: Enable or disable this based on your company's policy.
Step 6
Under this section, choose Yes or No for each setting based on your company's leave policy.
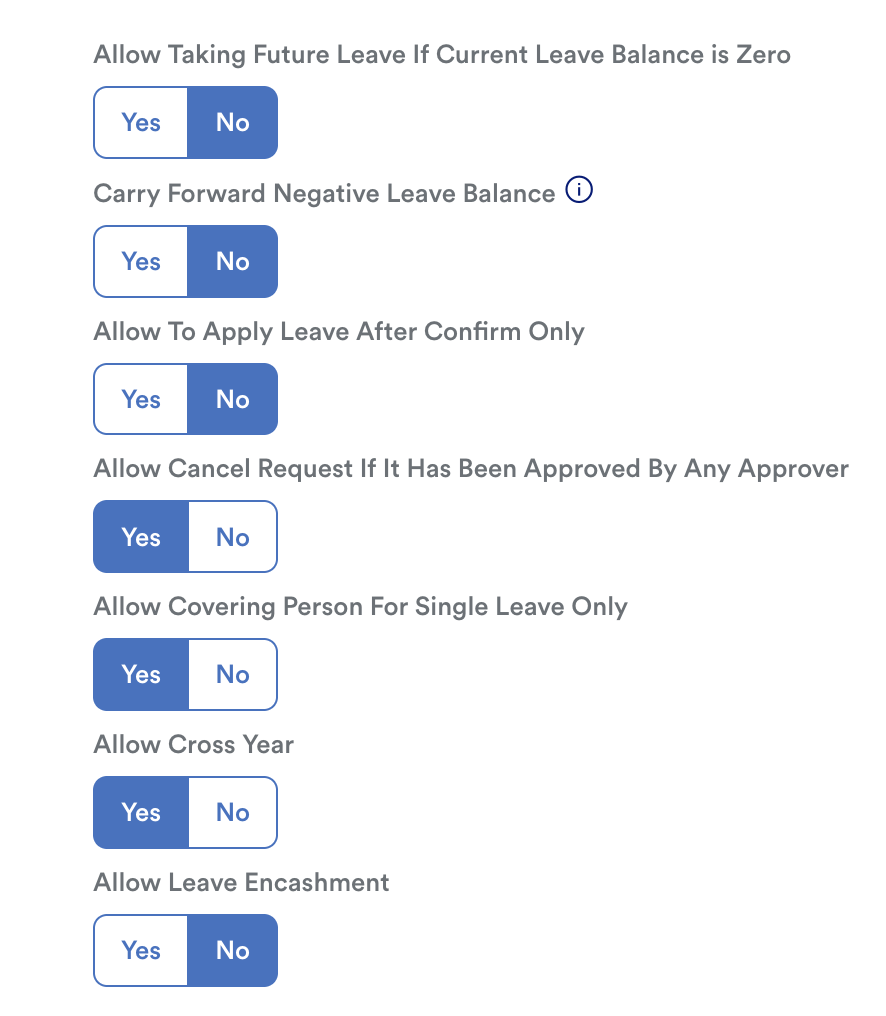
For Maternity Leave, pay particular attention to:
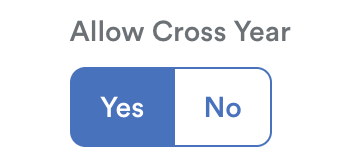
Allow Cross Year: Enable this setting to allow employees to submit a single maternity leave request that crosses into the next year. So you do not need to submit 2 leave requests for cross-year maternity leave, eg: 1 October 2026 to 6 Jan 2027.
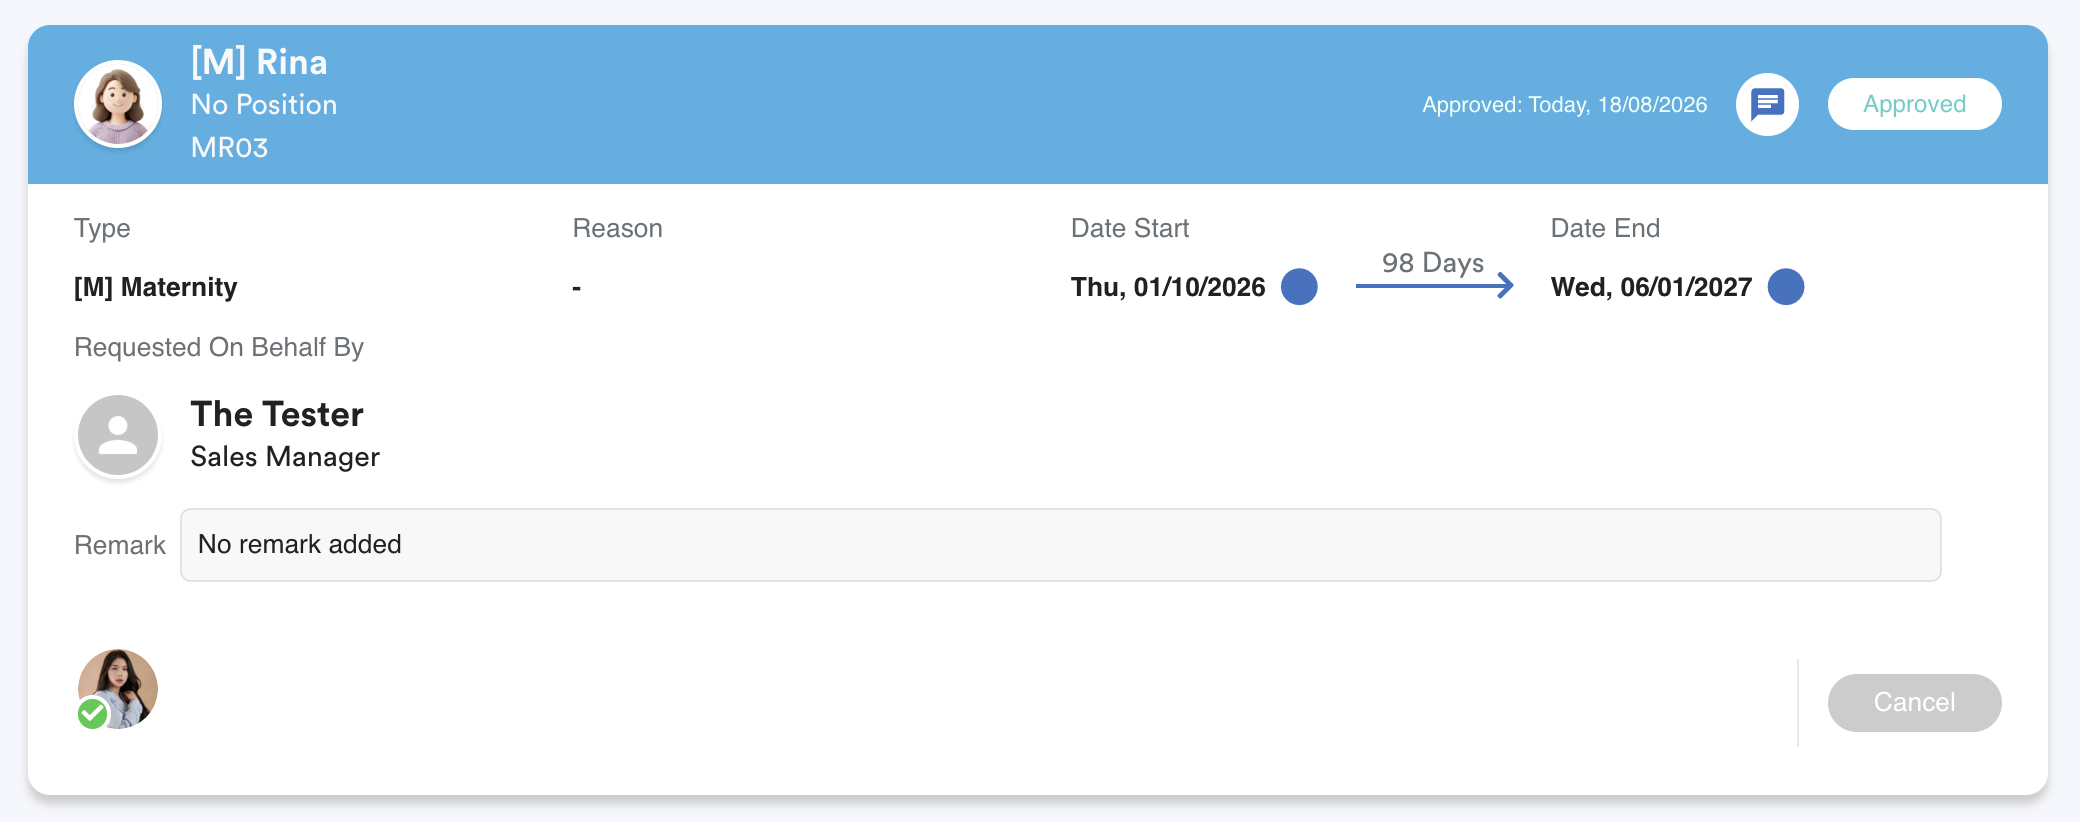
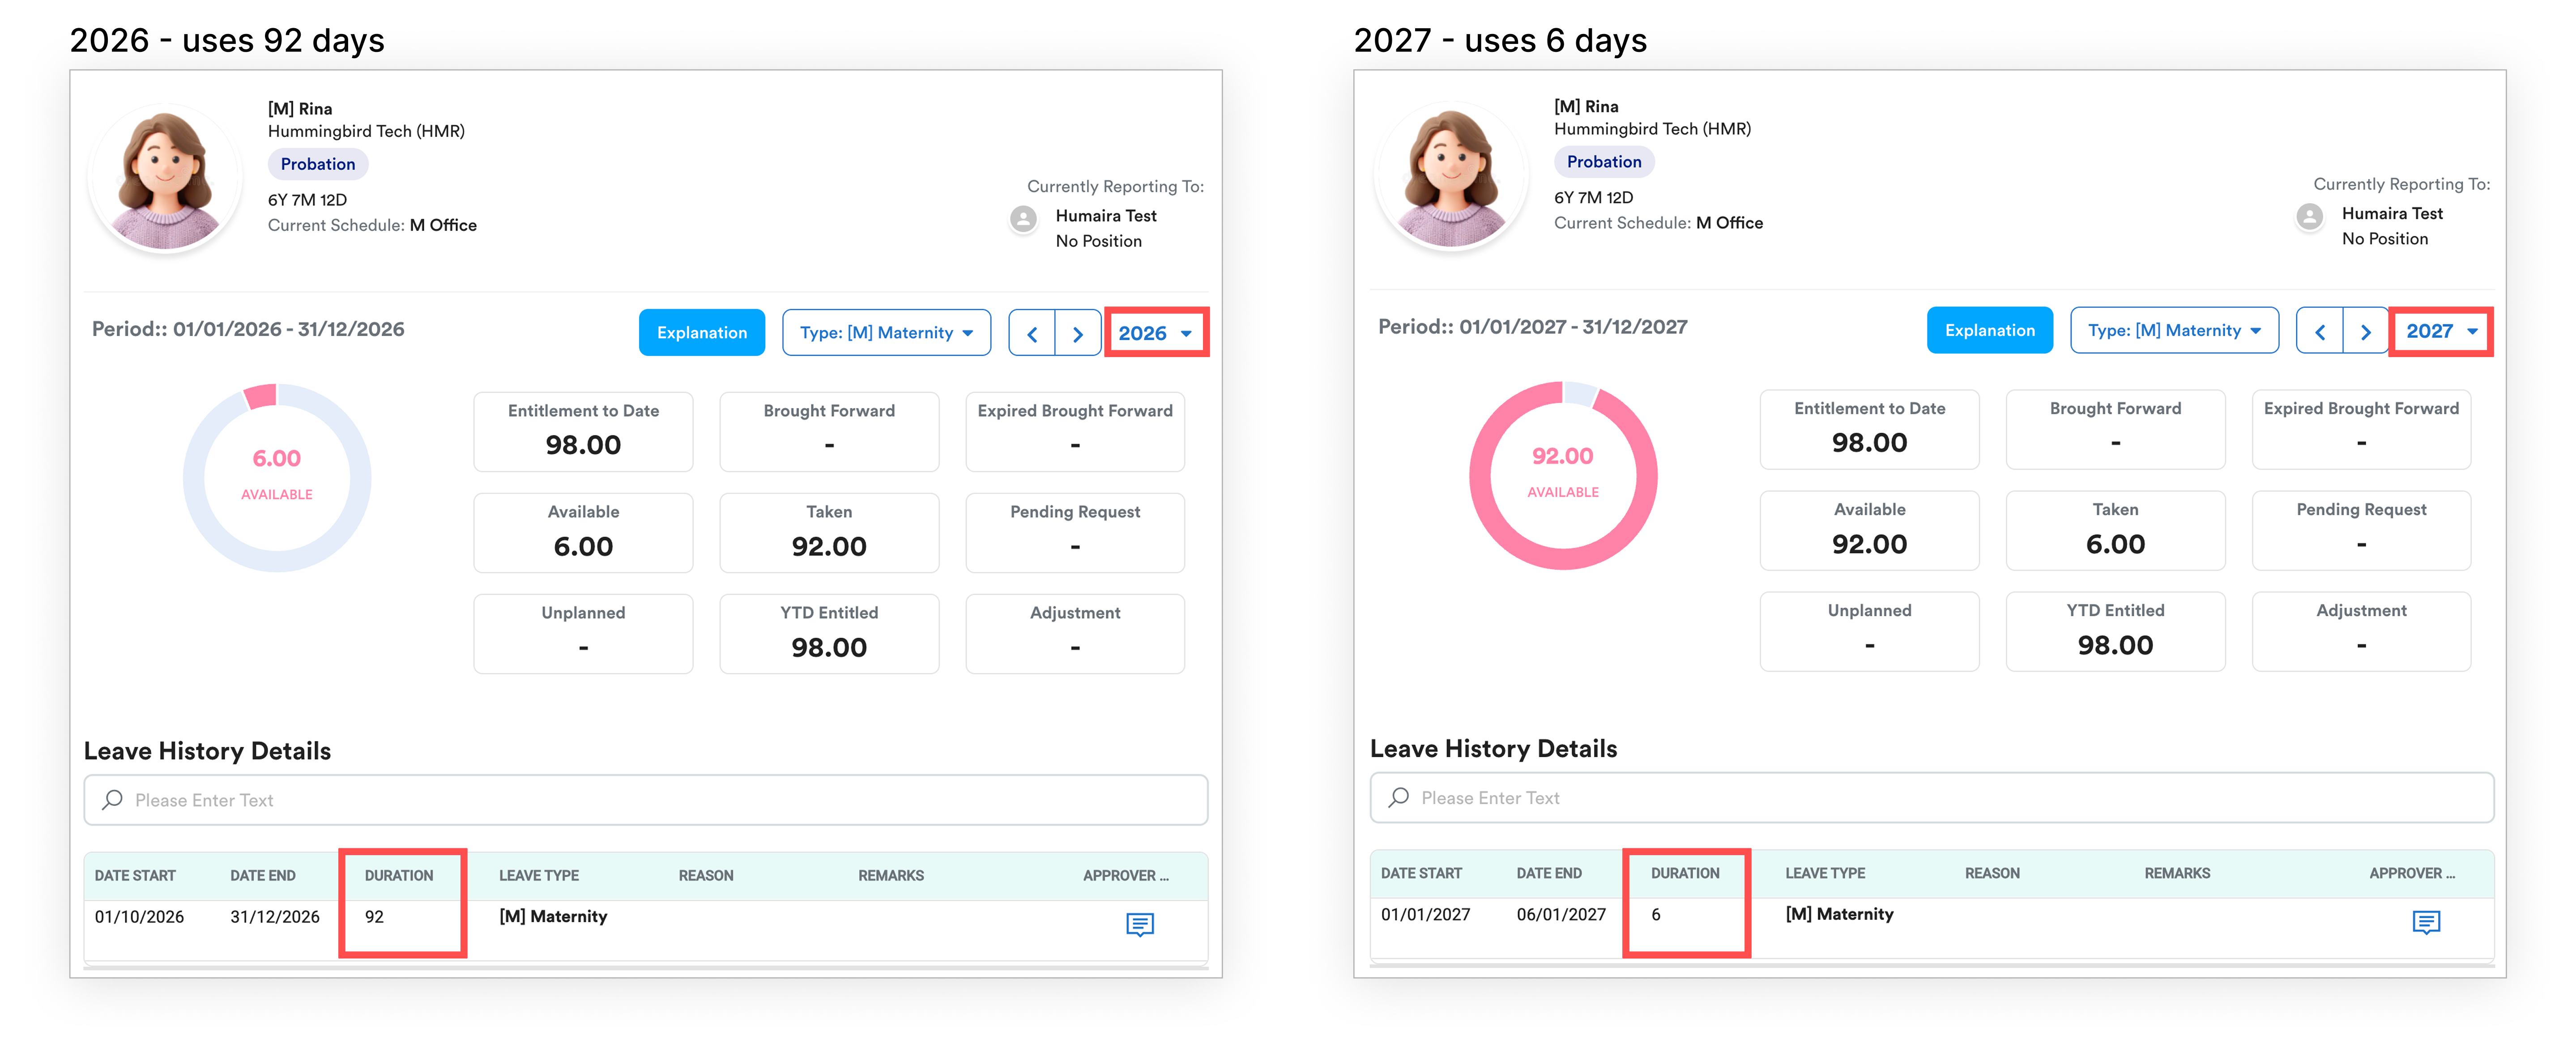
When a leave request crosses into a new year, the system will deduct the leave days from the entitlement of the respective year.
The employee's leave request can therefore use entitlements from both years, and the balance for each year is deducted separately.
Example:
An employee has:
- 2026 entitlement: 98 days
- 2027 entitlement: 98 days
The employee applies for maternity leave from 1 October 2026 to 6 January 2027.
Based on the company's leave calculation settings, the system deducts:
- 92 days from the employee's 2026 entitlement, leaving 6 days.
- 6 days from the employee's 2027 entitlement, leaving 92 days.
Important: Enable Allow Cross Year so employees can submit a leave request that crosses into the next year without HR having to manually generate the next year's entitlement first.
Step 6
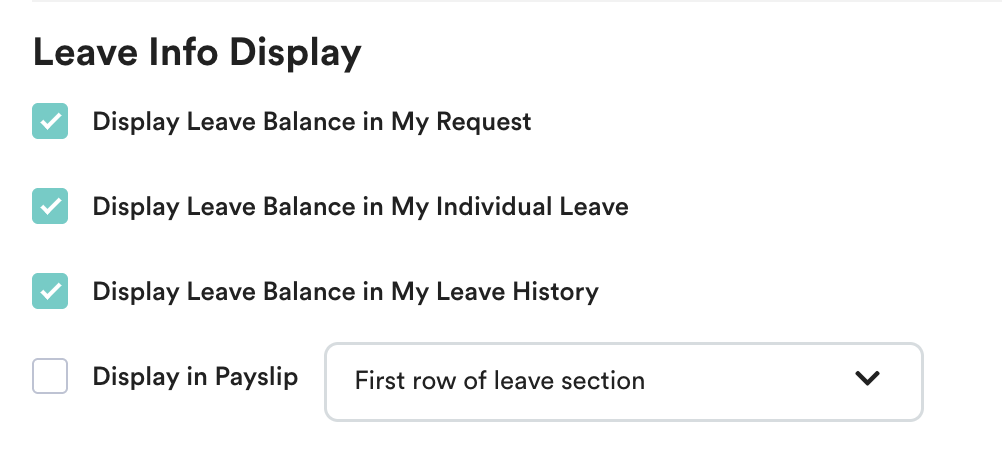
Under Leave Info Display, choose where Maternity Leave should appear in the system.
Step 7
Under Entitlement Policy, configure the entitlement calculation based on your company's policy.
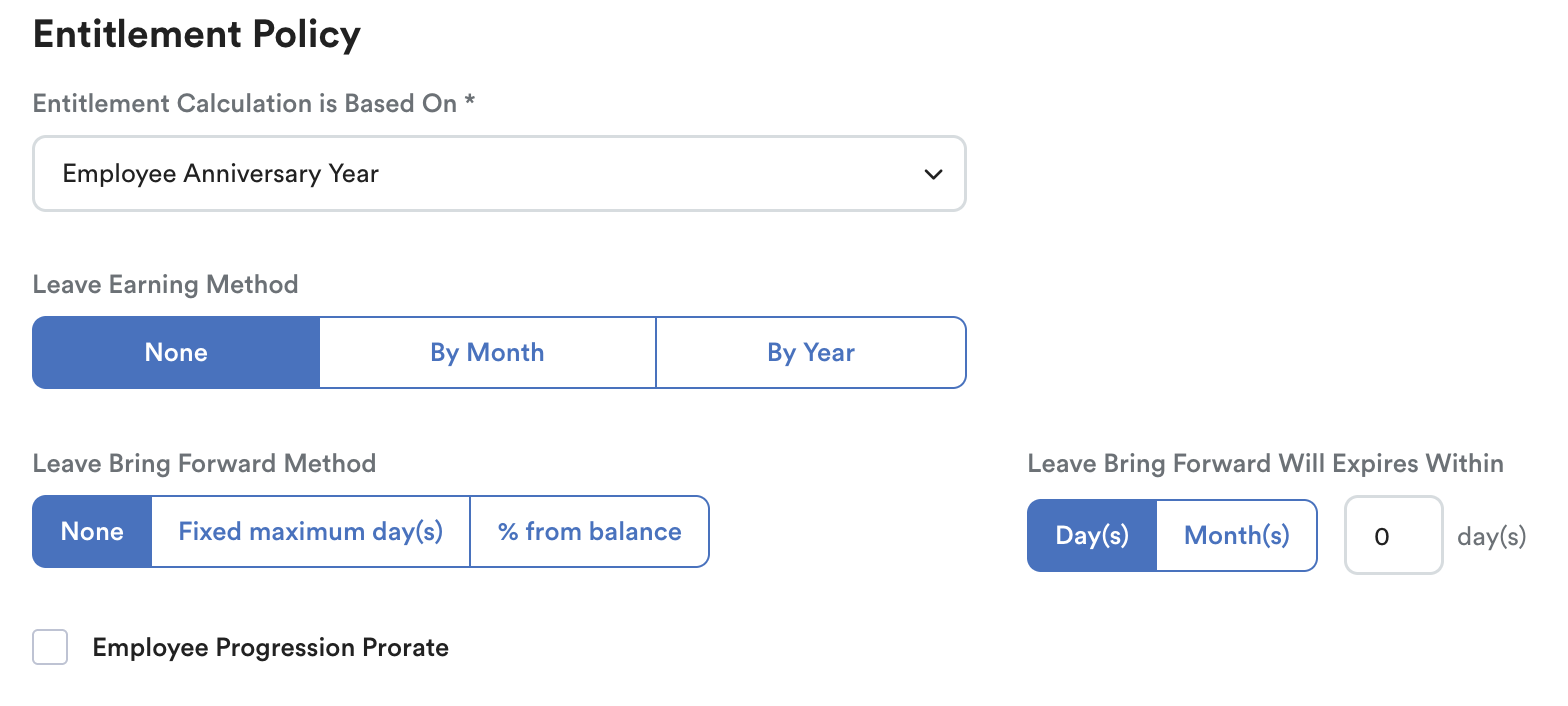
For maternity leave, ensure the entitlement is configured to provide the applicable minimum of 98 days per qualifying confinement.
Refer to Leave Entitlement Calculation Method for more information.
Step 8
Set up the Scheduler to automatically generate leave entitlements for employees.
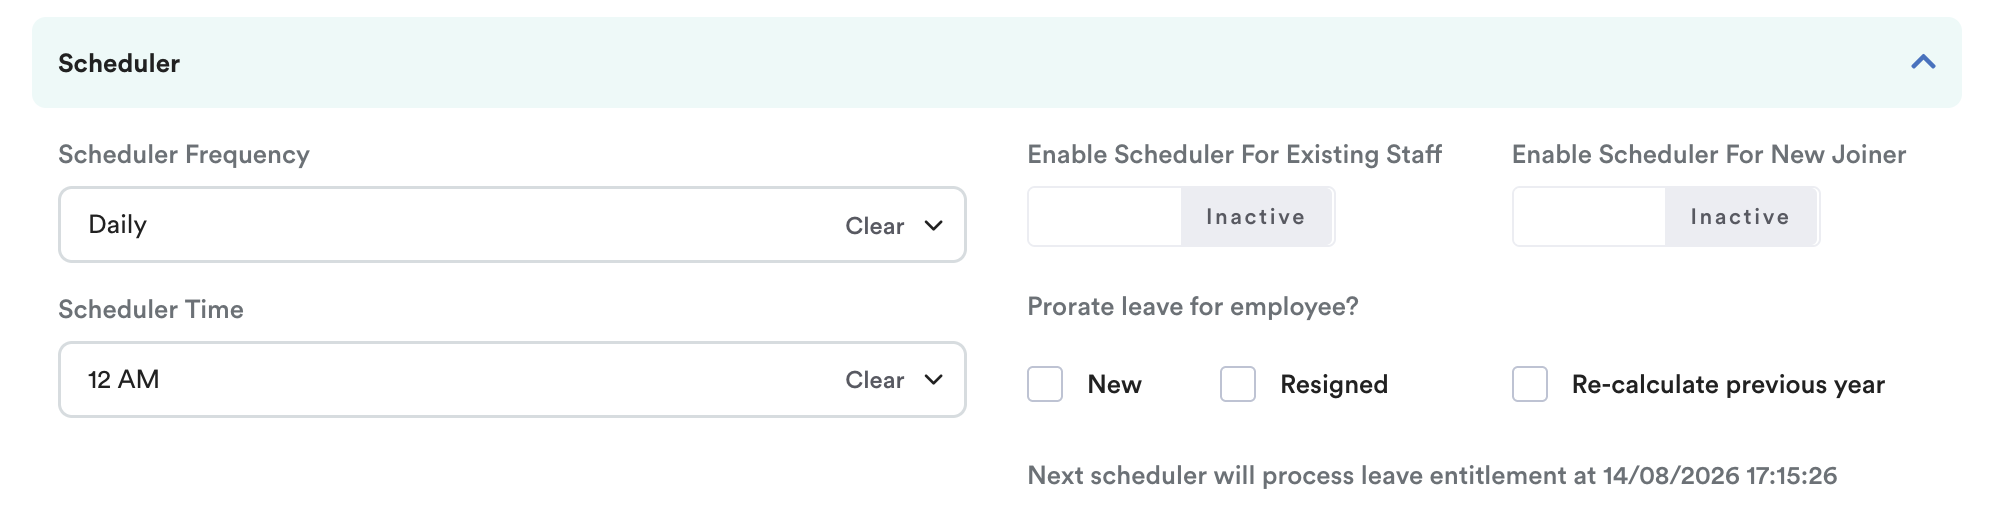
Refer to Setting Up Leave Scheduler for more information.
Step 9
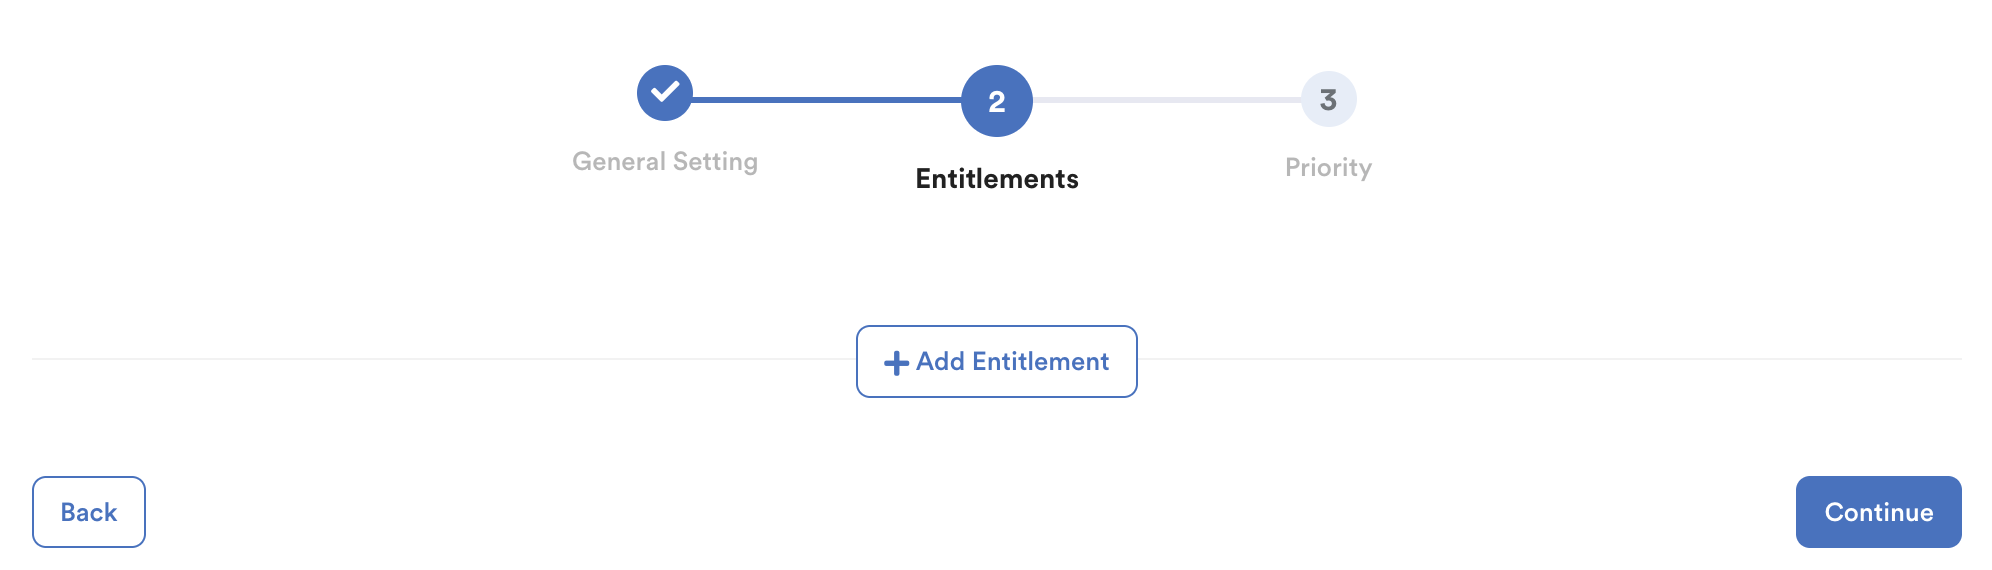
Under Entitlement, click Add Entitlement and create the entitlement table.
Step 10
Select the employees who are entitled to Maternity Leave.
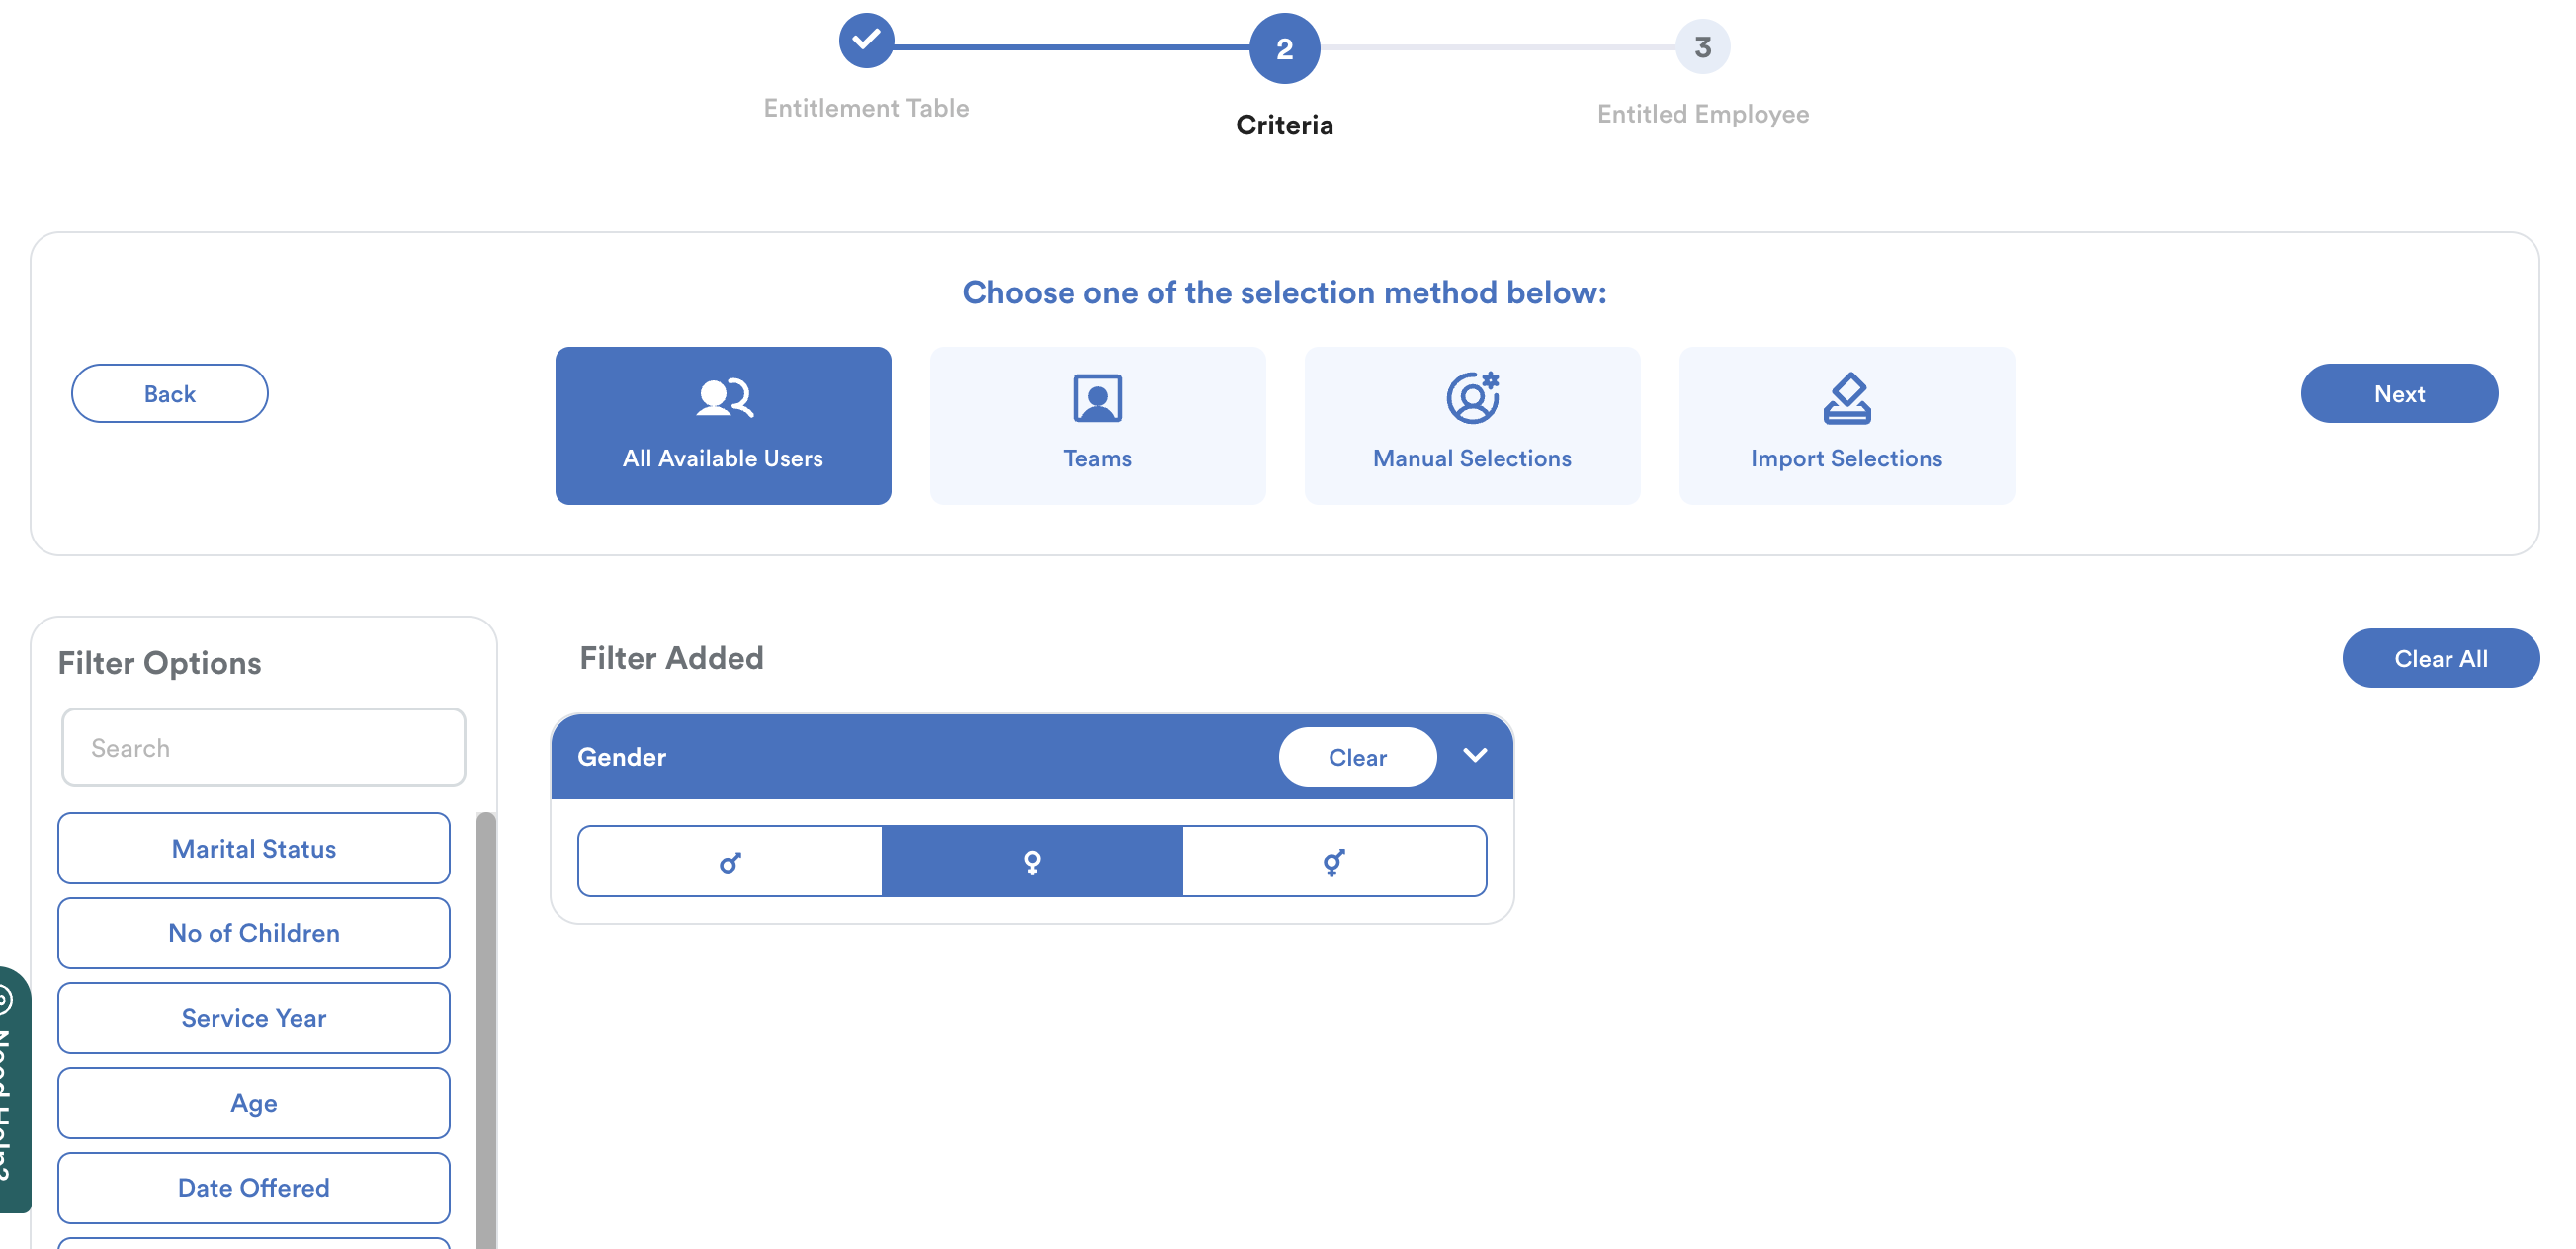
You can use the available filters to narrow down eligible employees, such as Gender before selecting the employees.
Note: These filters are only used to help identify employees for setup. The employee's actual eligibility should be verified based on the applicable statutory requirements and your company's policy.
Step 11
Lastly, click Save to complete the setup.
You have successfully set up the Maternity Leave leave type.
After completing the setup, proceed to Generate Leave Entitlement so employees can start applying for maternity leave.
We hope this explanation clarifies the matter. If you require additional assistance, do not hesitate to contact our support team.
Was this article helpful?
That’s Great!
Thank you for your feedback
Sorry! We couldn't be helpful
Thank you for your feedback
Feedback sent
We appreciate your effort and will try to fix the article