Shift Pattern allows you to automate employee shift rotations based on a predefined roster.
Prerequisite
Ensure the user role has relevant access to create shift patterns. Refer to Managing User Role & Access Rights

- Go to Settings > Access Rights > Menu Permissions: Settings > TMS Settings
- Enable Shift Pattern permission for the relevant role
Step 1
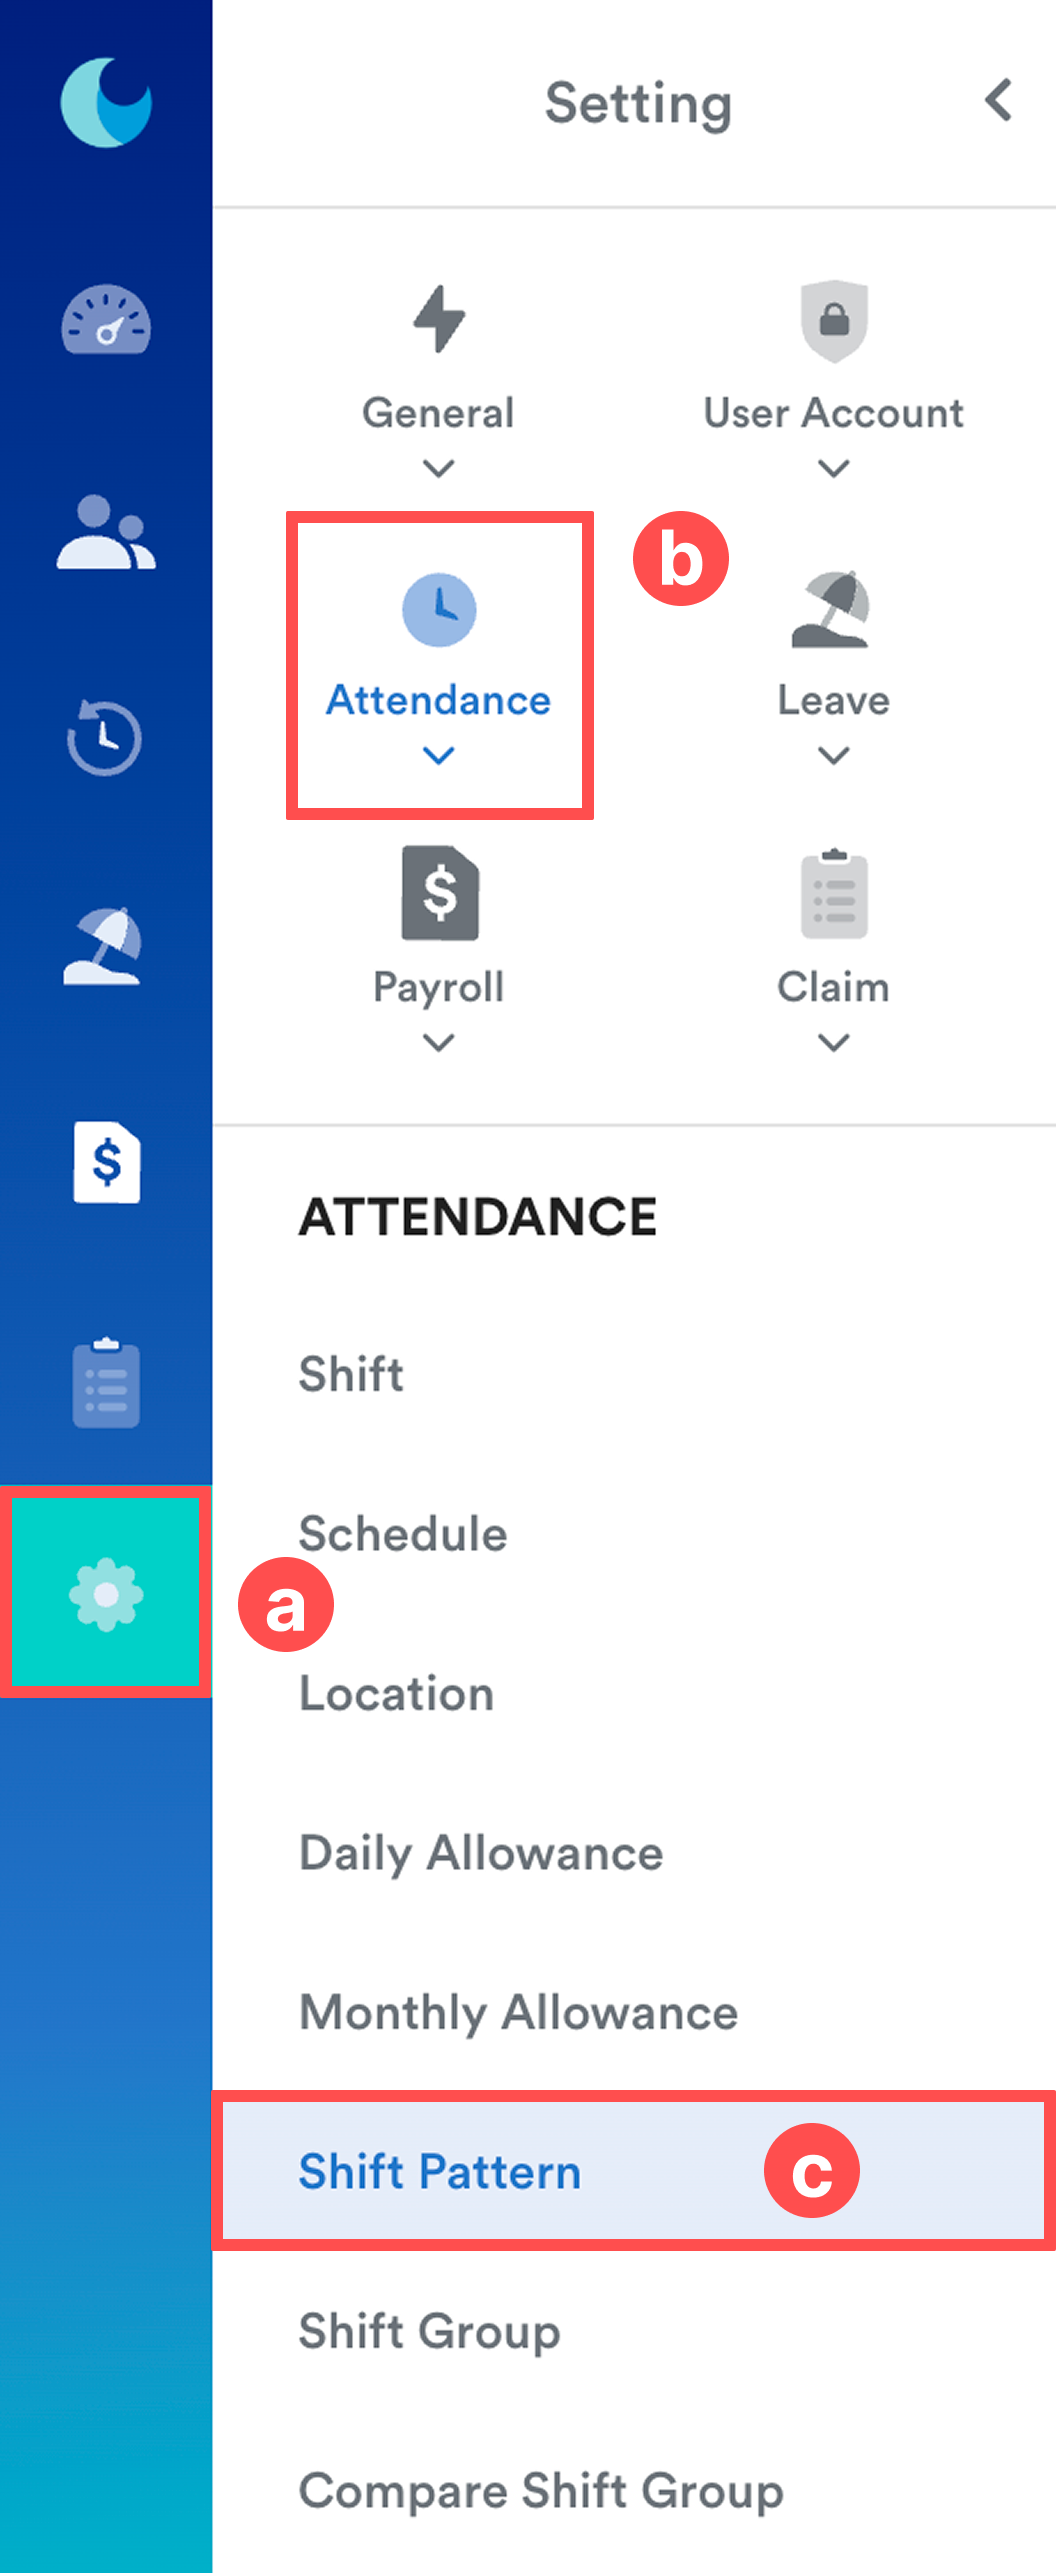
On the left menu, go to Settings (a) > Attendance (b) > Shift Pattern (c).
Step 2
Click Create New.

Step 3

Enter the shift pattern details:
- Shift Pattern Title: Enter a name for the shift pattern.
- Number of Days: Define the length of the rotation cycle. Minimum: 1 day, Maximum: 365 days.
- Color: Select a color to identify the shift pattern.
Step 4
The system will automatically generate rows for each day based on the Number of Days entered in Step 3.
For each day, select the shift that should be assigned. You can also drag and drop the day rows to rearrange the shift sequence as needed.
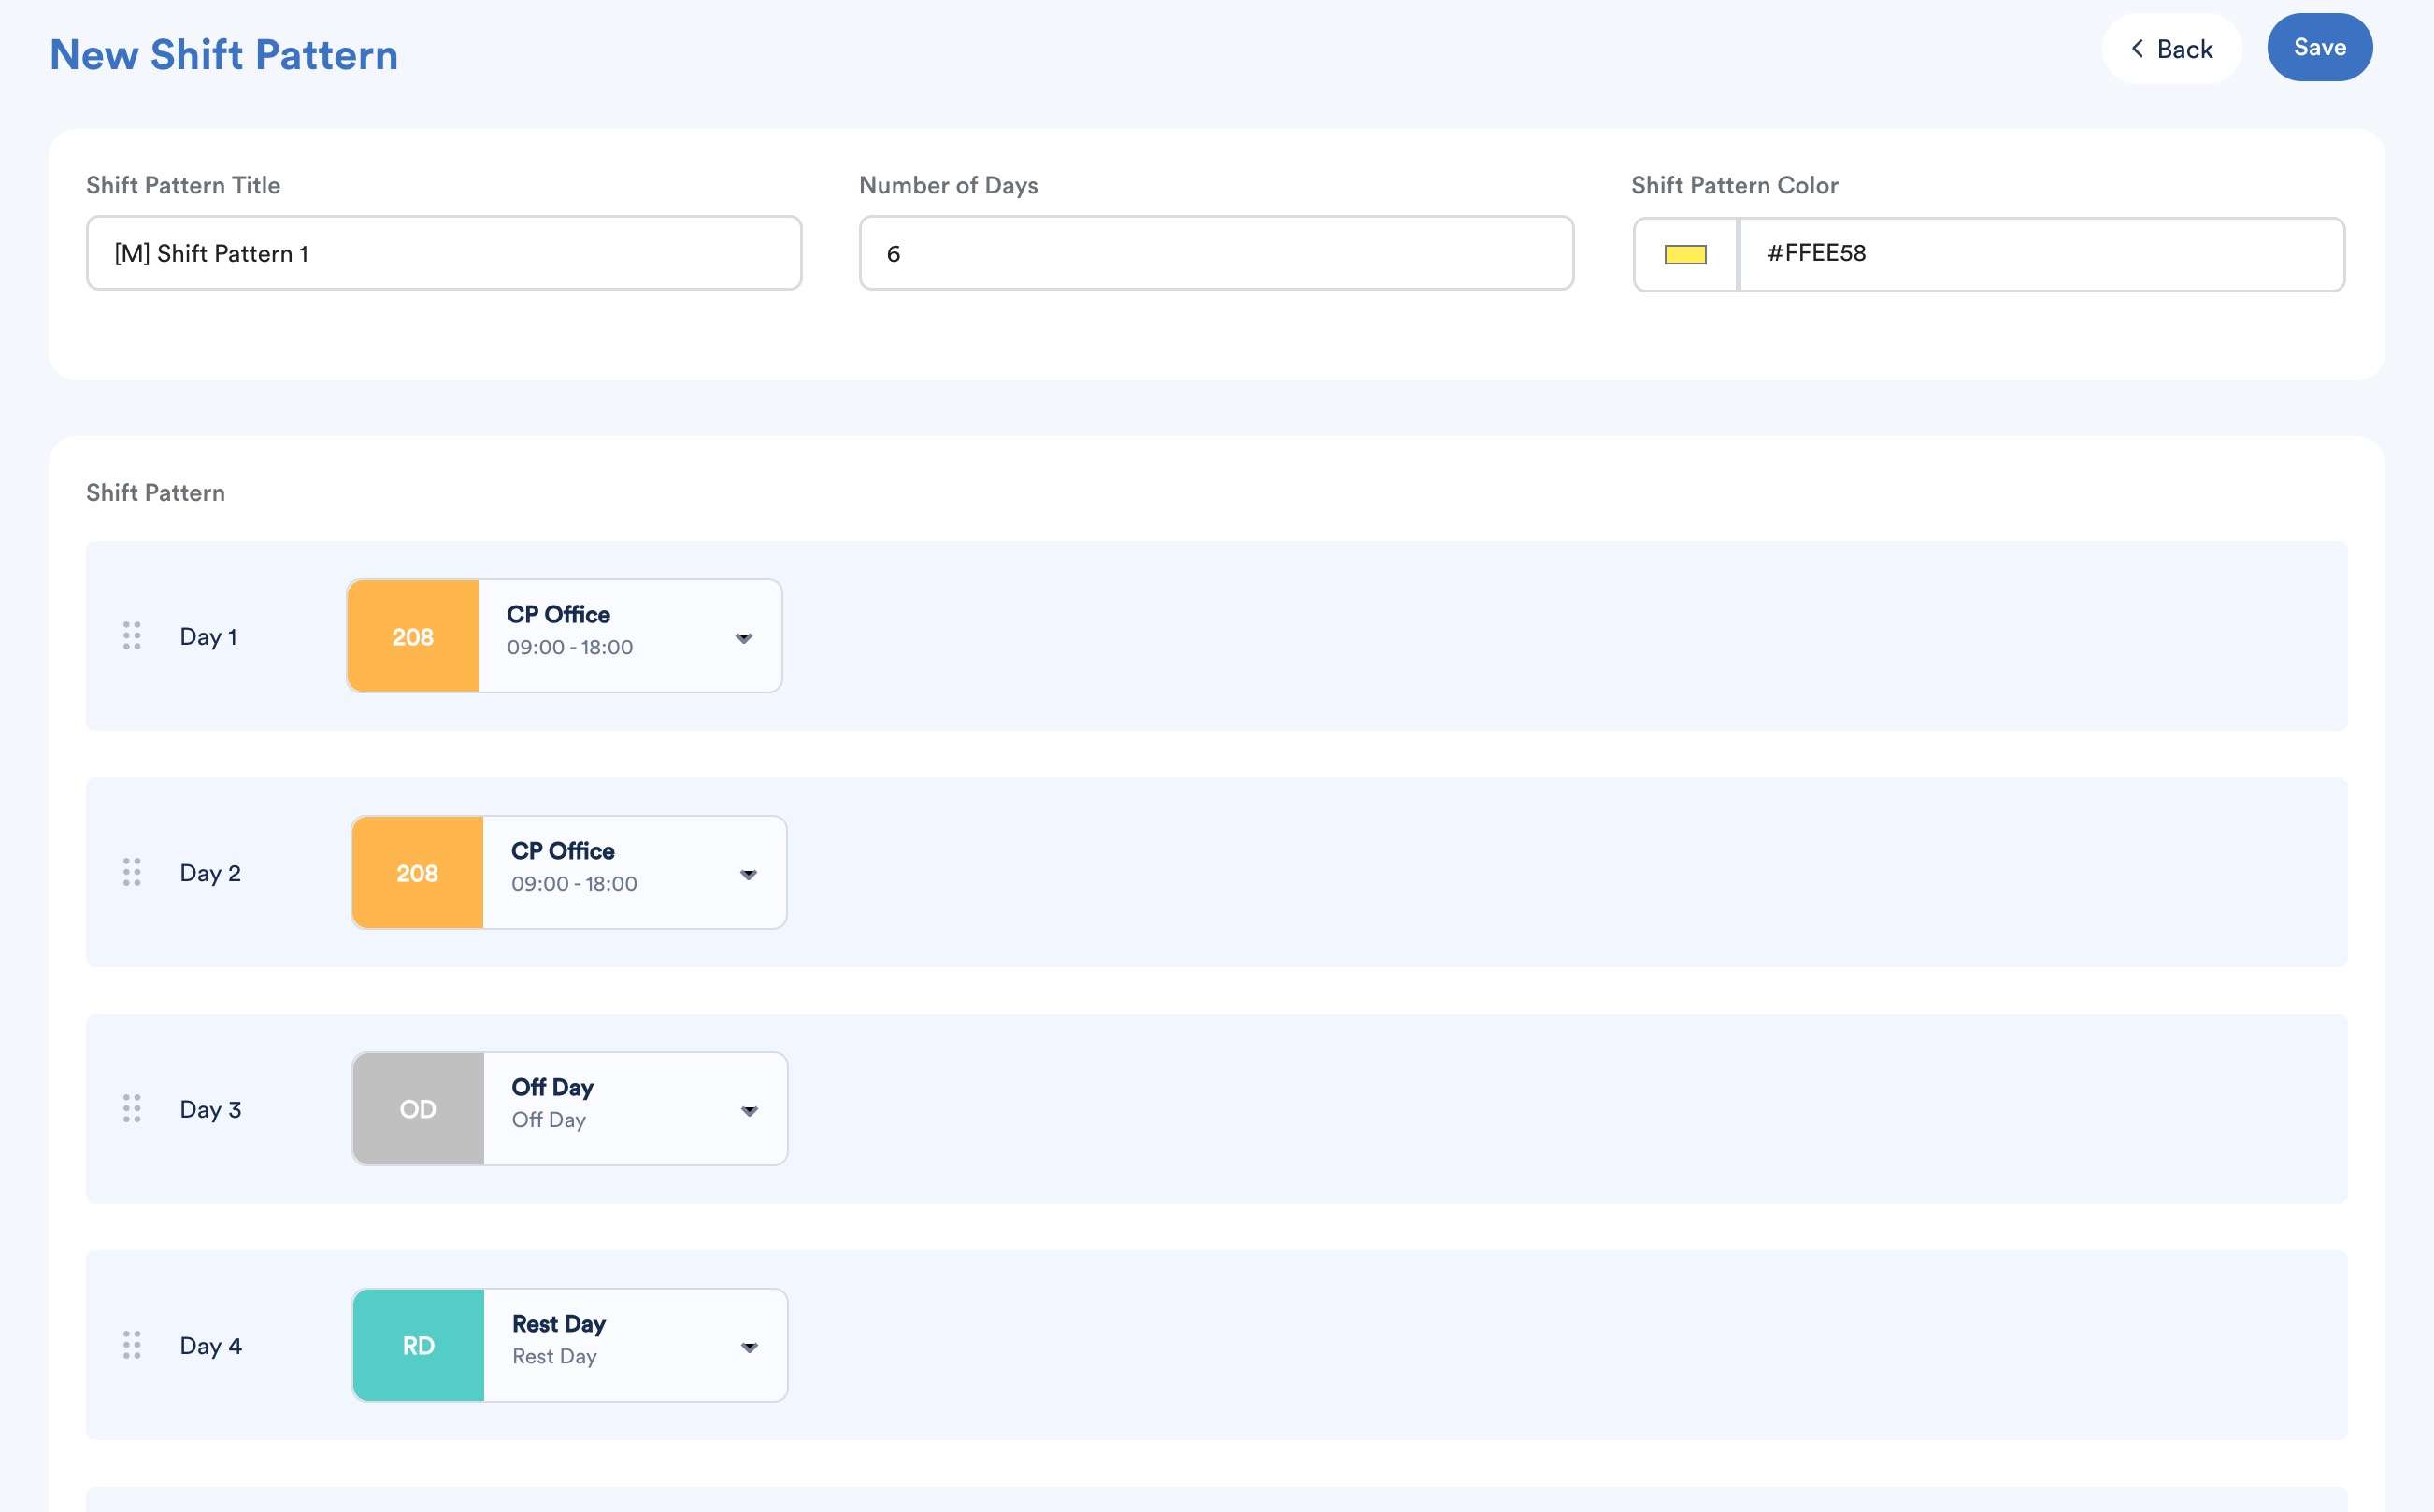
Once completed, click Save.
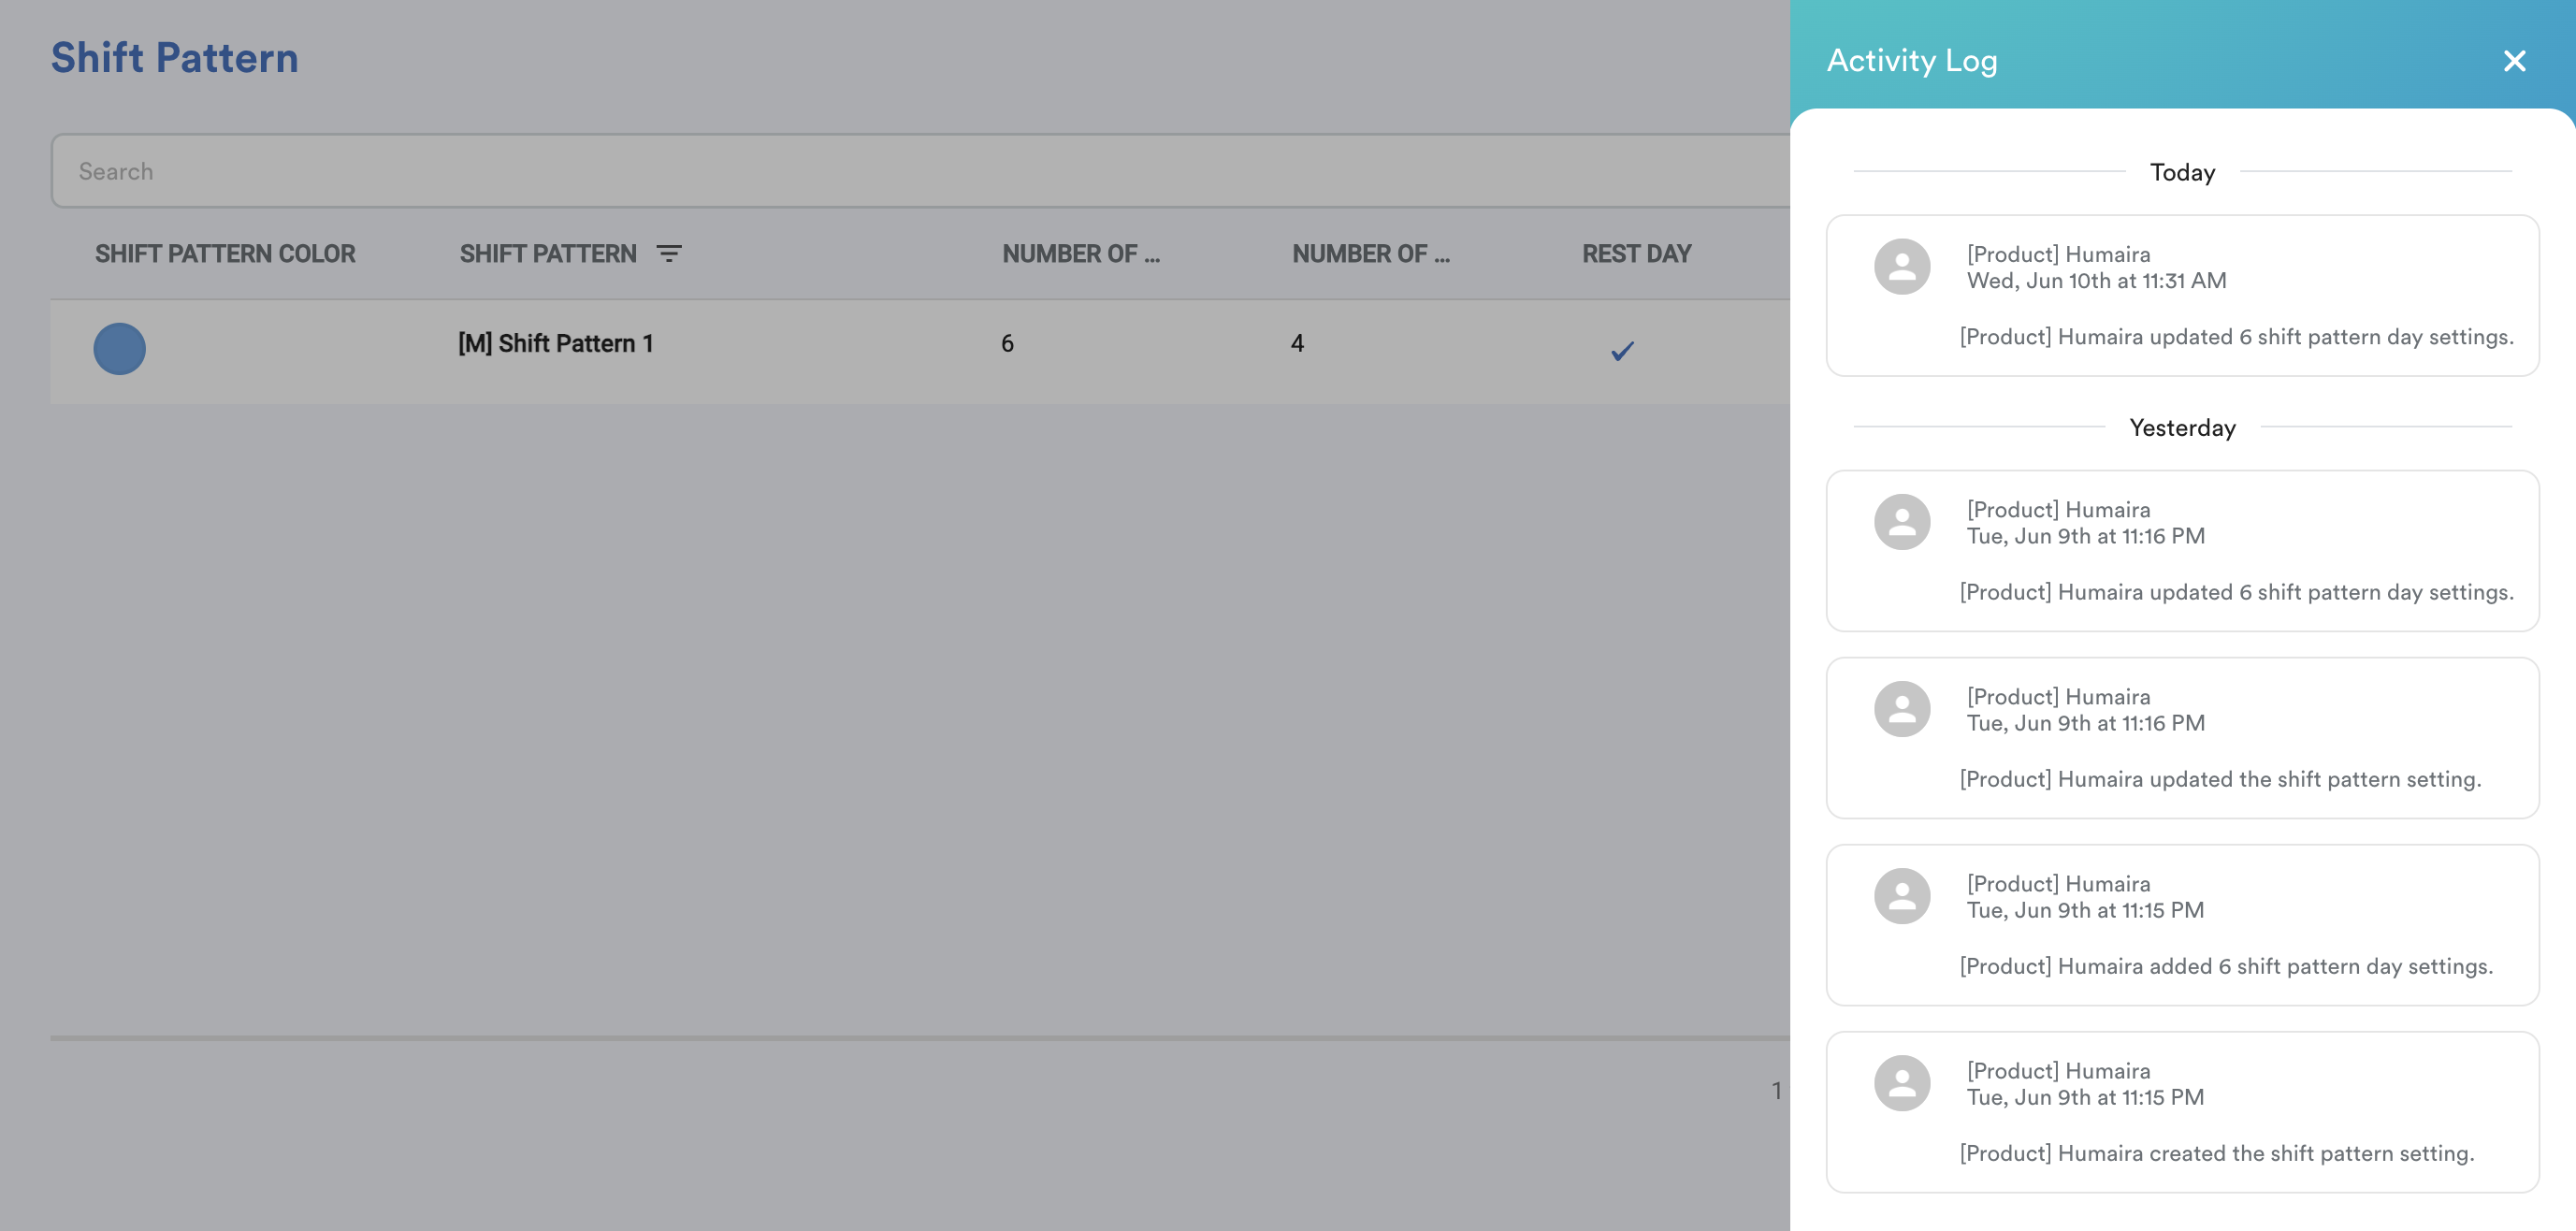
After saving, you will be returned to the Shift Pattern listing page, where all created shift patterns are displayed.

For each shift pattern, you can:
- Click the pencil icon to edit the shift pattern.
- Click Activity Log to view changes and activities performed on the shift pattern.
Important
- Only shift patterns that are not linked to any shift group can be edited.
- Shift patterns that are currently assigned to an active shift group cannot be deleted. This is to preserve existing shift schedules and prevent disruptions to attendance records.
To create a shift group, refer to Creating Shift Group.
We hope this explanation clarifies the matter. If you require additional assistance, do not hesitate to contact our support team.
Was this article helpful?
That’s Great!
Thank you for your feedback
Sorry! We couldn't be helpful
Thank you for your feedback
Feedback sent
We appreciate your effort and will try to fix the article