This guide explains how to reset attendance records to follow the schedule settings.
This process is usually run when there are changes made to a schedule’s settings, such as shift rotation, exception settings, added or removed holidays, overtime rules, or clocking methods, and you want to update those changes in the attendance records.
Quick Links
Why are the latest changes not reflected?
Step 1
Note: Batch process is needed when you want to change backdated data or future dates but the attendance has been edited before.
Why are the latest changes not reflected?
It is important to note that when the record is at "Pending" status, changes to settings, such as holiday or schedule settings, will not be automatically reflected in the attendance.
- Refreshing the attendance records
- Assigning a shift (either from the Attendance page or the Duty Roster)
- Submitting a leave or overtime request for the specific date
In short, you need to do a batch process when the attendance records are in "Pending" status in Individual Attendance.

Step 1
On the left menu, go to Attendance (a) > Batch (b) > Batch Process (c).

Step 2
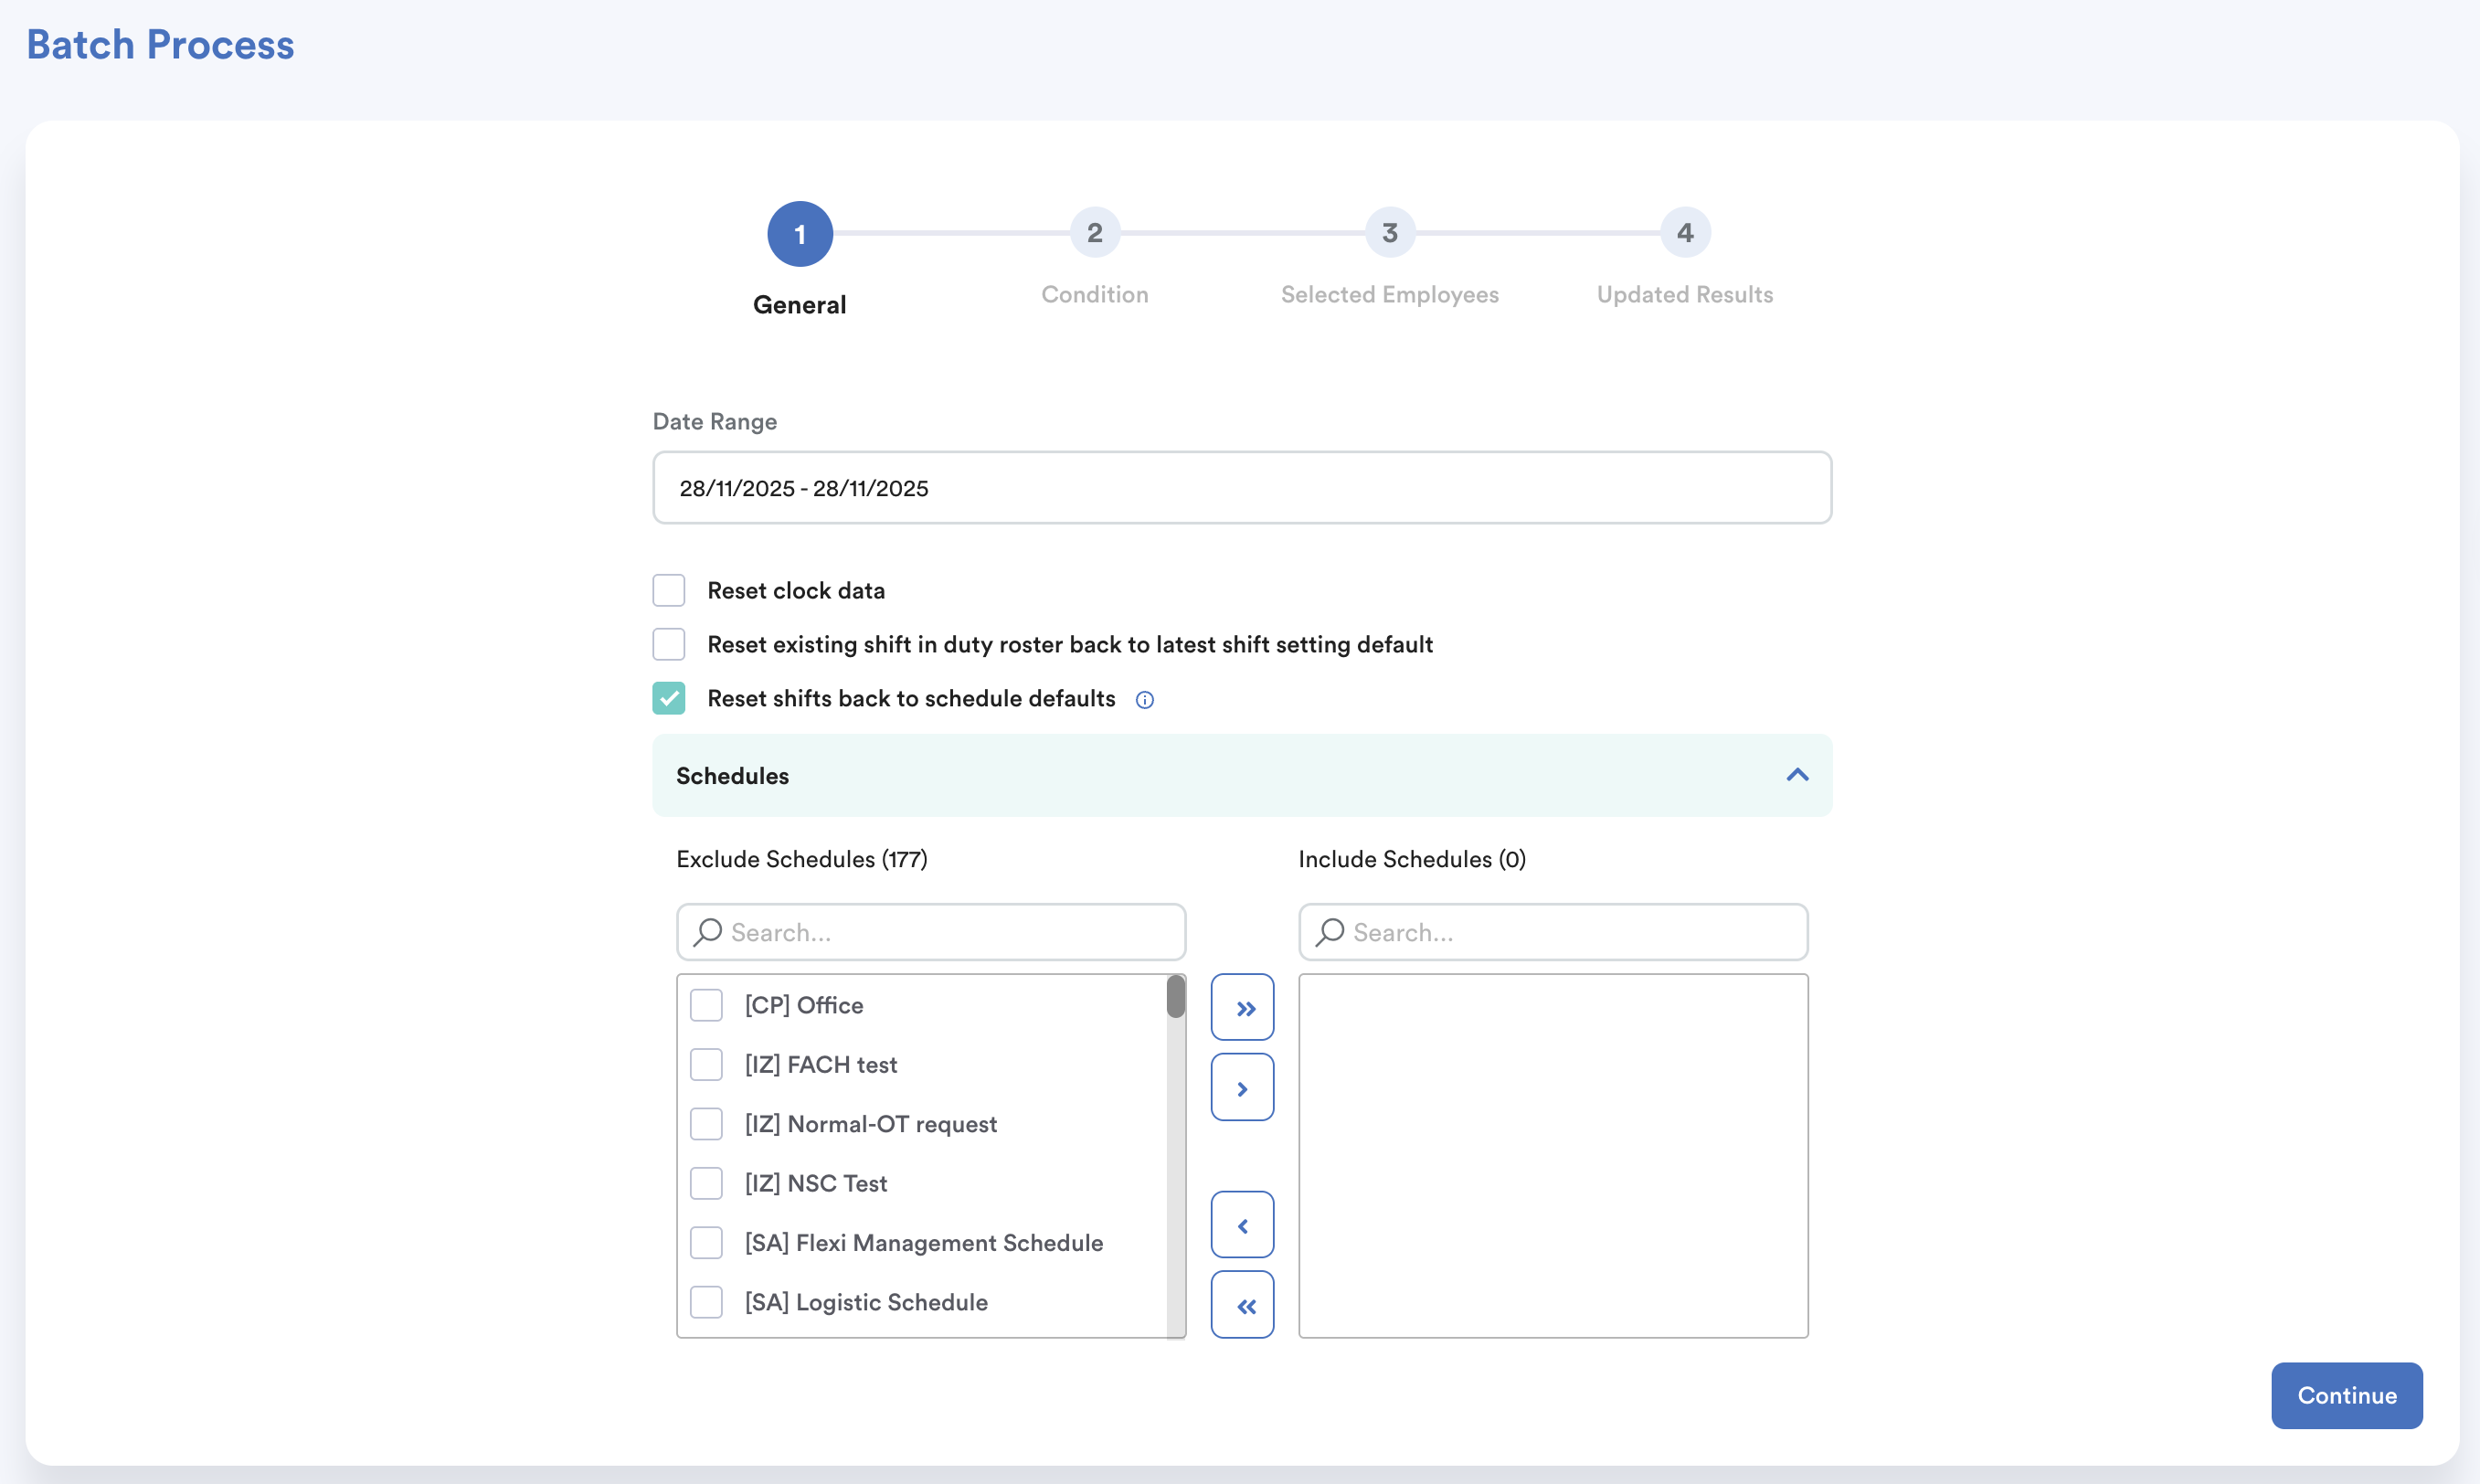
Select the date range for which you want to reset the attendance.

There are three options available, and each will produce a different outcome. Choose the correct option based on your desired result.
For this process, tick Reset shifts back to schedule default.

a. Reset clock data
Restores and rearranges the original clock data before any changes made.
b. Reset existing shift in duty roster back to latest shift setting default
Updates attendance to the latest schedule settings without changing Duty Roster shifts.
c. Reset shifts back to schedule defaults:
Updates attendance and resets Duty Roster shifts to the original shift based on schedule settings.
Note: If you select this option, all shifts assigned through the Duty Roster will be cleared and reverted to the default schedule settings. Do not choose this option if you do not intend to remove shifts assigned by the Duty Roster.
Then, select the shifts you want to reset and click Continue.
Step 3
Select the employees whose attendance you want to reset using one of the following methods.

Once you have finalized your selections, click Next.

The system will then reset the attendance according to the schedule settings.
**You may double-check the changes in individual attendance.
We hope this explanation clarifies the matter. If you require additional assistance, do not hesitate to contact our support team.
Was this article helpful?
That’s Great!
Thank you for your feedback
Sorry! We couldn't be helpful
Thank you for your feedback
Feedback sent
We appreciate your effort and will try to fix the article