This guide explains how to add a new employee or update an existing employee’s profile. Employee information is organized under 8 tabs:
Step 1: Access Employee directory
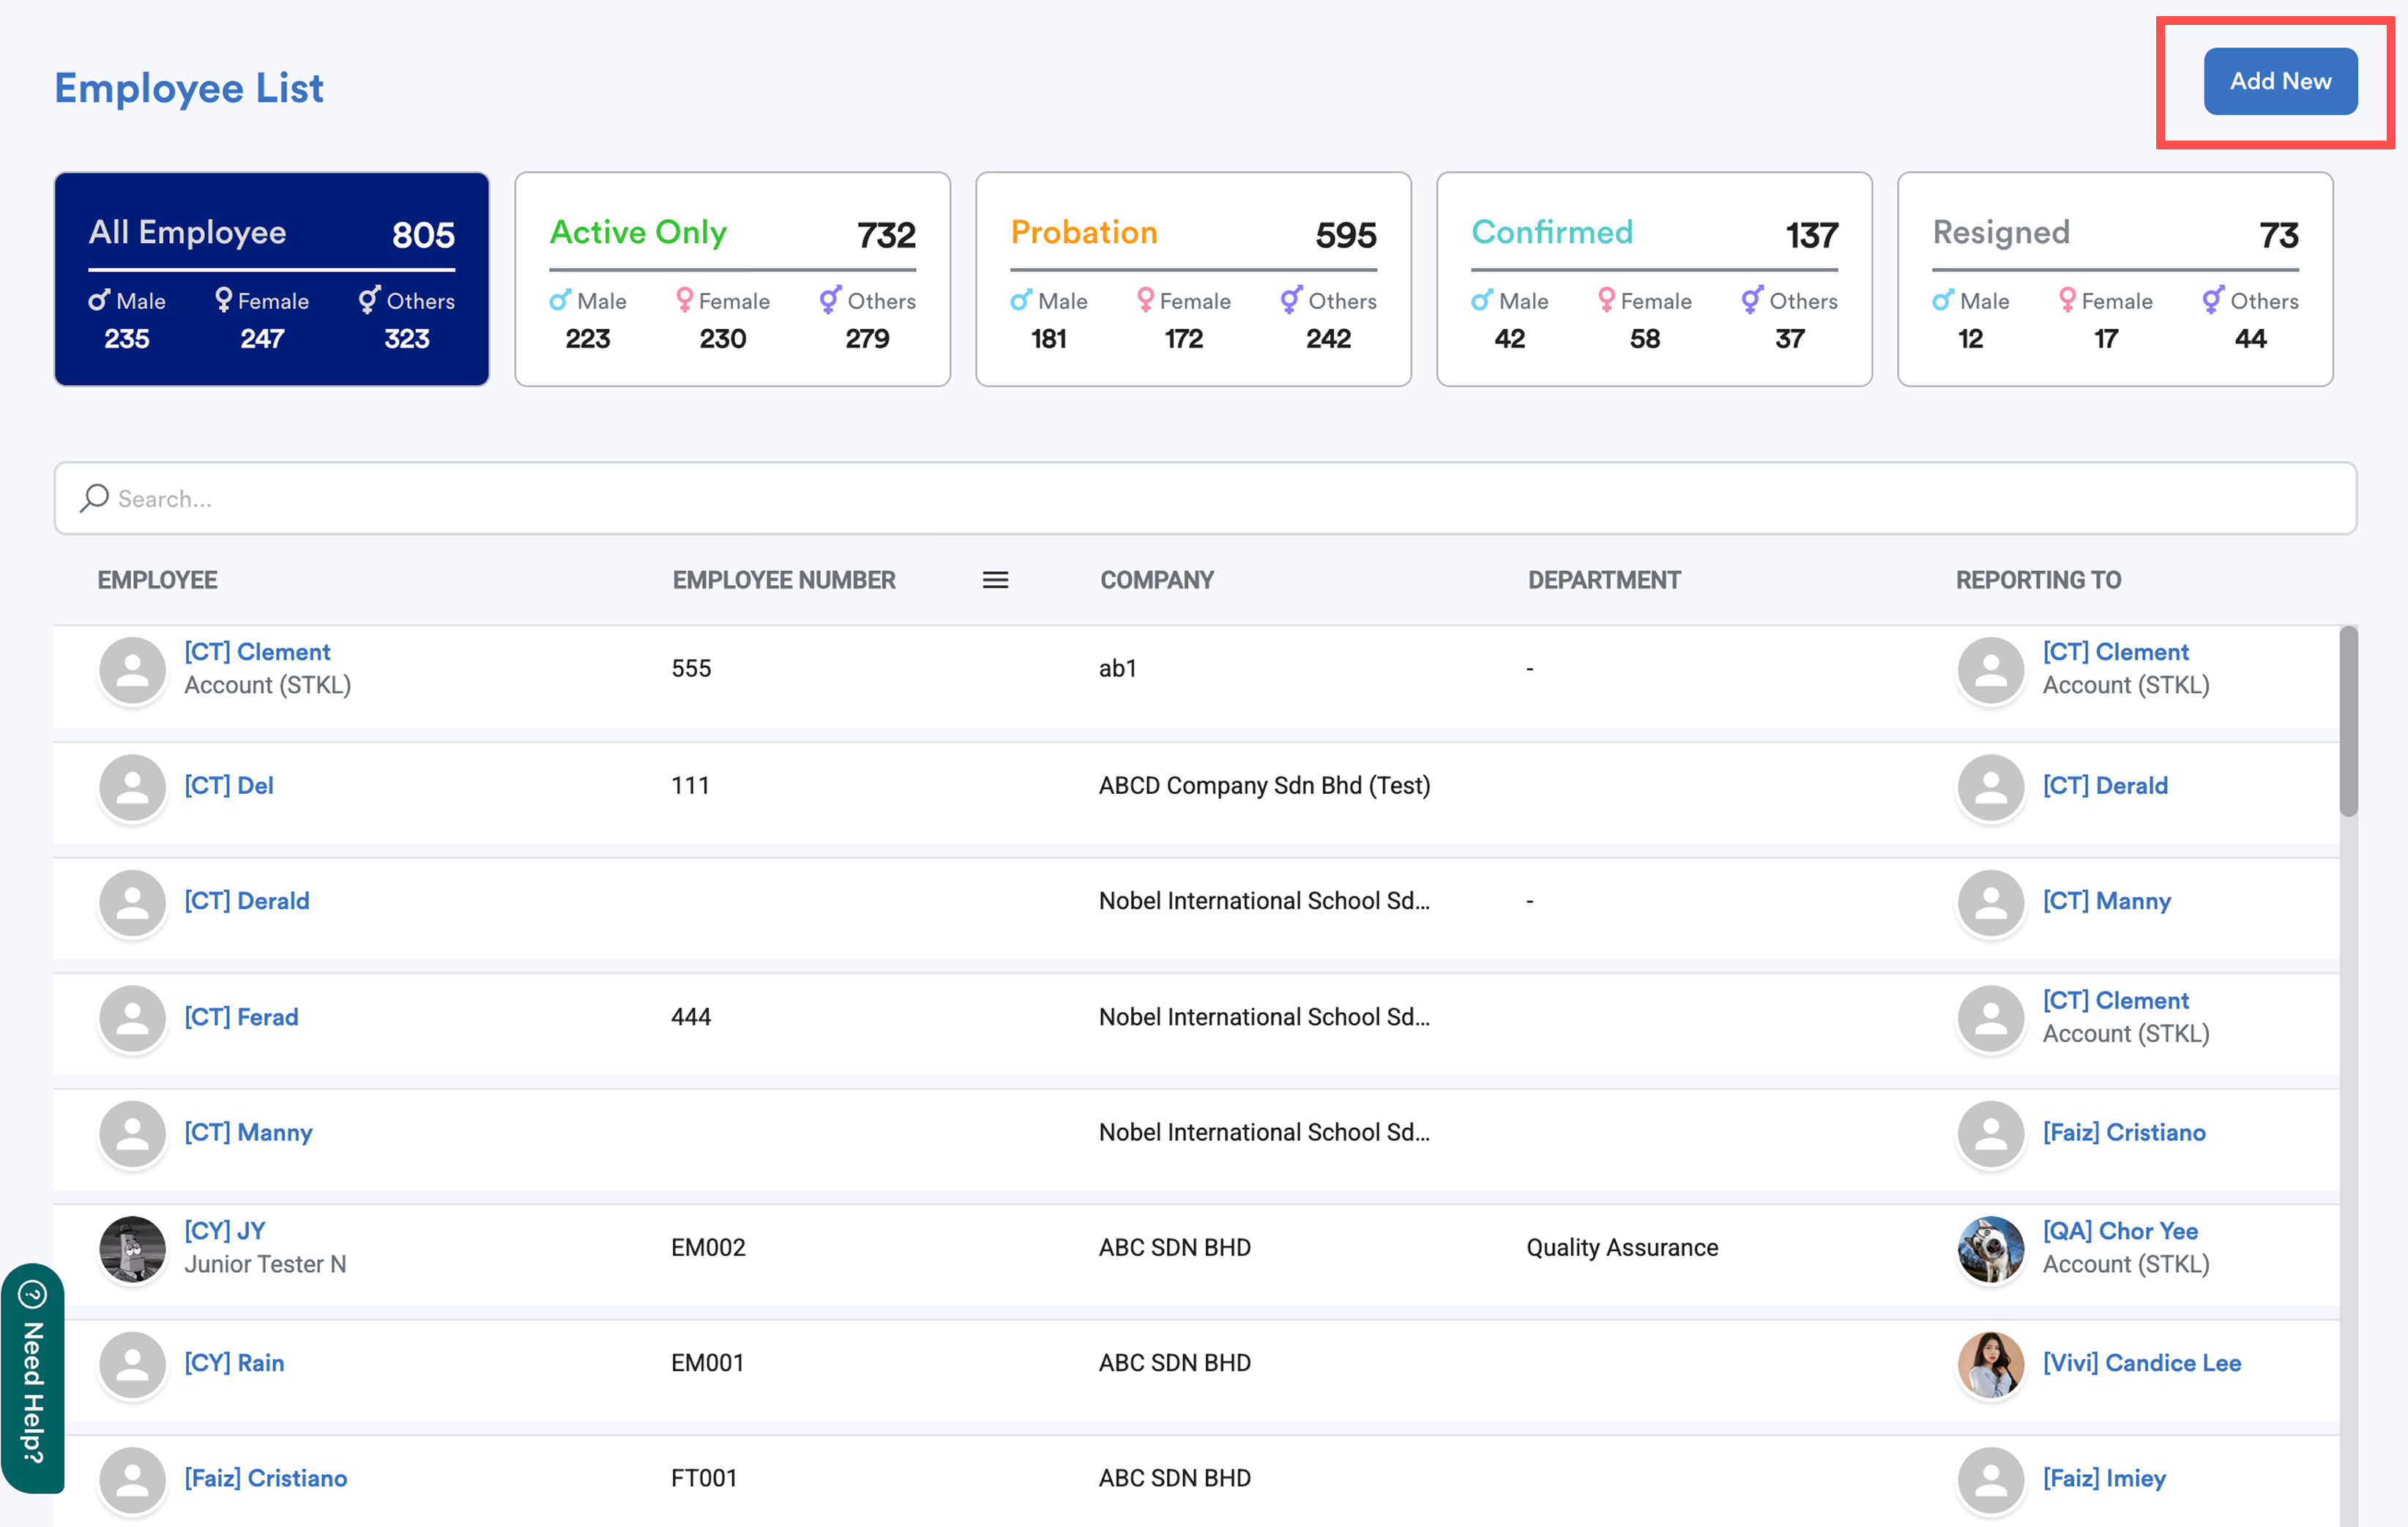
On the left menu, go to Employee > Directory. You will see a list of existing employees.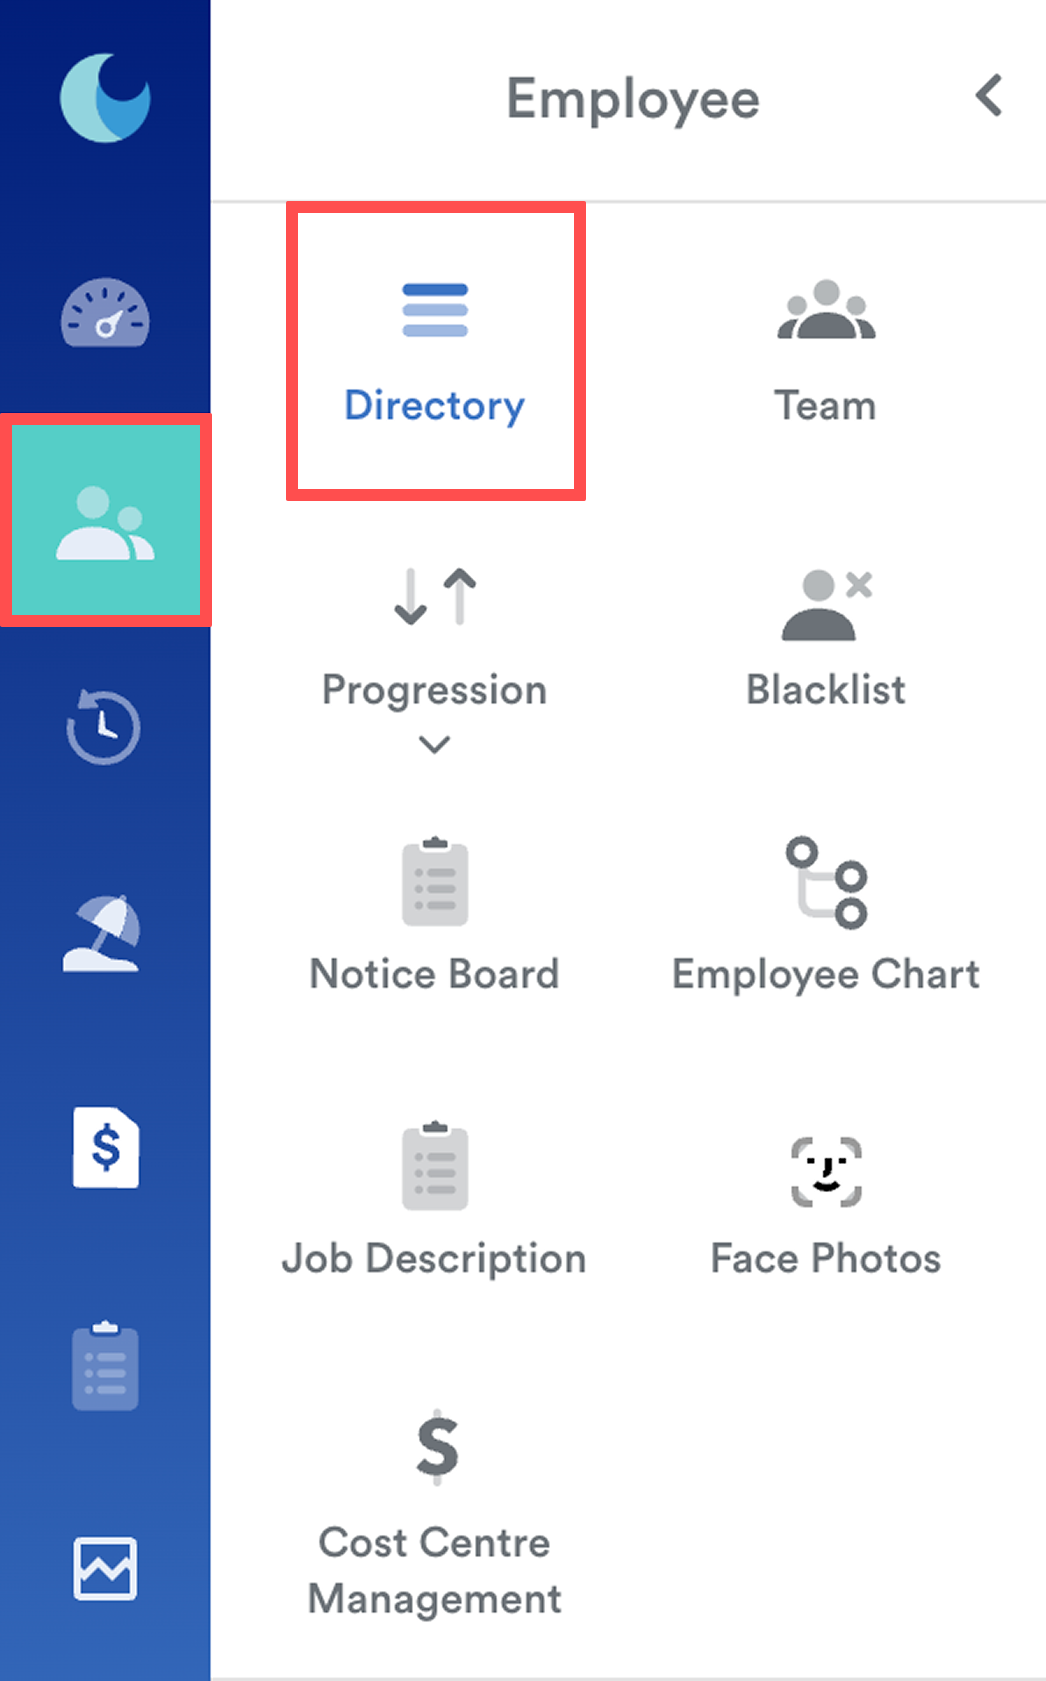
To add a new employee, click Add New on the top-right. To update an existing employee, search and select the employee from the list.
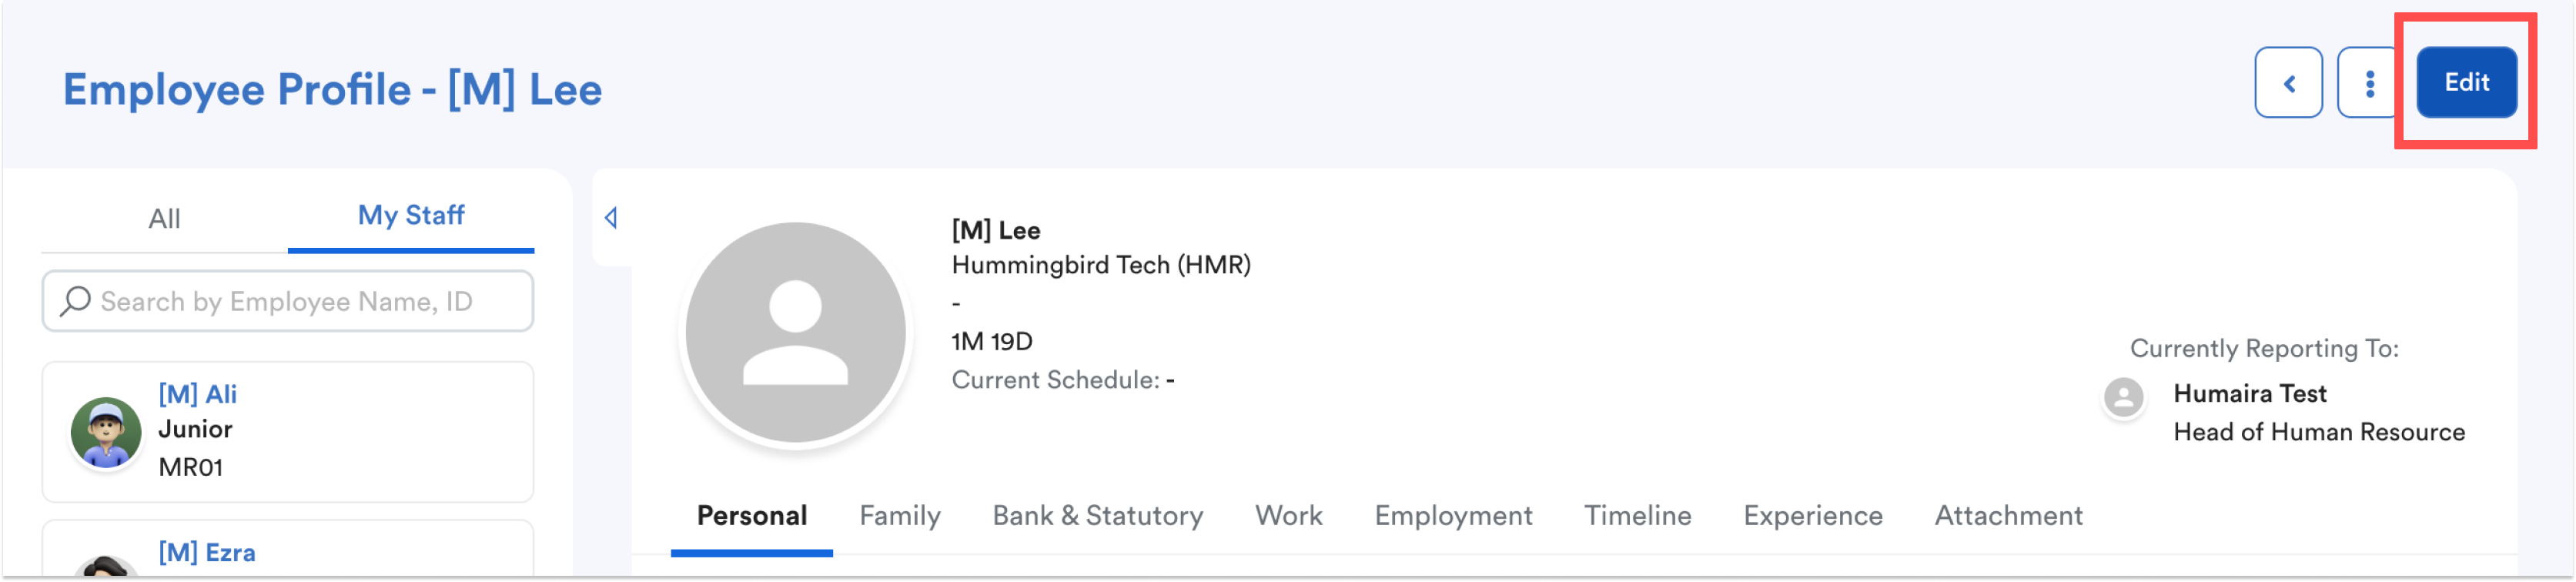
Step 2: Edit Employee Profile
Once inside the employee profile, click Edit on the top-right. As an administrator, you can edit all profile information.
Note:
Fields marked with an asterisk (*) are compulsory:
- Personal Tab → First Name, Last Name, Phone Number, Identification Number
- Bank & Statutory Tab → EPF, SOCSO, EIS, Income Tax
- Work Tab → Work Email
- Employment Tab → Hire Date, Confirmation Date
Step 3: Understanding the Tabs
Tab 1: Personal
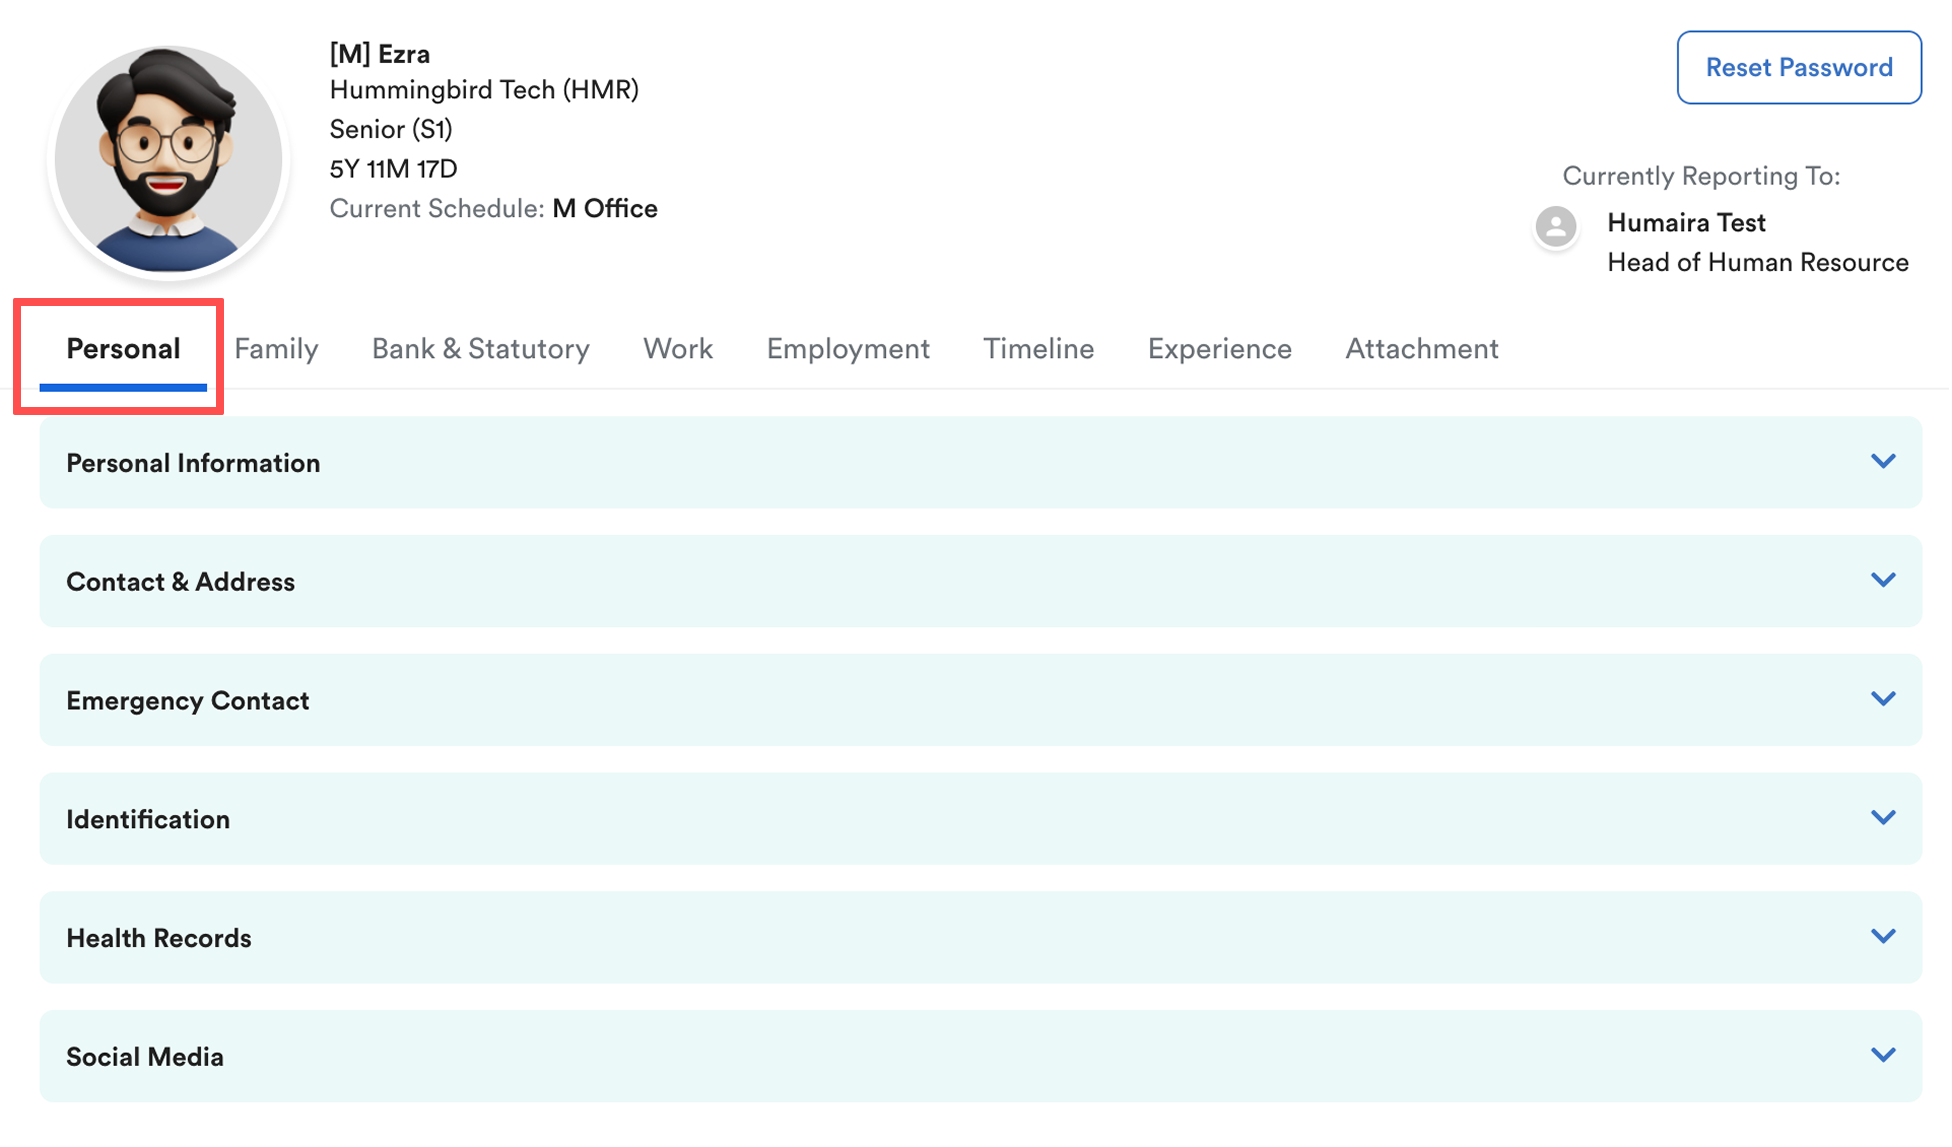
Contains basic employee information. Employees can update most fields themselves, except Identification Number.
Personal Information:
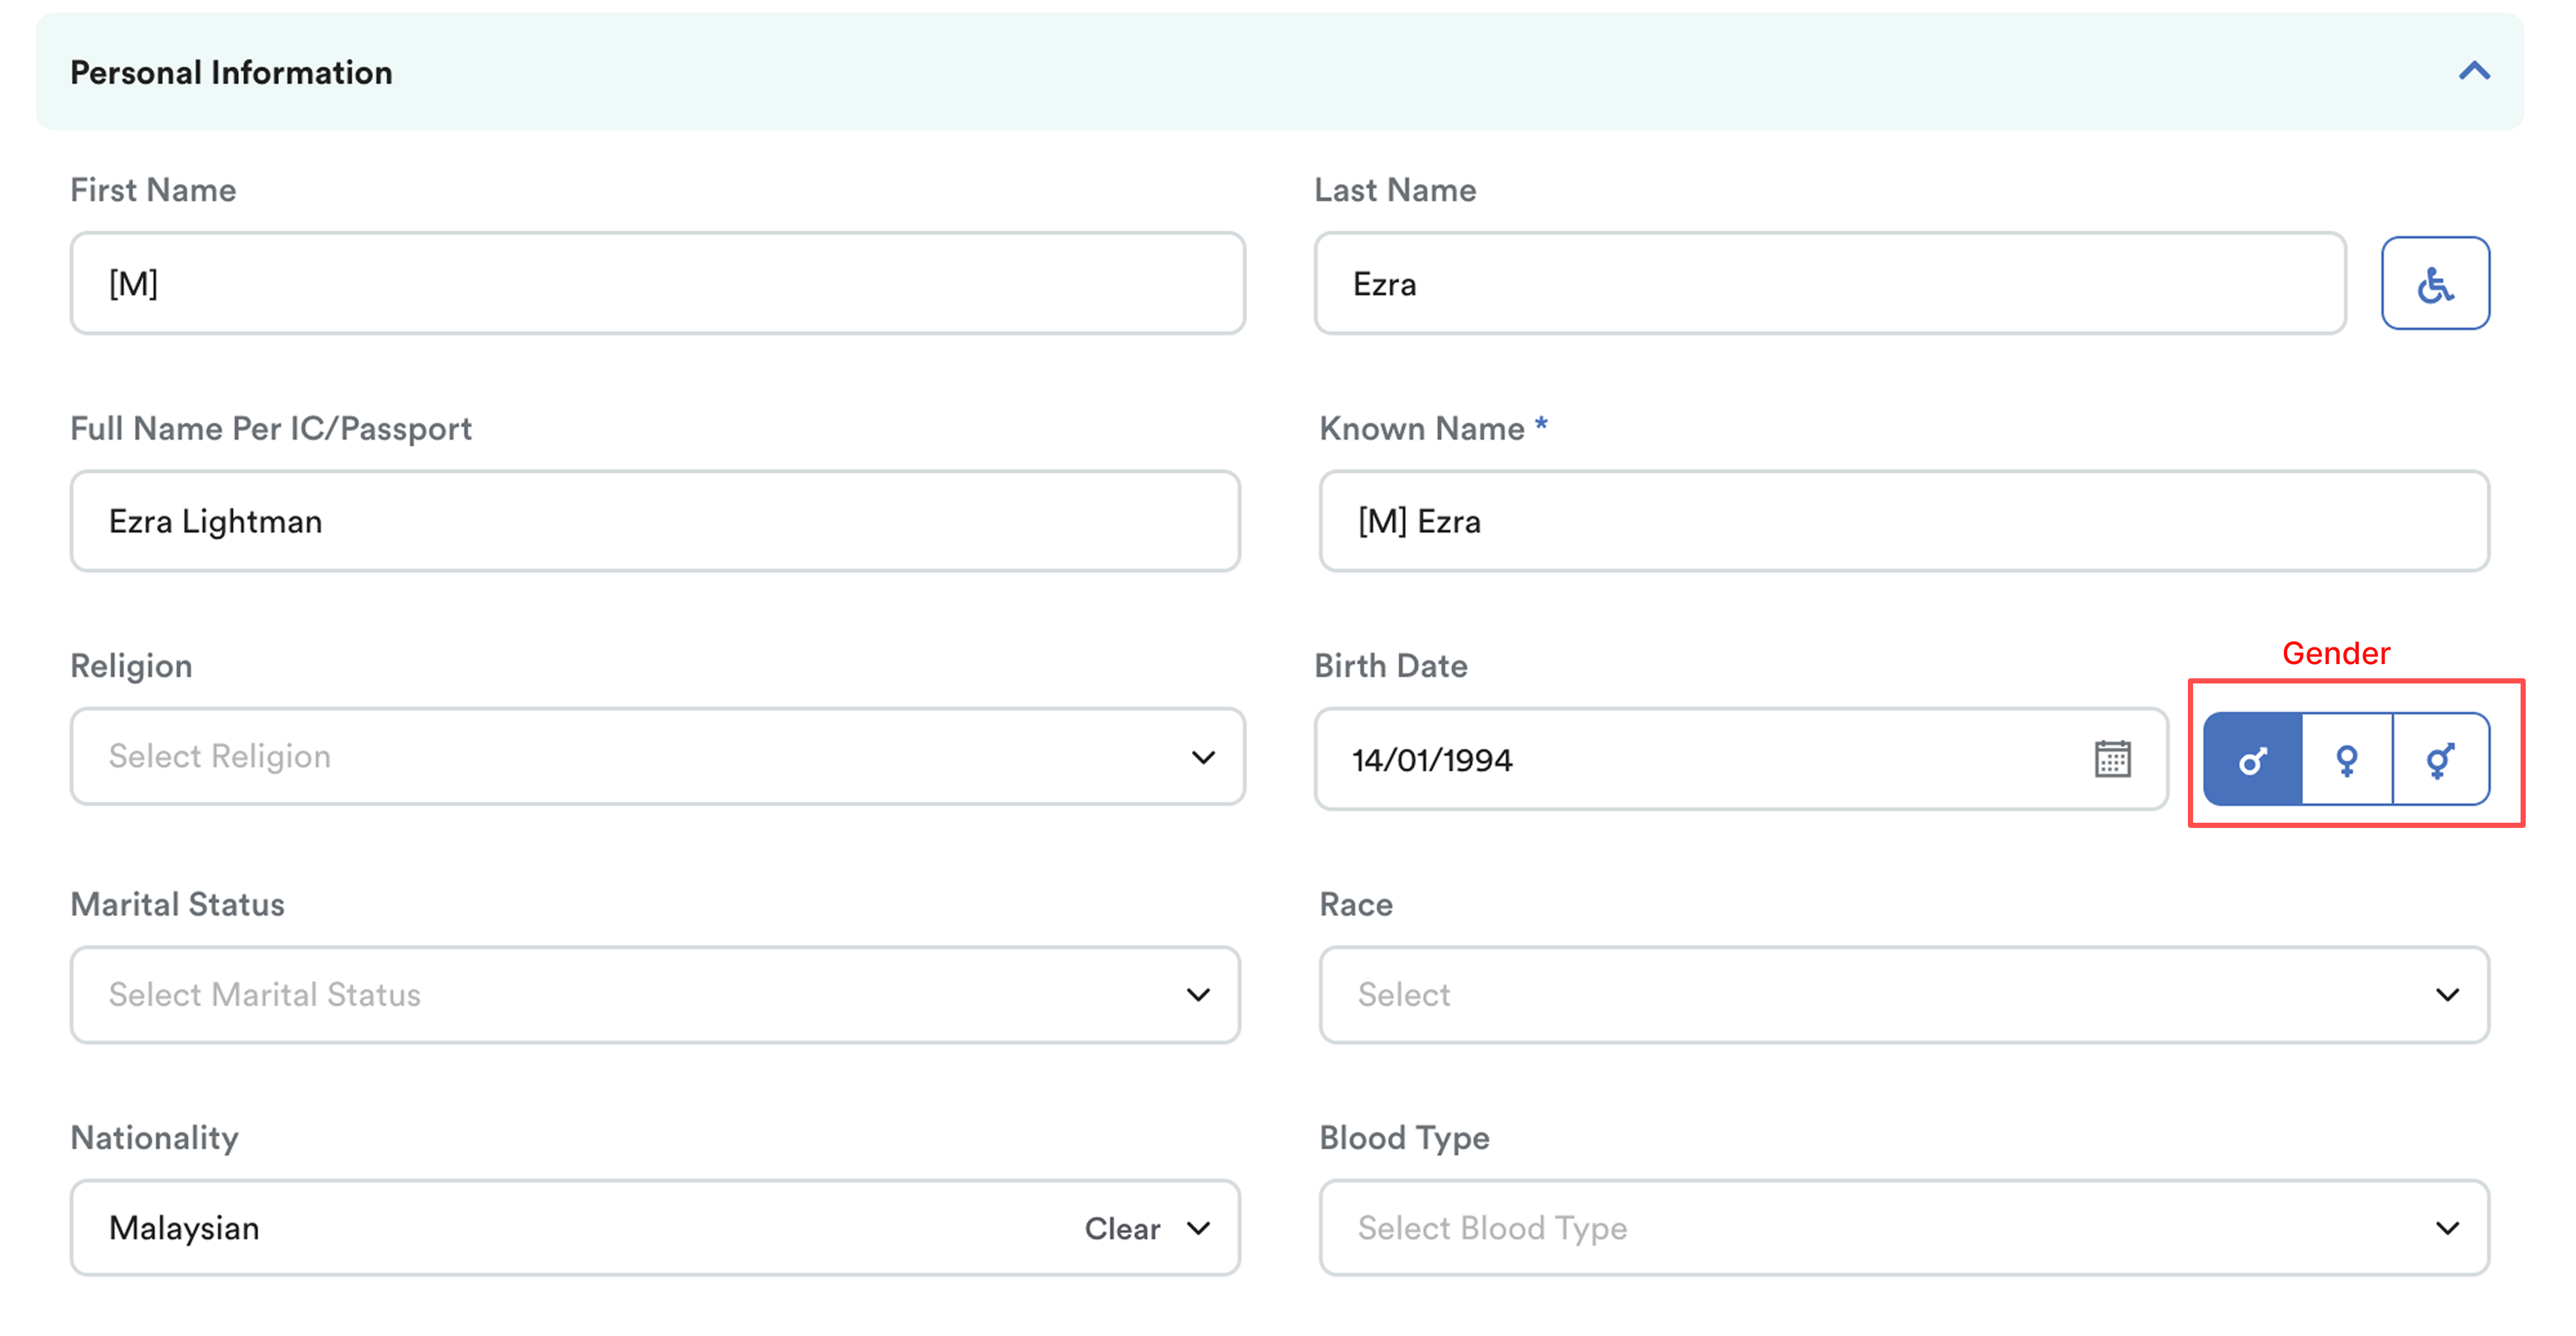
- Disability: If the employee has a disability, click the wheelchair icon on the right. The icon will turn blue when enabled. (This settings affects tax calculation)
- Name, Religion, Birth Date, Gender, Marital Status, Race, Nationality, Blood Type
Note: Remember to fill in the gender if you would like your condition to run smoothly when you set female colleagues on maternity leave.
Note: Make sure to fill in the correct birth date to ensure accurate EIS/Socso contribution. (Refer to Why No SOCSO / EIS Contribution Appear in Payslip?)
Contact & Address:
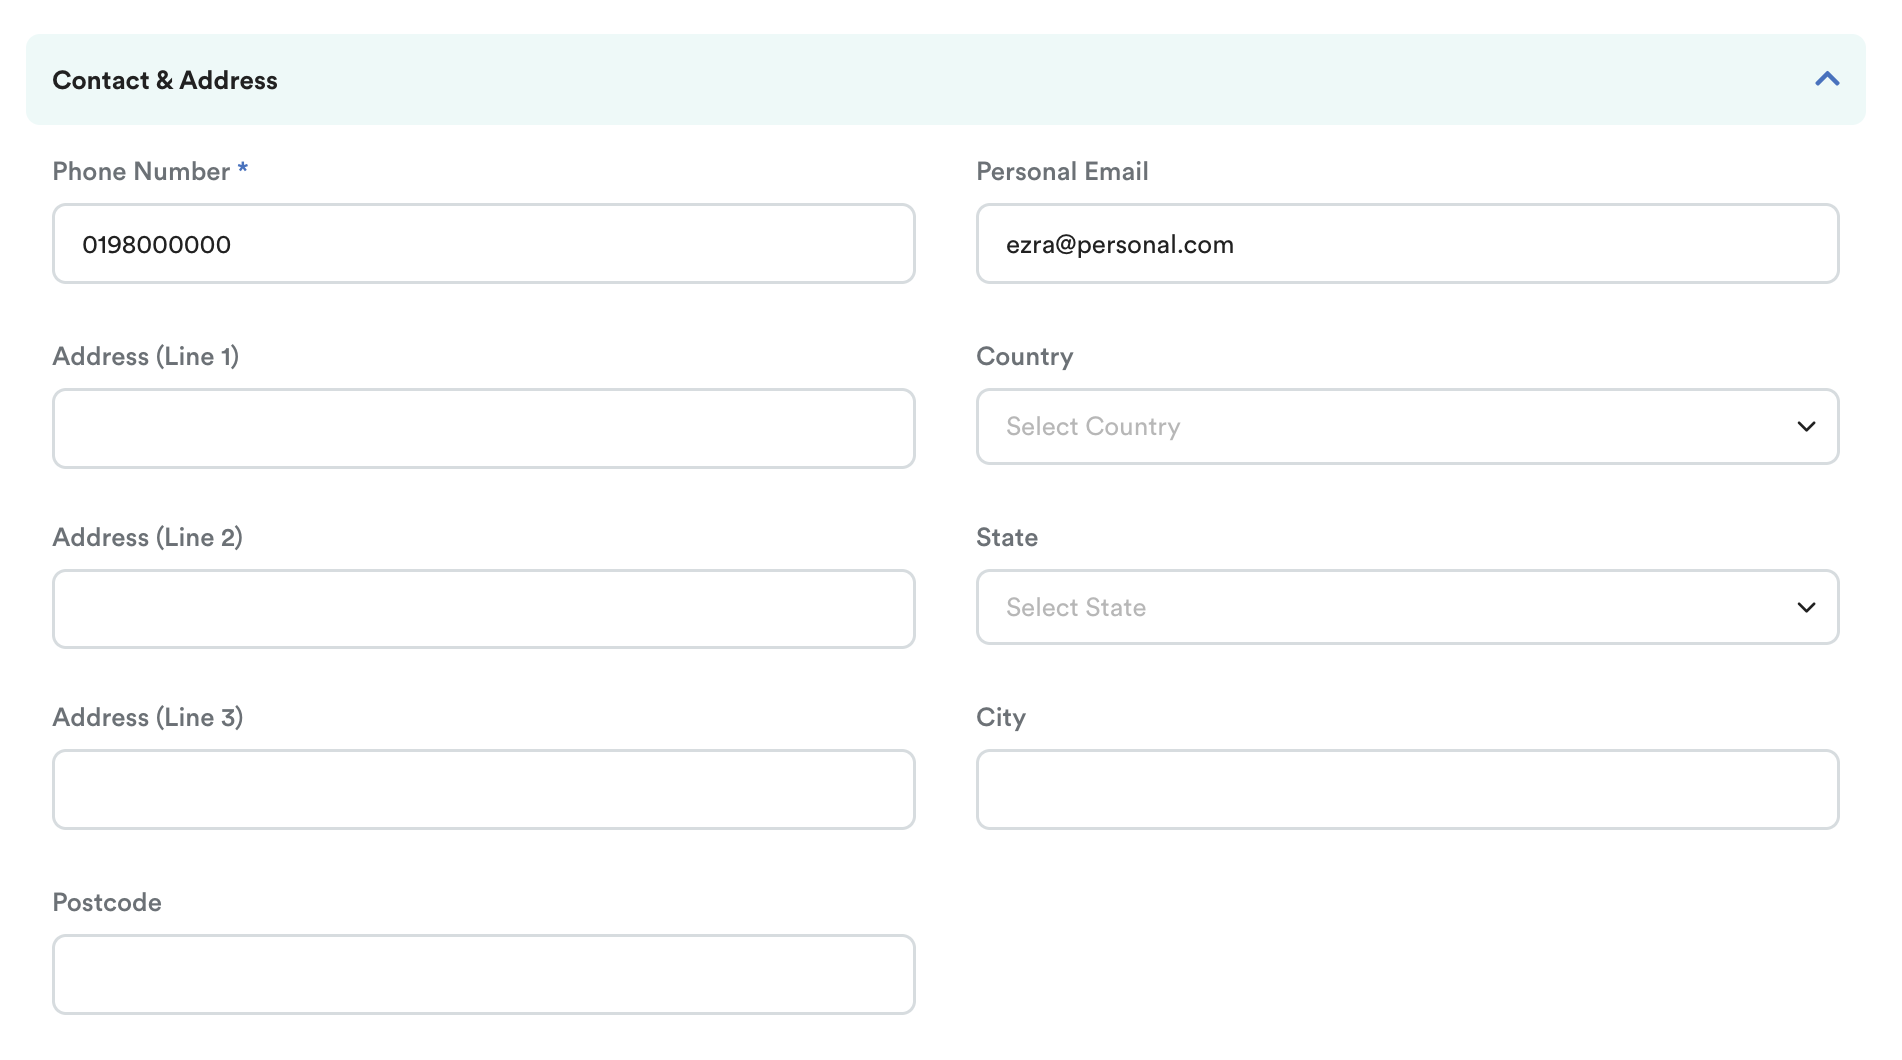
- Phone Number* (compulsory)
- Personal Email
- Address 1–3, Country, State, City
Emergency Contact

- Contact Person 1
- Contact Person 2
Identification
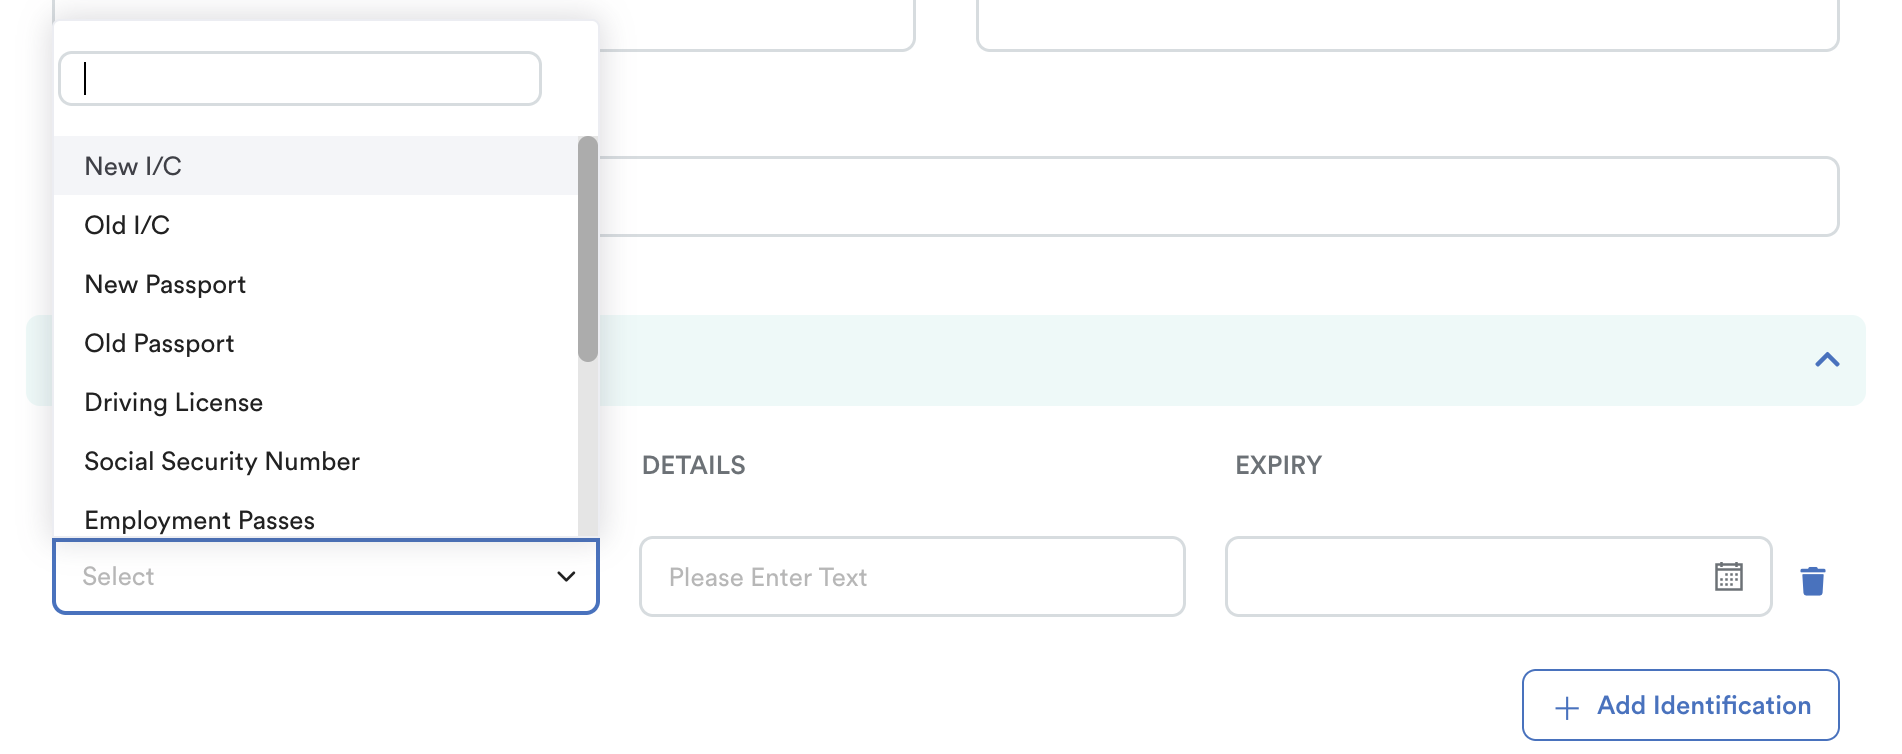
Click +Add Identification to upload official documents related to the employee and their dependents, such as:
- Driving license
- Passes
- Permits
Health Record

Click +Add Entry to record any illness or medical conditions that are important for employment purposes.
- Hospitalised: Yes / No
- Remarks
- Duration of illness or hospitalization
Social Media:
- Full URLs for Facebook, LinkedIn, Twitter, Instagram
Tab 2: Family
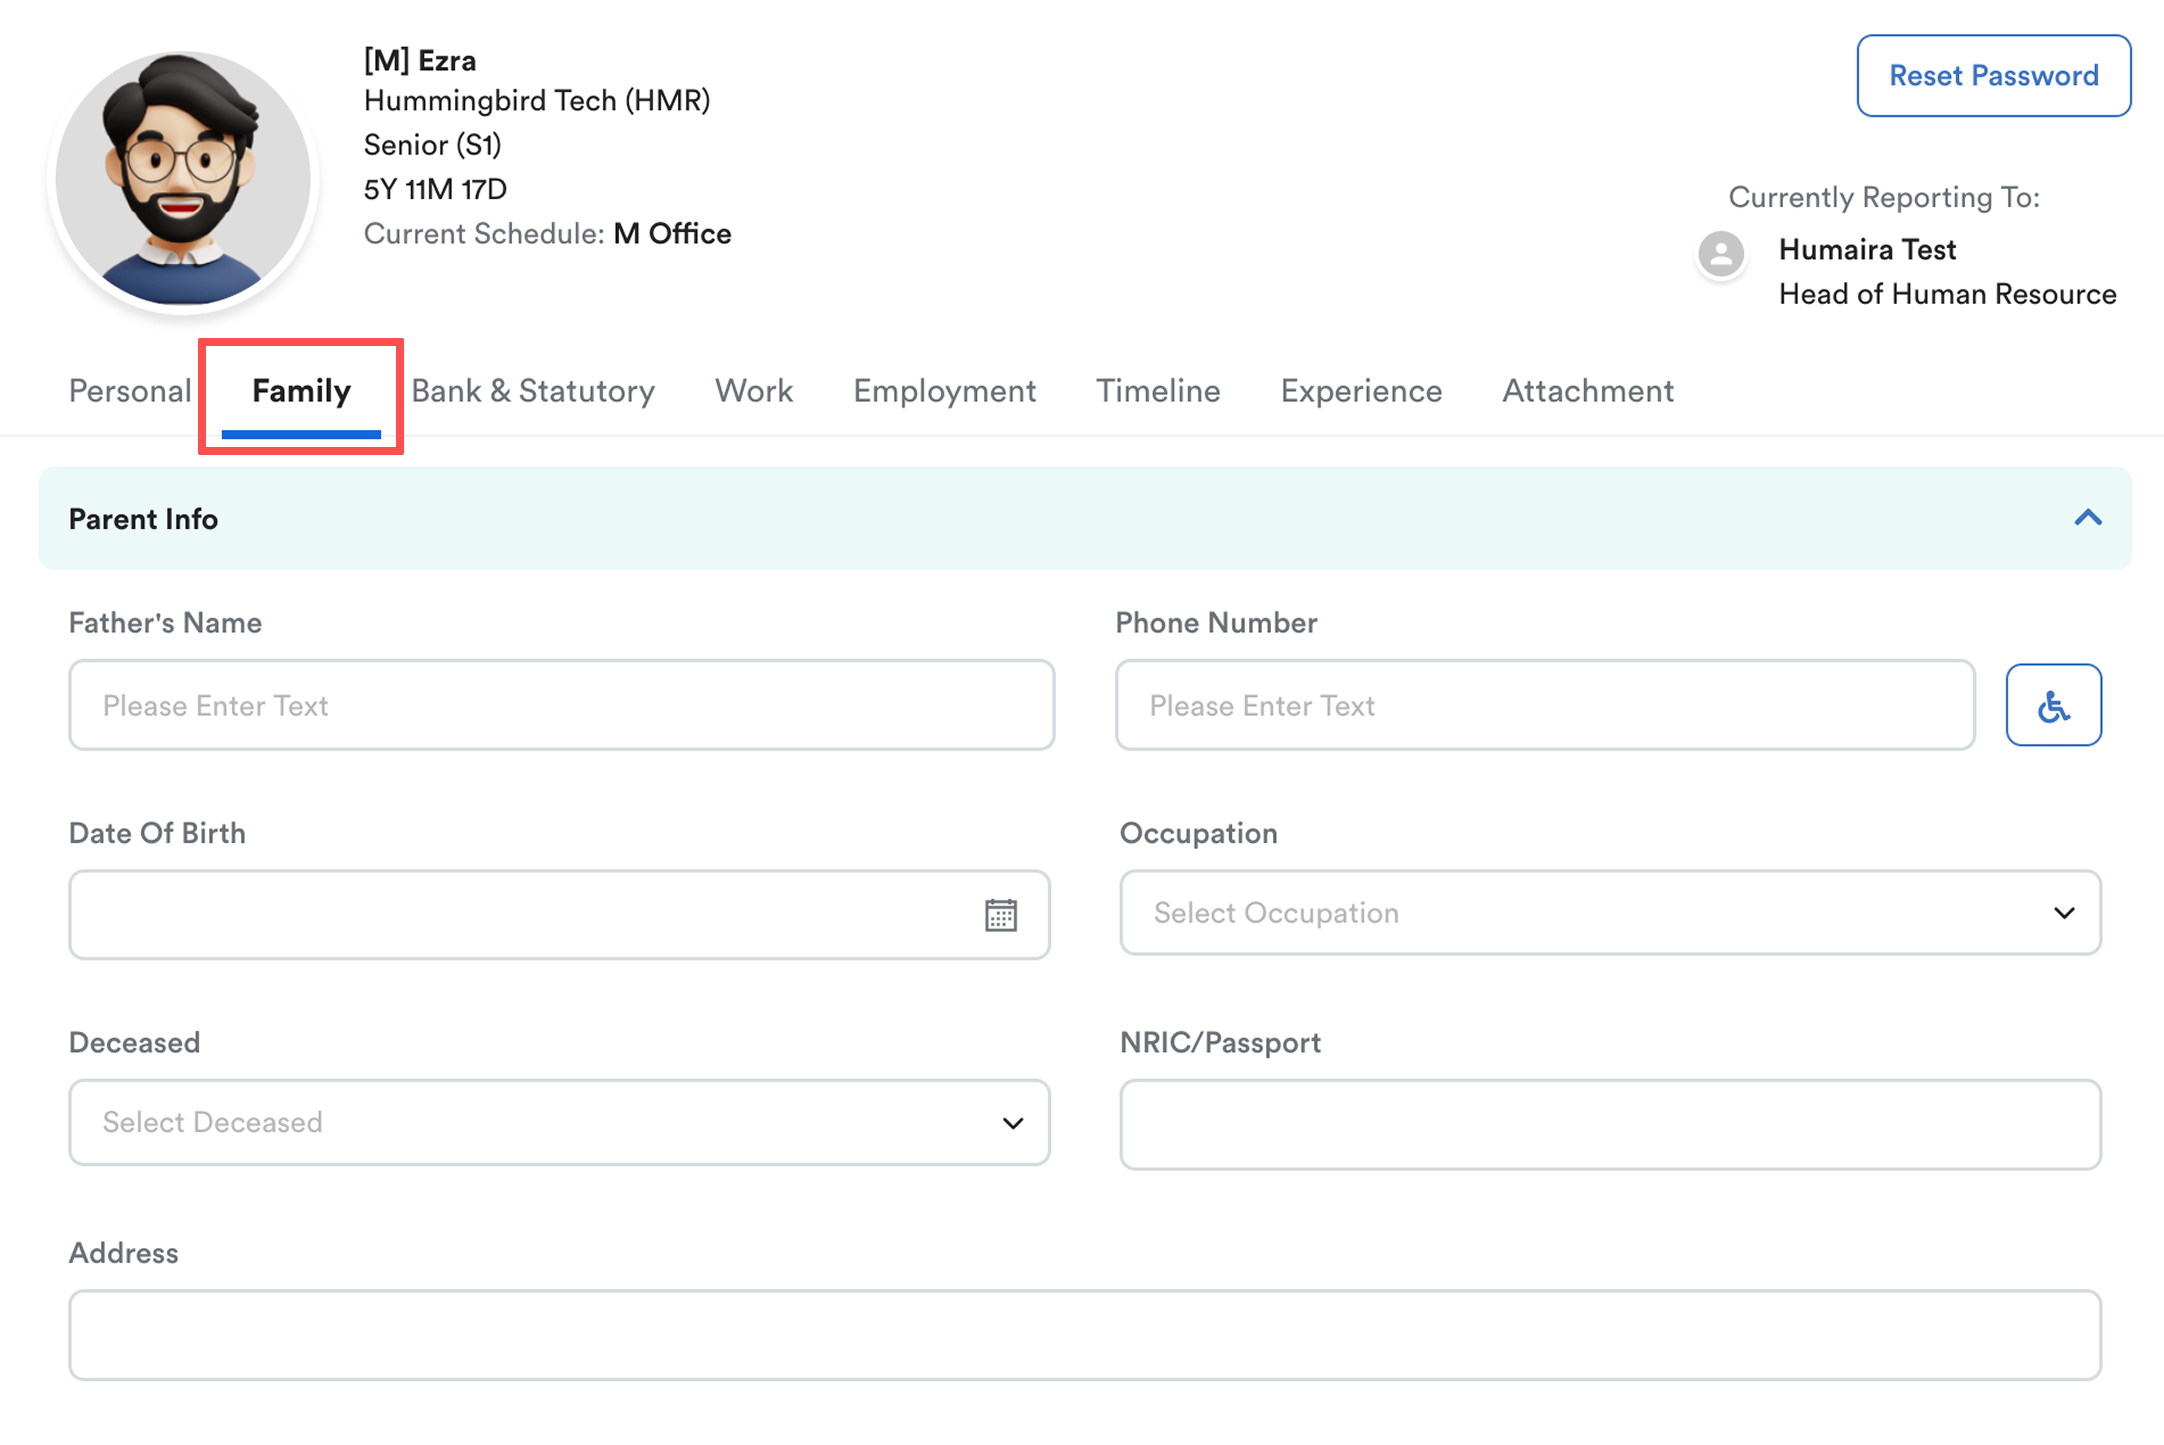
This tab stores information about the employee’s parents, spouse, and children. The information entered here is linked to dependent claims under Claim Items.
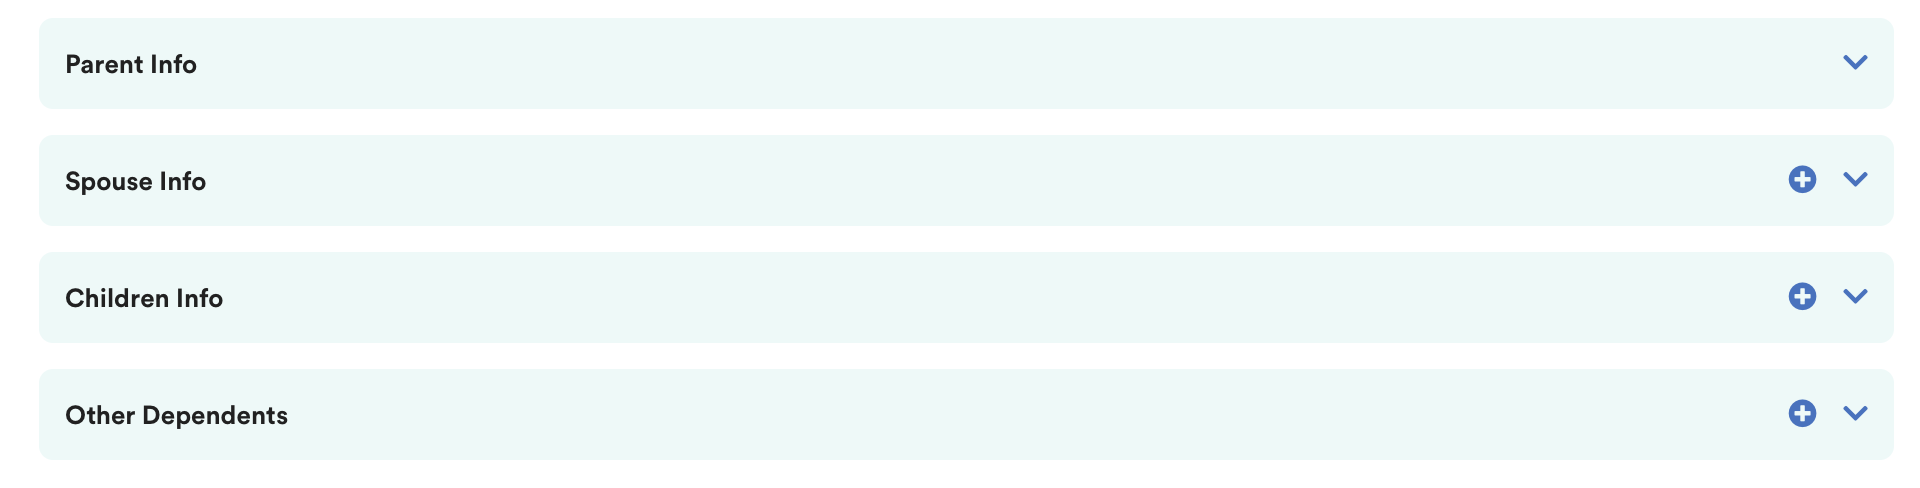
- Parent Info: Name, phone number, occupation (If the parent has a disability, click the wheelchair icon on the right. The icon will turn blue when enabled)
- Spouse Info: Name, phone, disability, occupation, employer name
- Children Info: Number of children, name, birthday, occupation, education
- Other dependents
Note: Employees are able to update this tab themselves.
Tab 3: Bank & Statutory
To disable statutory contribution, refer to How to Disable Statutory Contributions (PCB, KWSP, SOCSO, EIS) for an Employee.
Includes payroll-related information:

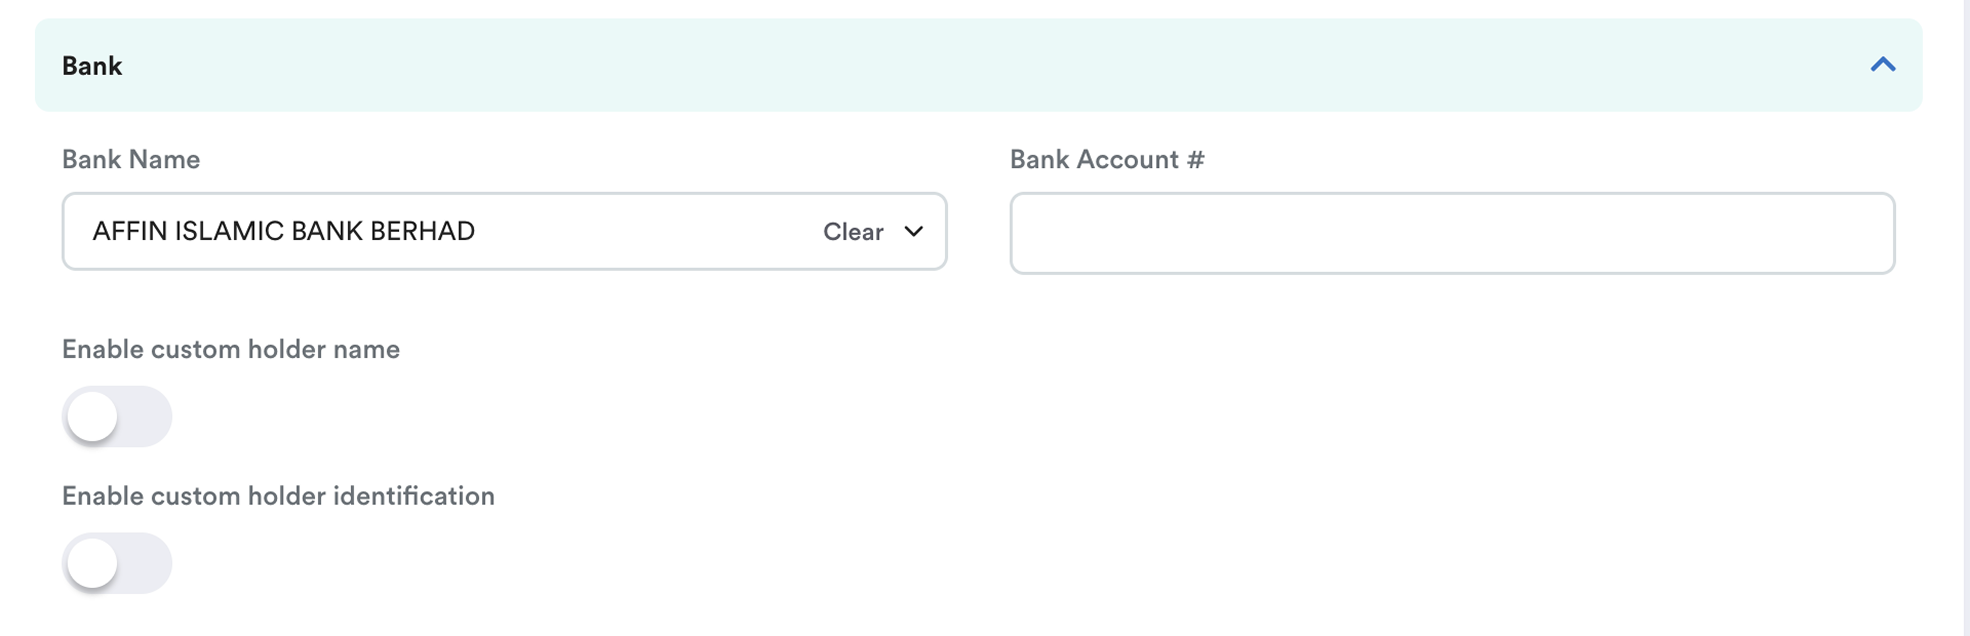
Bank: Bank name and account number. You can toggle on the custom holder name and holder identification.
Income Tax: Tax number, residency, dependent children, tax category, Employer Bears Tax Contribution option

Important: 50% Child Relief
- To claim 50% child tax relief, set the Tax Category as Divorced / Single with Kids.
- LHDN only allows divorced or legally separated parents to split child relief equally.
- If the employee is not divorced or separated, only one parent may claim 100% of the relief, and it should not be entered as 0.5 child.
If the employee is not entitled to PCB deduction, you may set the tax category to "NONE".
EPF (KWSP): EPF number, initials, category, additional contributions, Employer Bears EPF Contribution option
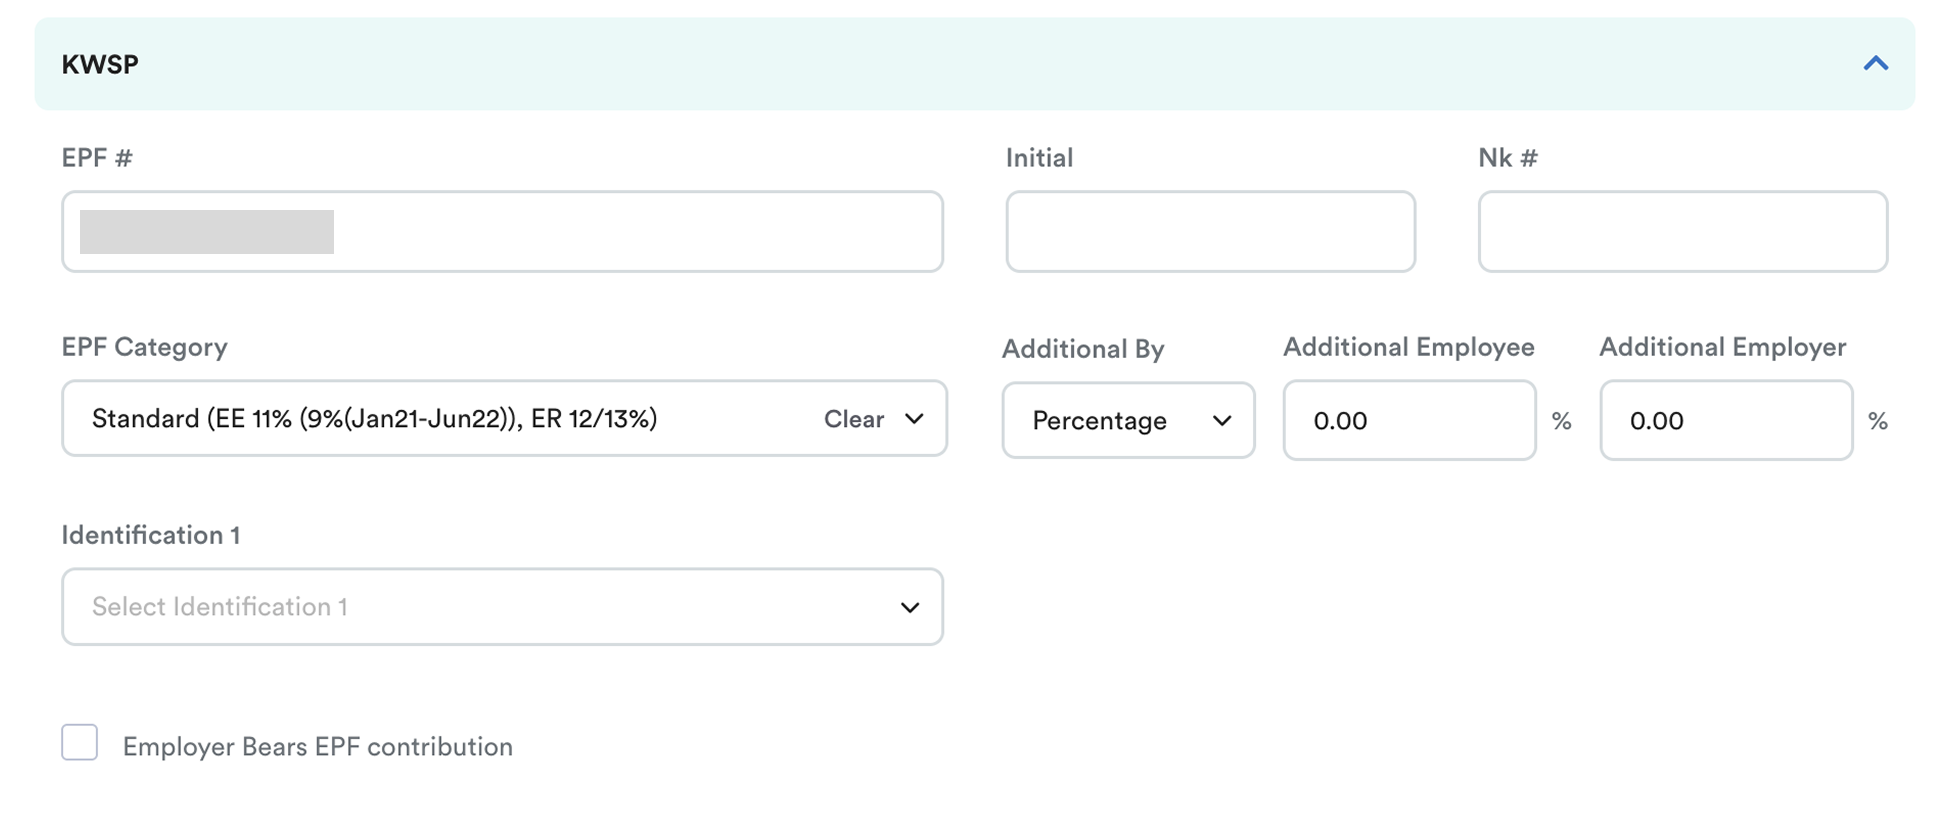
Important:
For employees with EPF Category set to Custom or who have additional contributions, HR/admin must ensure the setting aligns with “EPF Base Calculation for Non-Standard Percentage” in Company settings. Refer to: How to Create a Company - Statutory
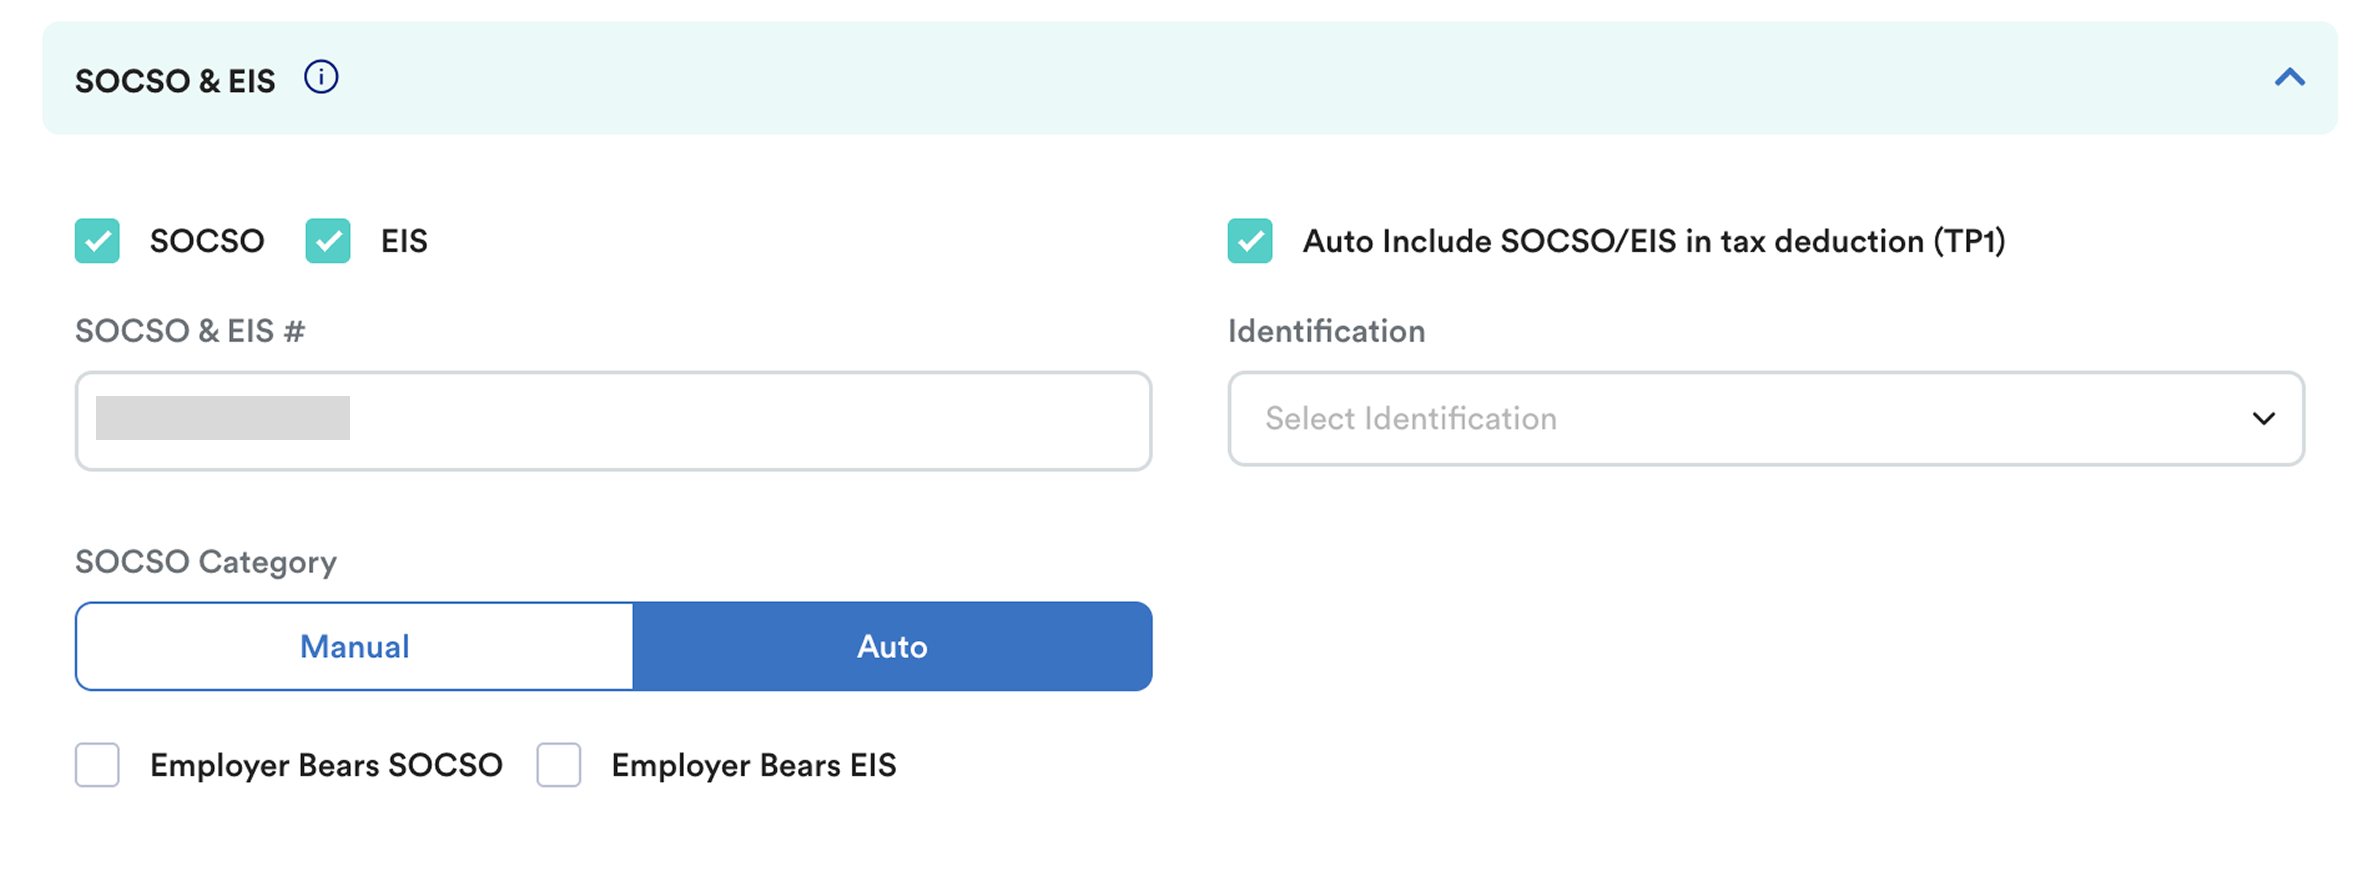
SOCSO & EIS: SOCSO & EIS Number, identification, Auto-include SOCSO/EIS in TP1, SOCSO category.
SOCSO Category: Auto / Manual
Auto (Recommended) – System automatically assigns the category based on age and contribution status.
Manual – Select the category yourself:
First Category – Employees below 60 years old, contributing to both Employment Injury Scheme and Invalidity Scheme.
Second Category – Employees aged 60 and above, or first employed at 55+ with no prior contributions.
Other Statutory: Zakat, HRDF, PTPTN, ASB, Tabung Haji

Note: Ensure HRDF is ticked if your company is liable to contribute to HRD levy. Refer to HRDF Levy Calculation & Setup Guide
Tab 4: Work
Work-related info that affects attendance and payroll.
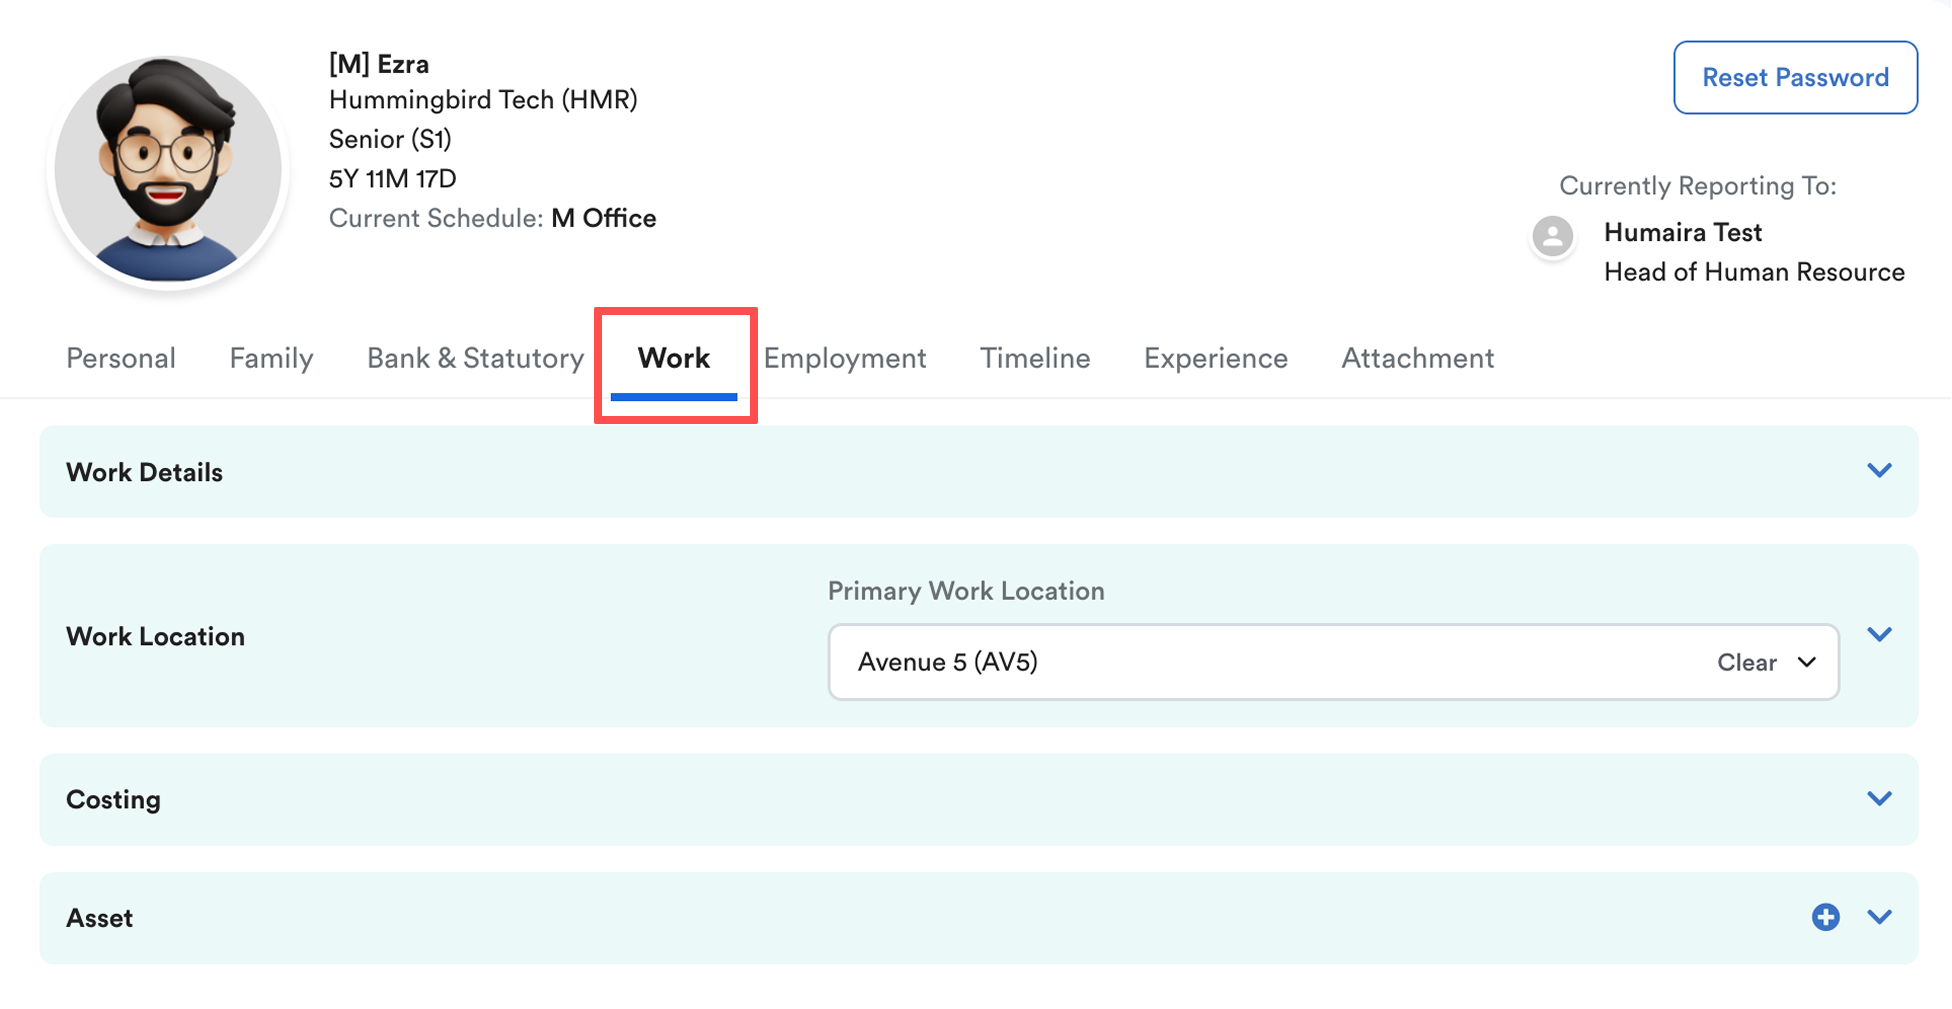
Word Details - Employee ID, Attendance ID, Work Email (used as login and unique ID)*, Work Phone Number, and Benefit Start Date.

Note: The benefit start date will affect the leave entitlement. This date can be earlier or later than your hire date. In the case when you would like leave to be generated only after 3 months, you can set the benefit start date here.
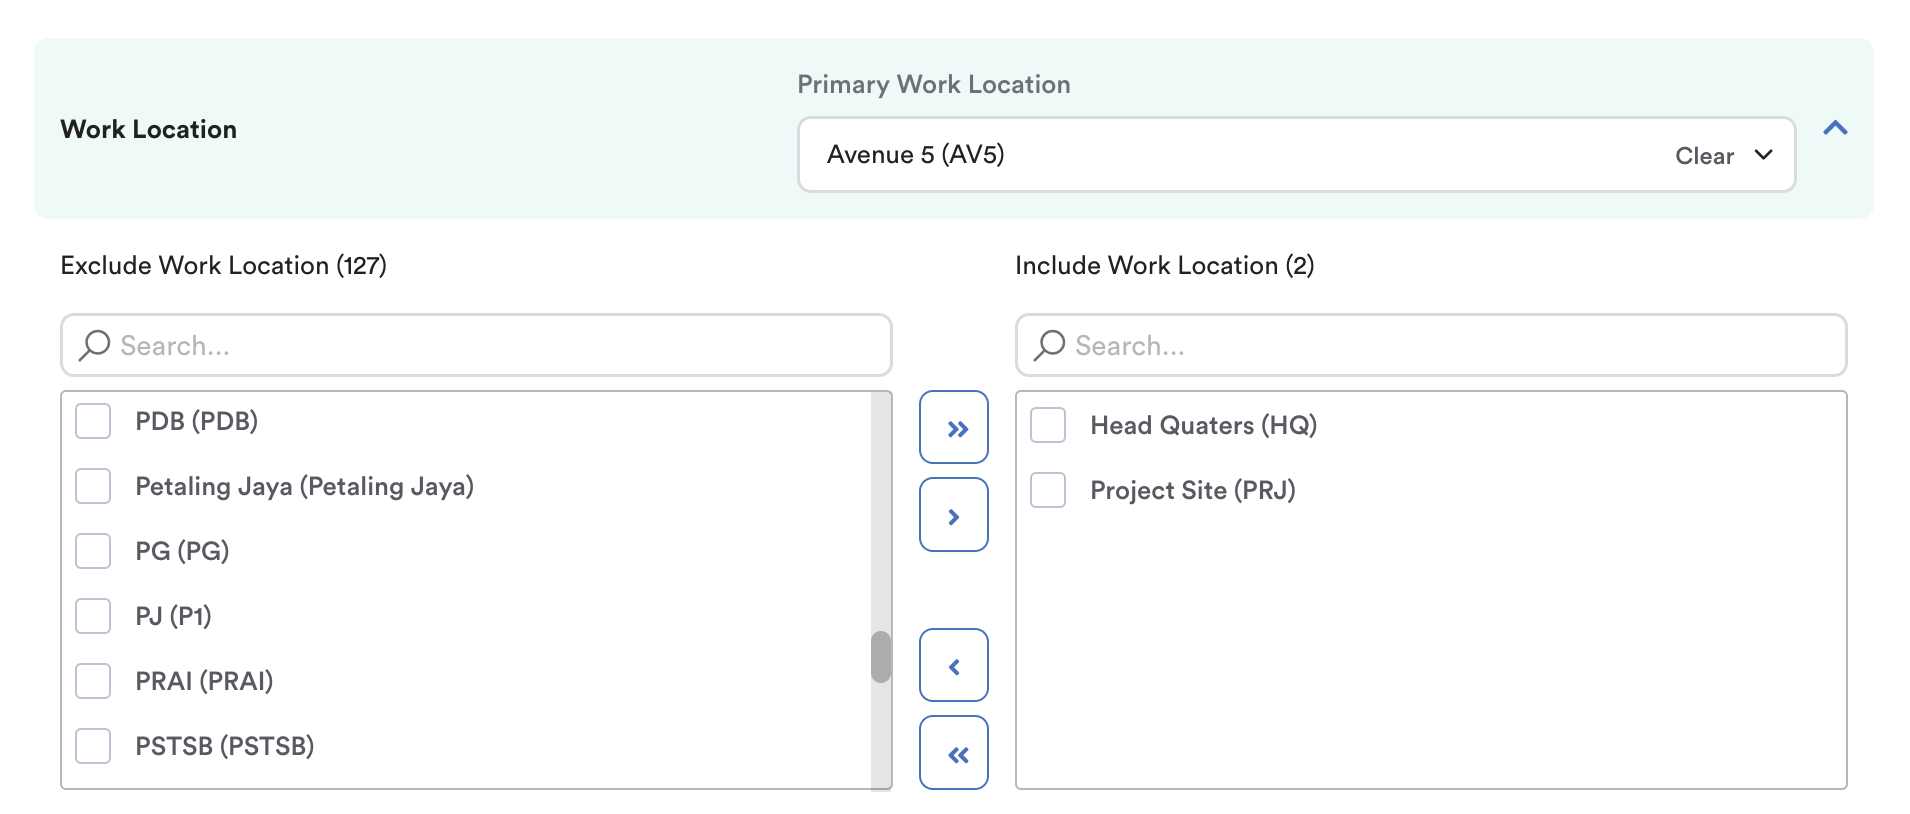
Work Location - Employees are allowed to clock in the locations under "include" and "primary work location" if Enable Location Specified Clocking.
Primary work location is crucial if you want to set up workers in different timezones, refer to Allow Employees to Clock In from Different Time Zones.
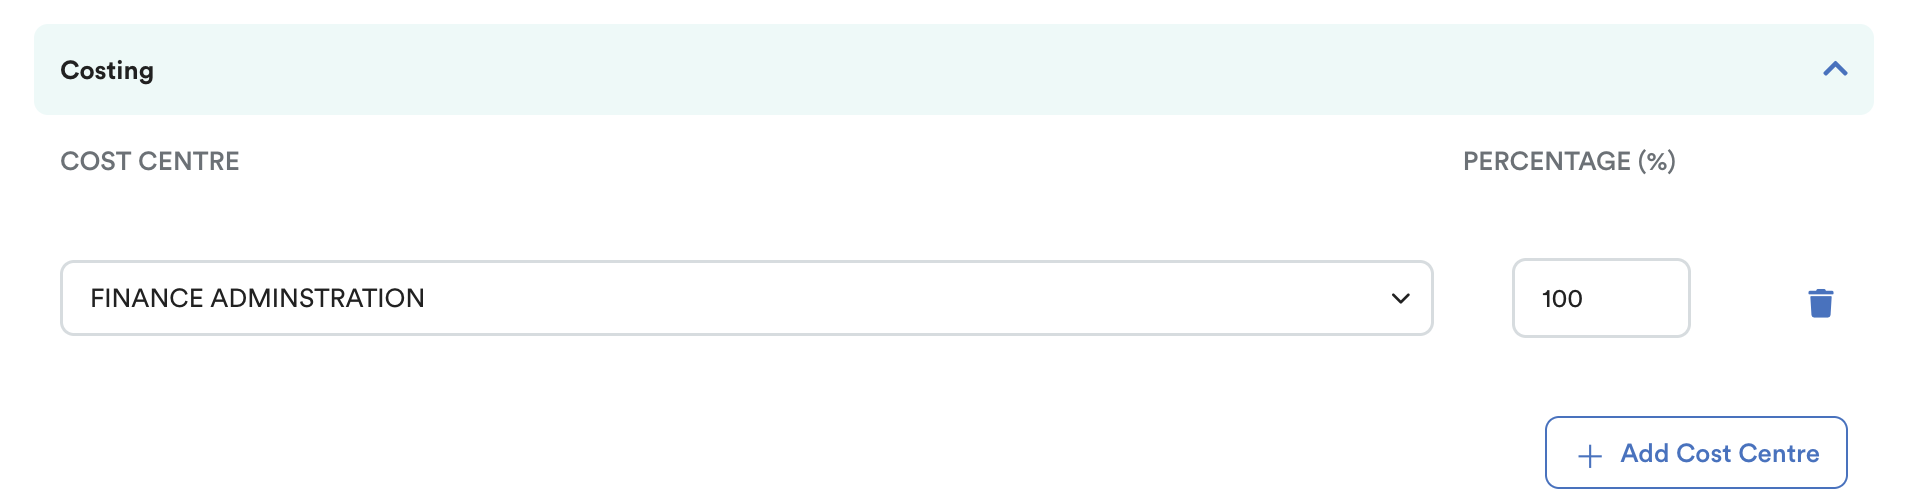
Costing - Assign default cost centres to the employee.
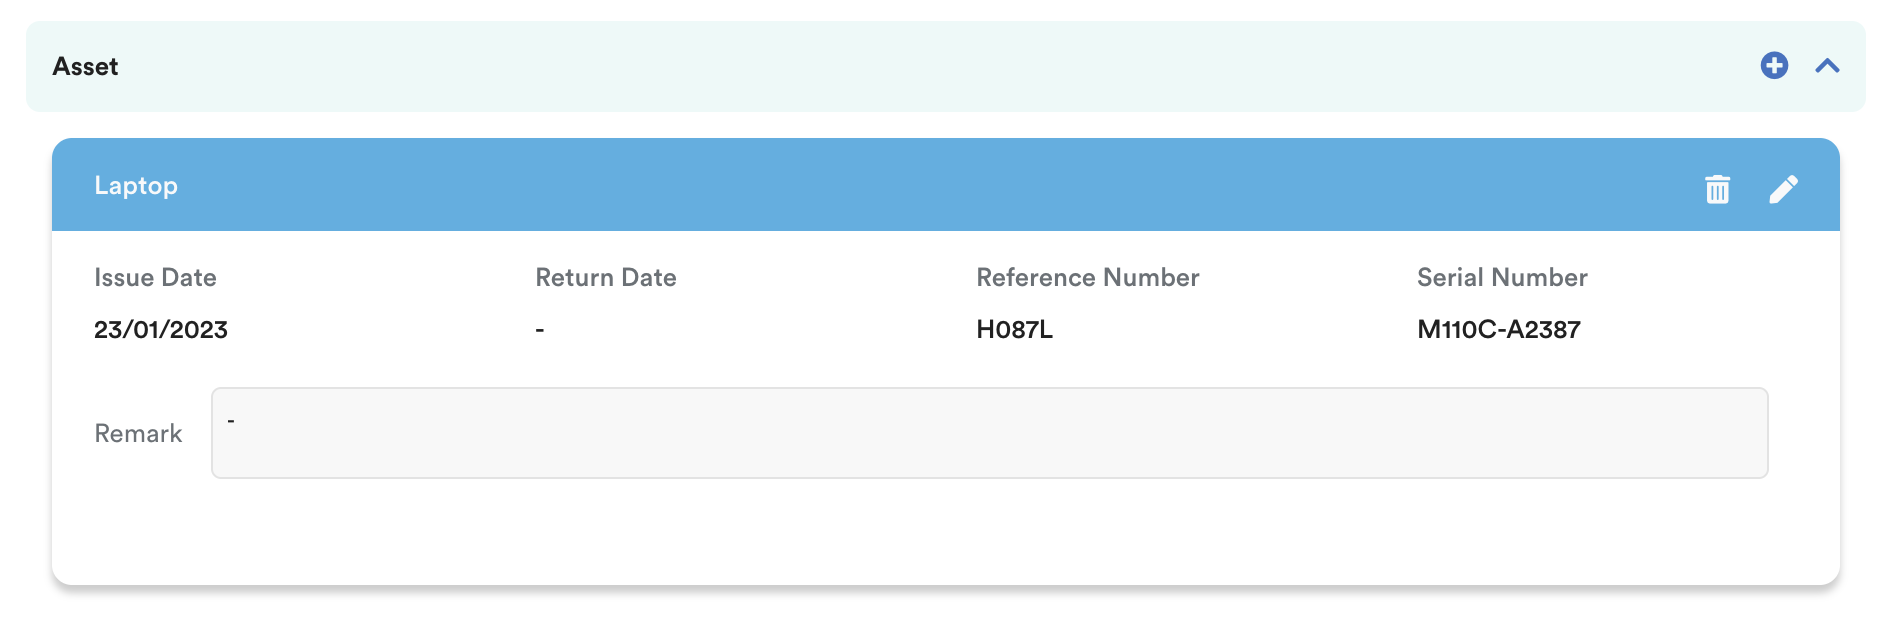
Asset - Click the + icon to record any company assets assigned to the employee (e.g. laptop, mobile phone, access card).
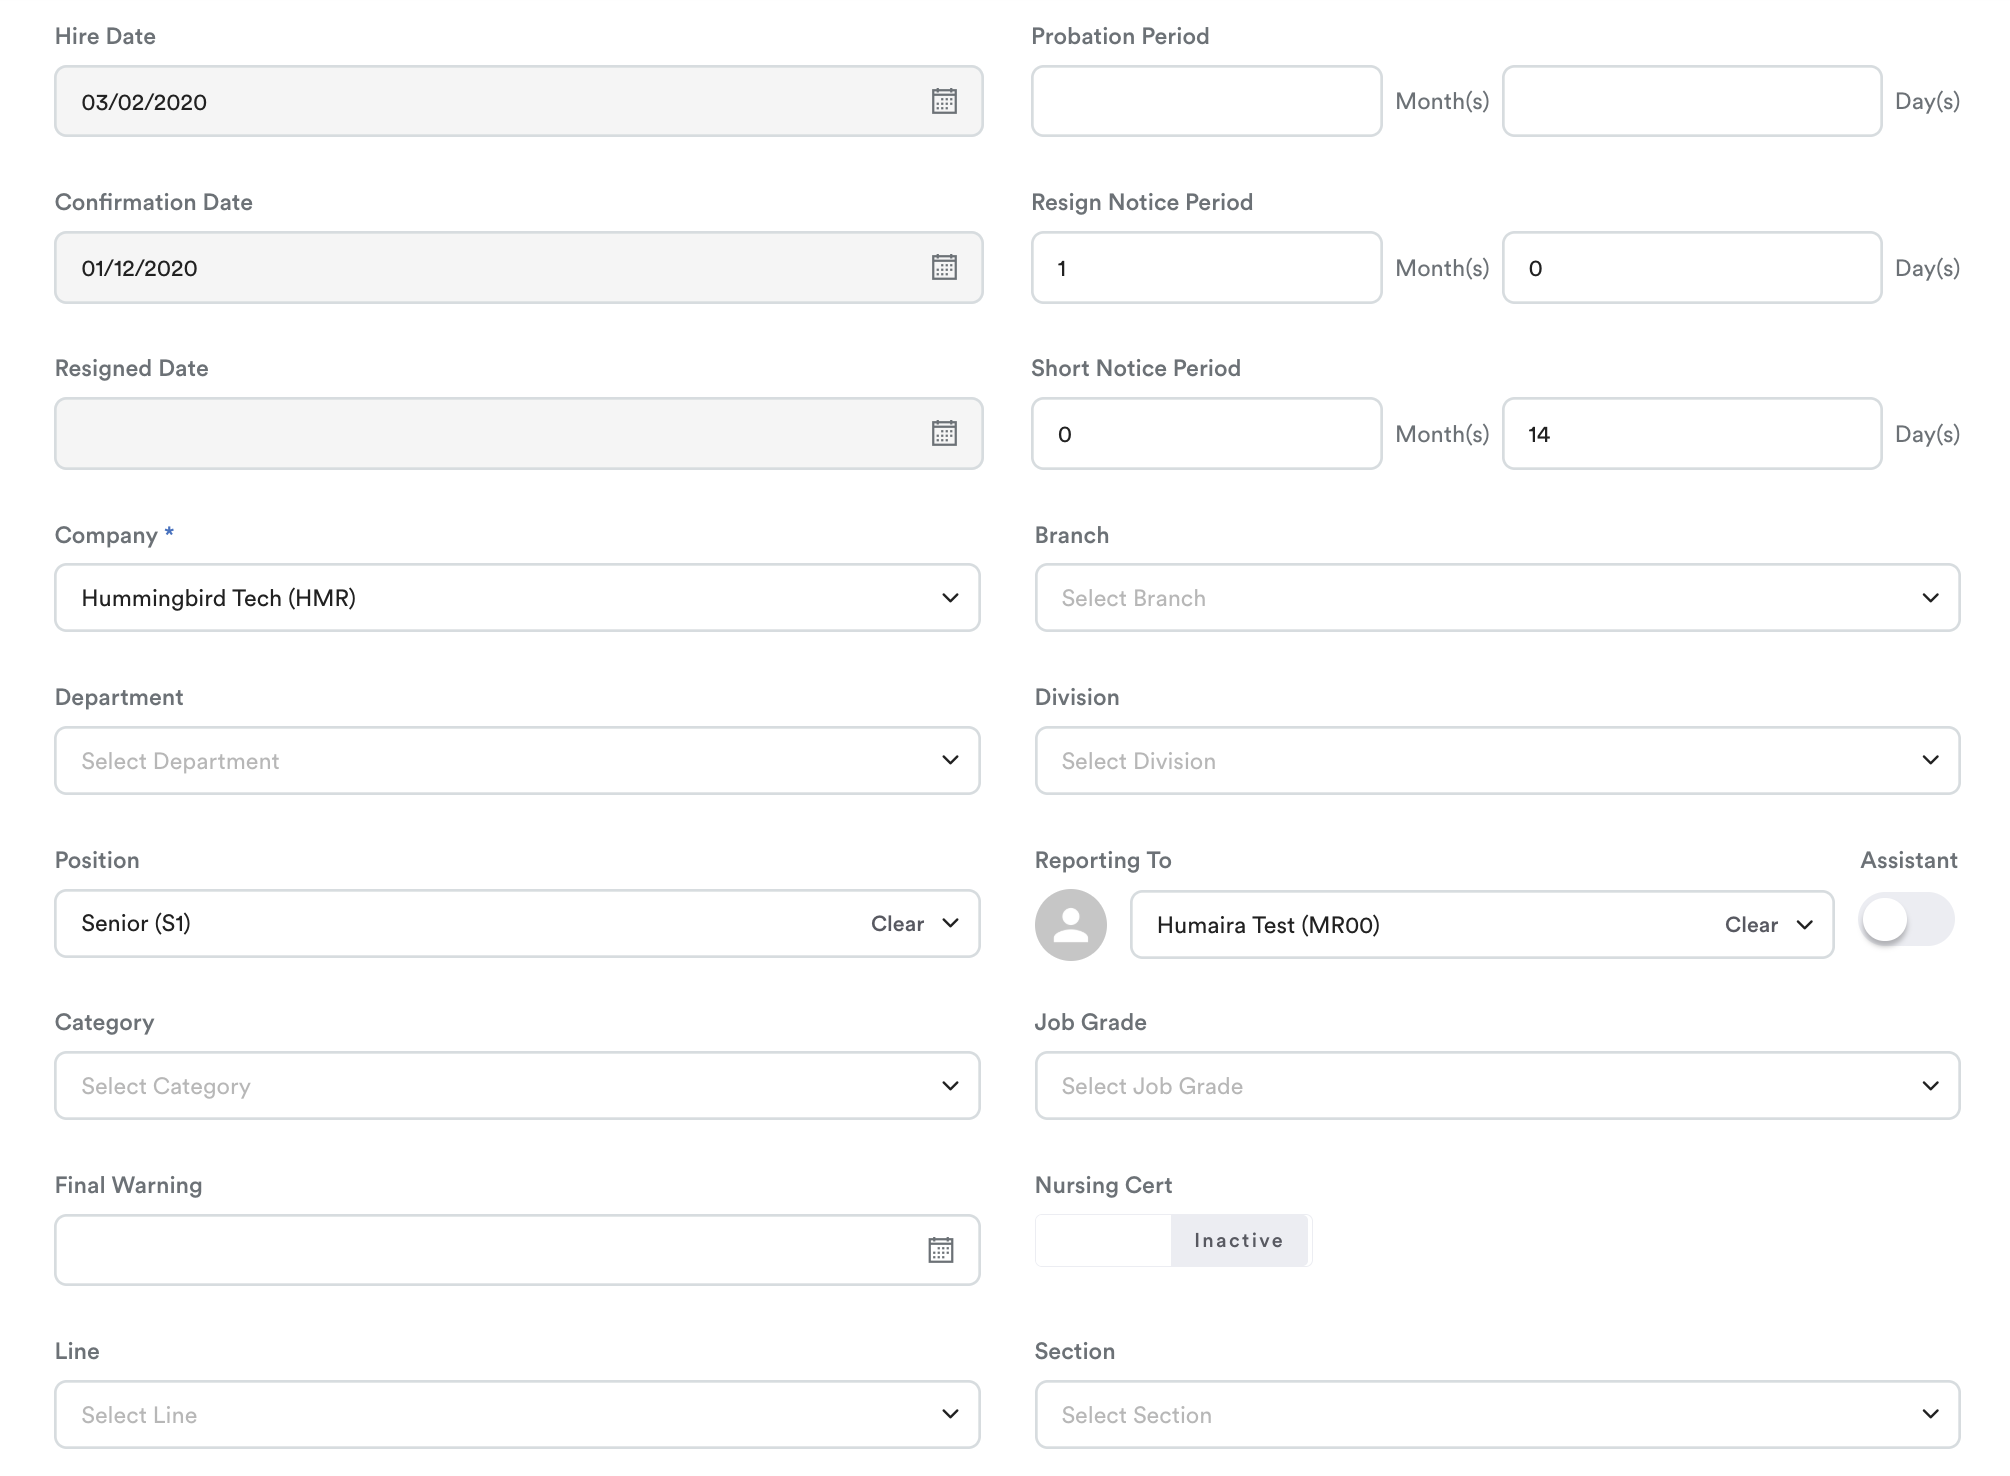
Tab 5: Employment

All information in this tab is time-sensitive. Any updates made here will automatically capture the system date as the effective date. To set a specific effective date, update via Employee > Progression > Update.
- Hire Date, Probation, Confirmation Date, Resigned Date, Notice Period
- Company*, Department, Branch, Position, Reporting To, Assistant (Shows employee as assistant in org. chart), Position, Category, Job Grade, Final warning, Nursing certificate, Line, Section
Note: To select a position, you need to create a system label first; refer to Managing System Labels.
- Basic Salary, Payment Method, Salary Frequency, Remarks
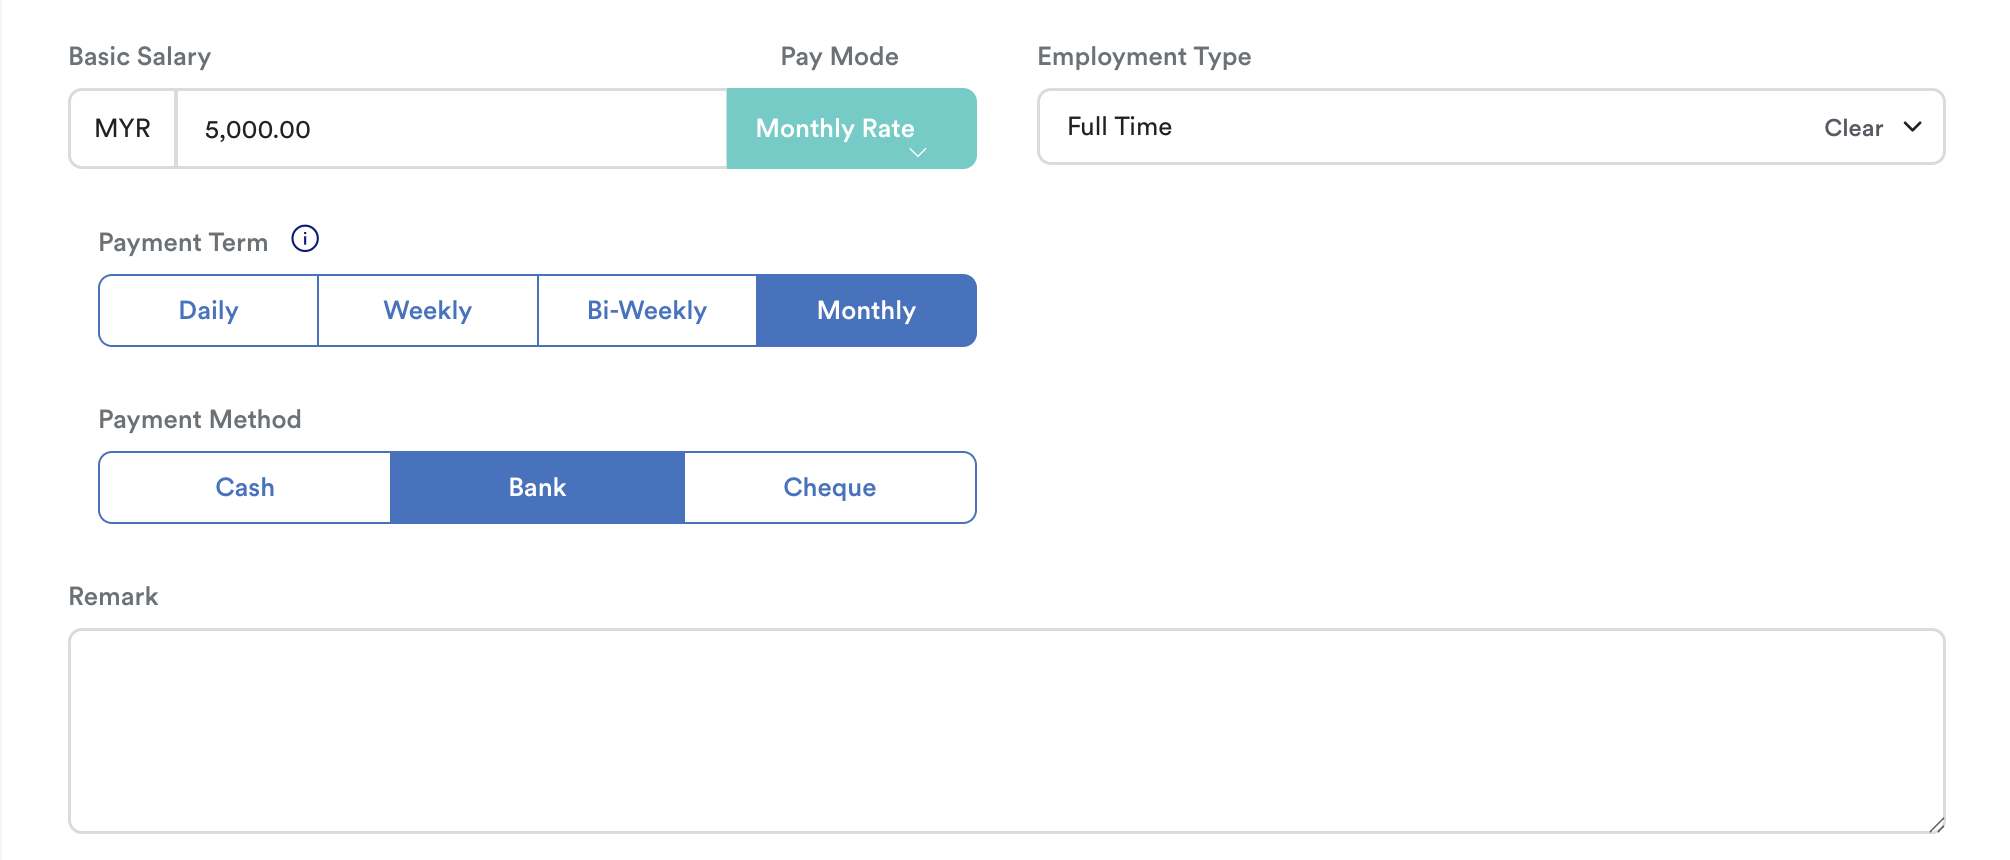
Note:
- Basic Salary is recommended to fill in, even if not mandatory.
- Ensure Payment Term is specified (Daily/Weekly/Bi-Weekly/Monthly) so payroll runs smoothly.
- If Bank is selected as payment method, the employee’s bank account number in the Bank & Statutory tab becomes mandatory.
Tab 6: Timeline
Shows all historical updates made to the employment information either from Employment tab or Progress screen. Payroll proration uses the effective date shown here.
Example:
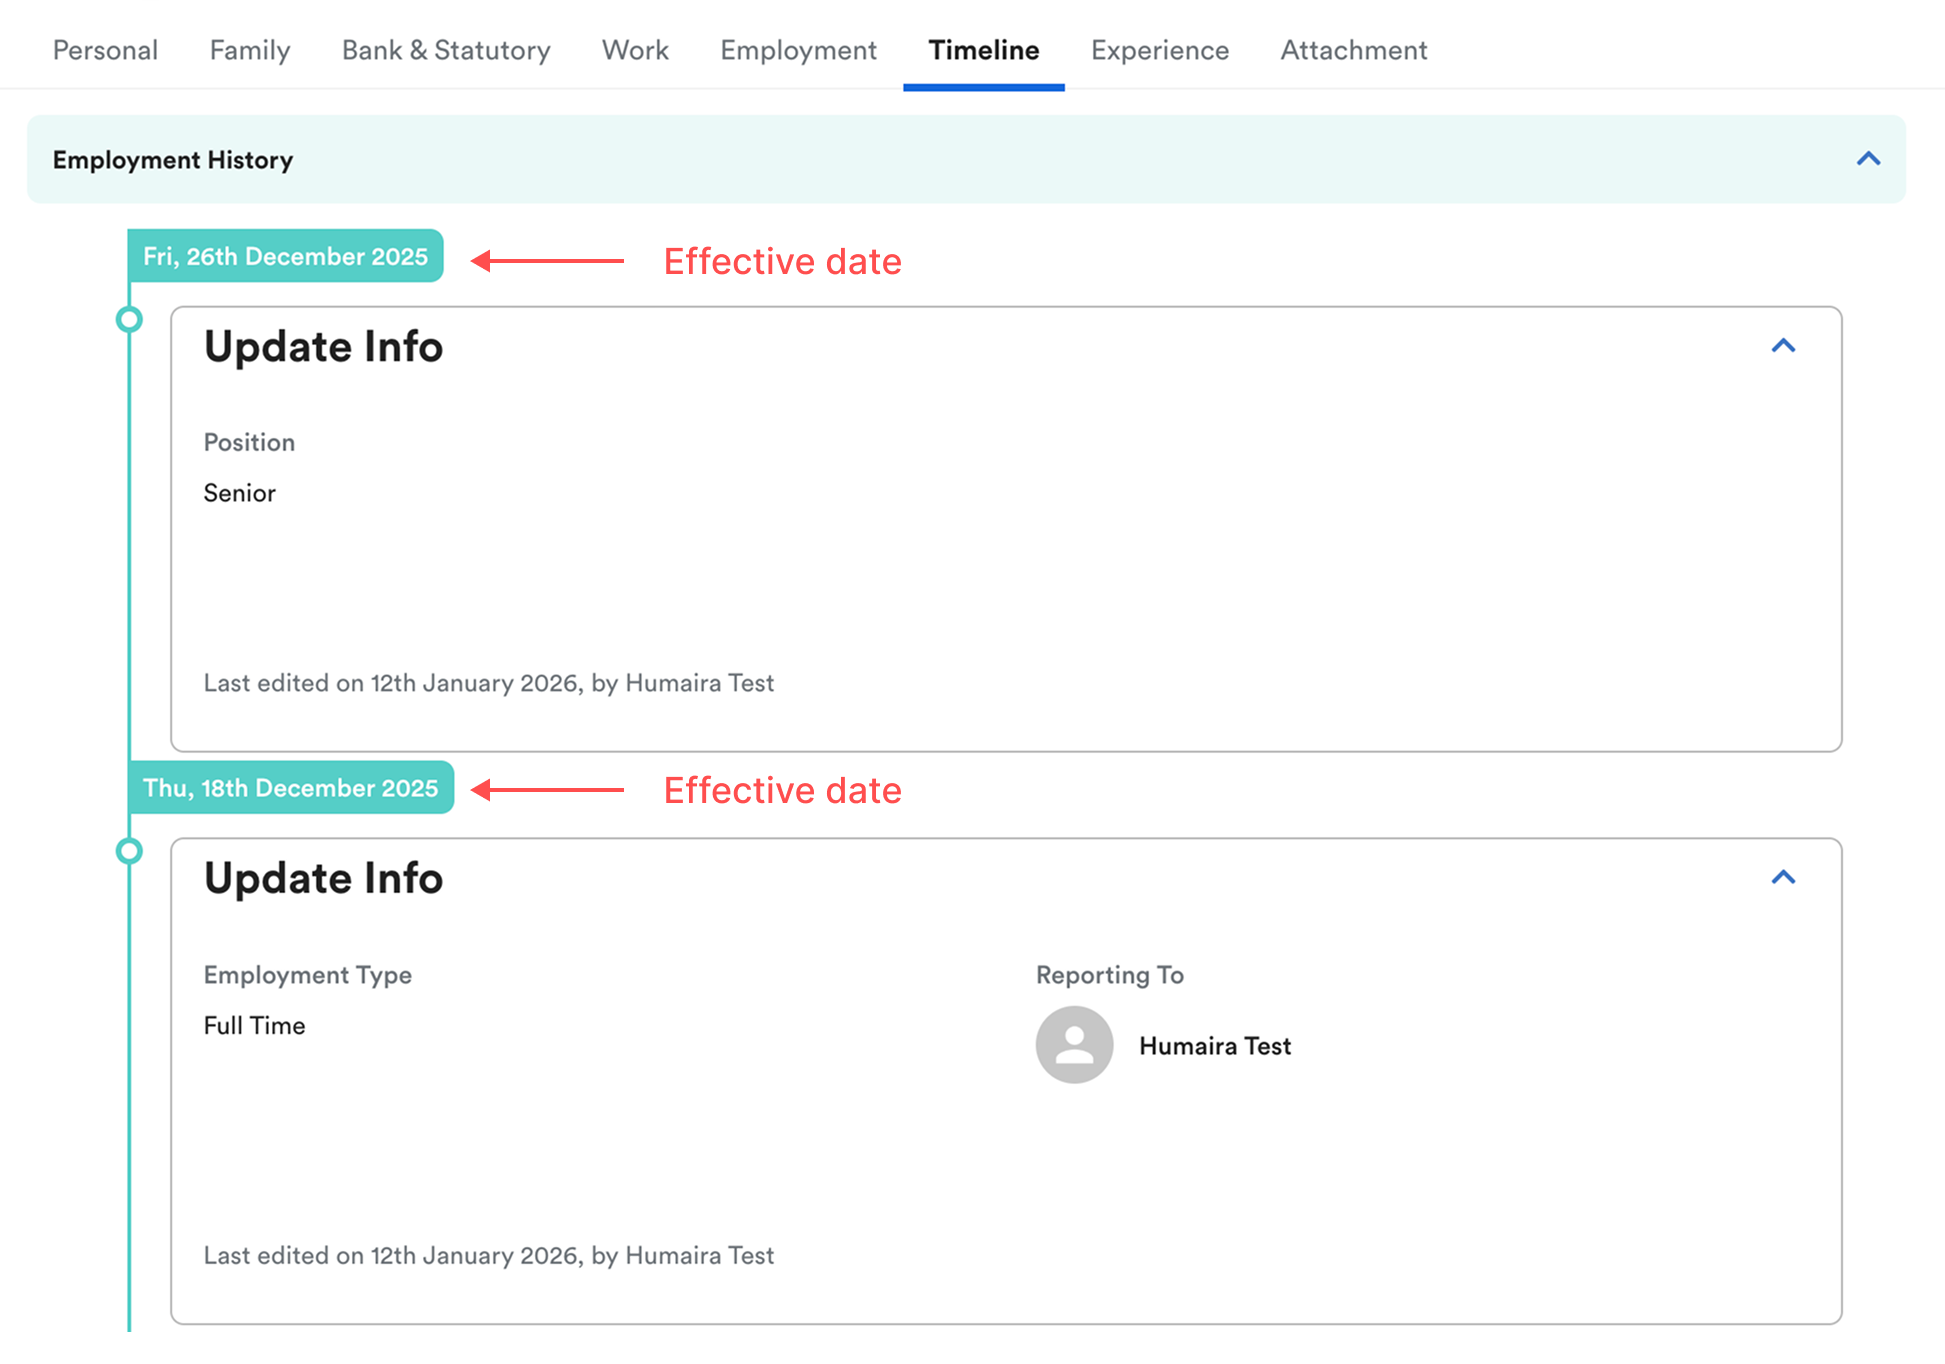
If salary is updated on 18th December, proration will only apply from 18th December onwards.
- To change the effective, use Employee > Progression > Update. Adjust the Effective Date. Refer: Update Employee Info & Salary in Progression
Tab 7: Experience
This tab stores the employee’s background, education, and experience records.
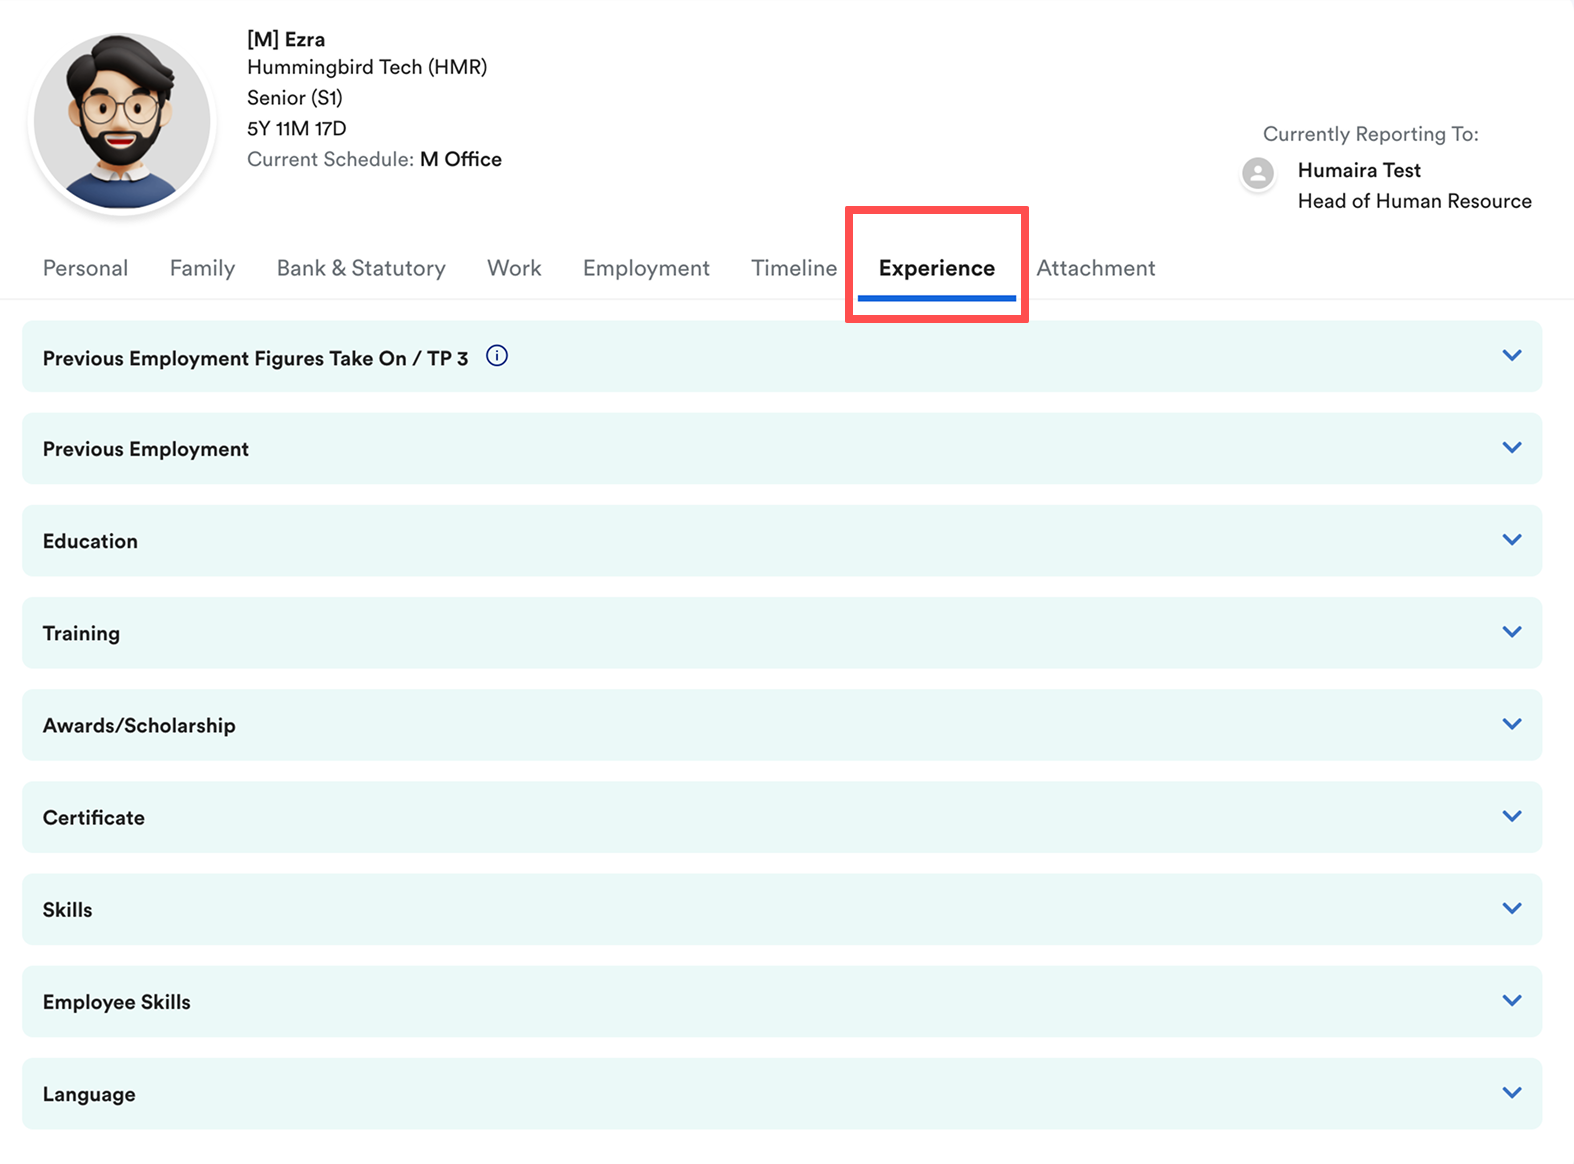
Previous Employment Figures Take On/TP3 - Enter payroll figures from the employee’s previous employment to ensure accurate tax and statutory calculations under your company payroll.
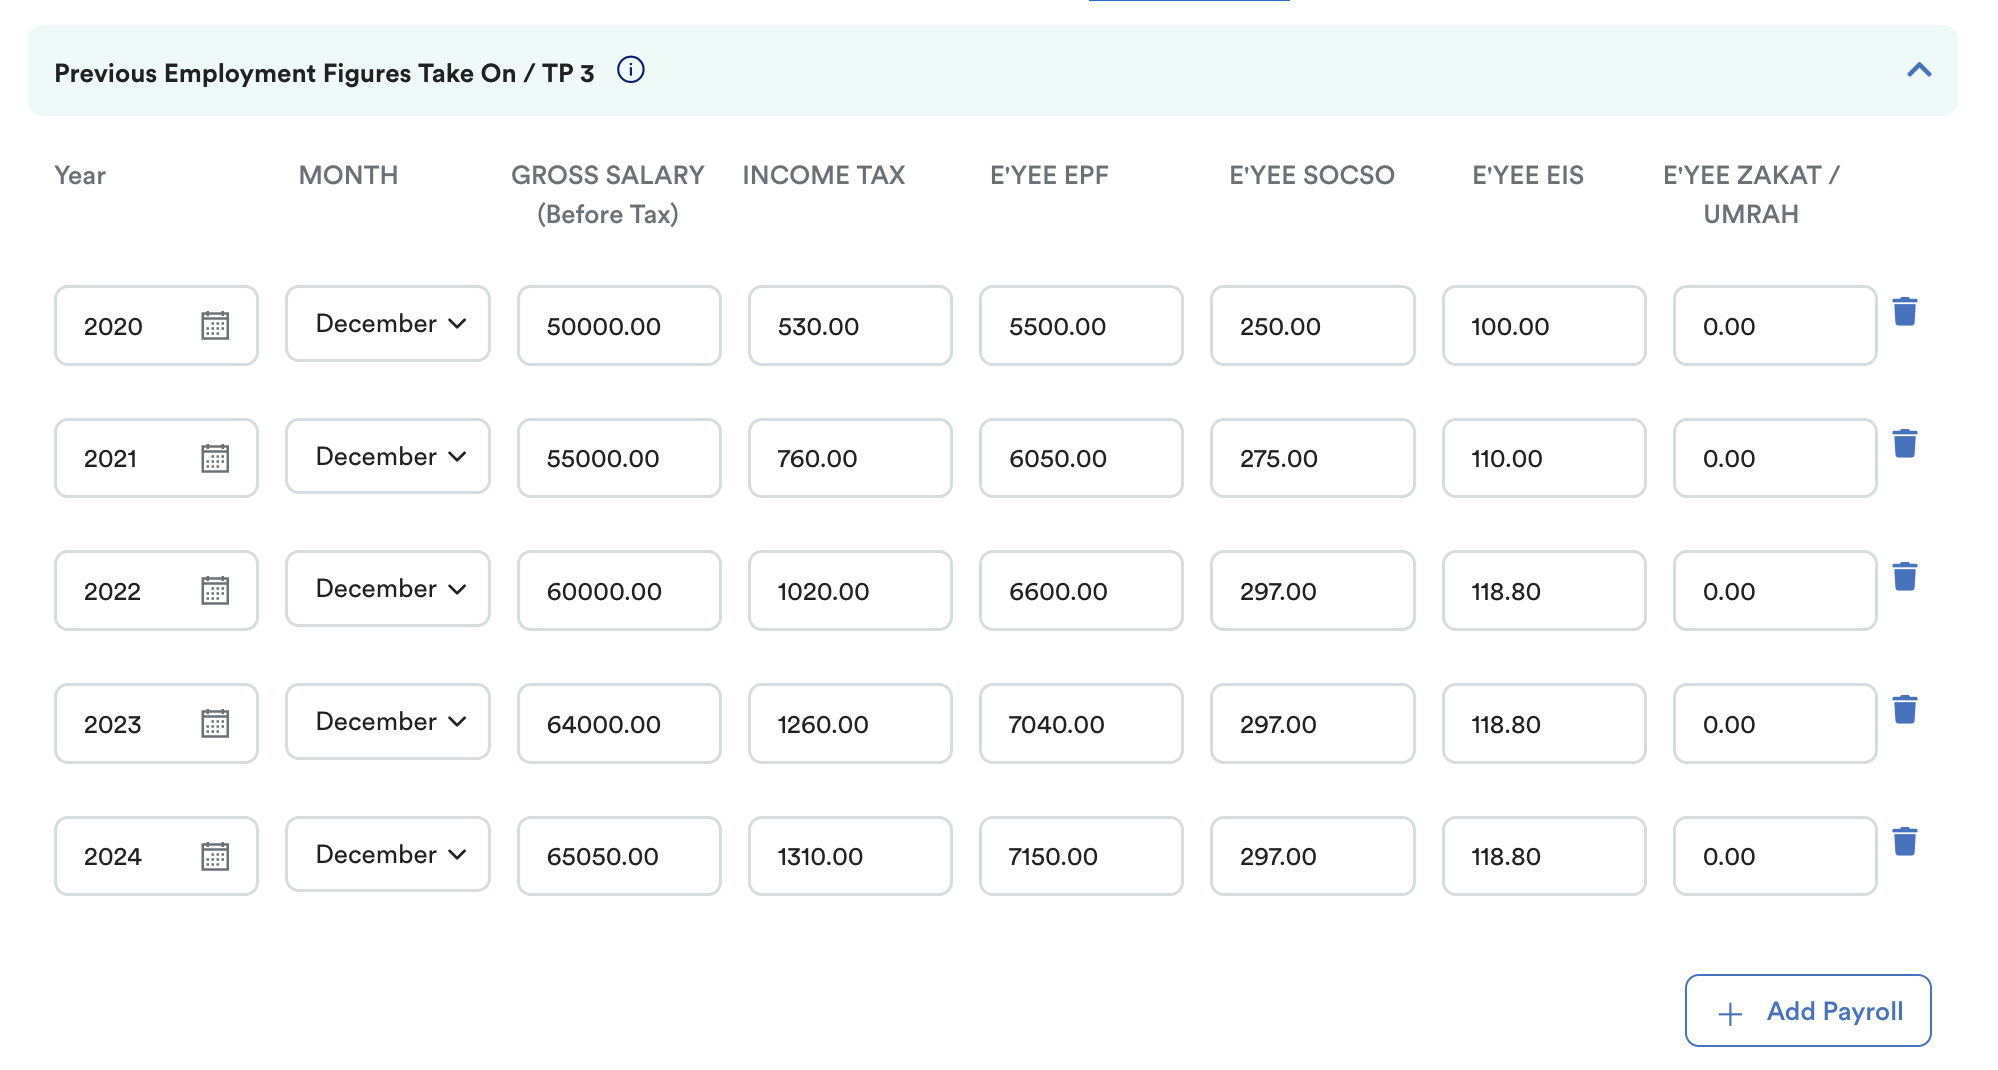
- Previous Employment - Record the employee’s previous job details, including Company name, Joined date, Resigned date, Last drawn salary, Reason for leaving
- Education - Enter the employee’s education background such as Qualification, Institute, Major, Years, CGPA
- Training - Record any trainings attended by the employee.
- Award/Scholarship - Add any awards or scholarships received by the employee.
- Certificate - Upload or record professional or academic certificates.
- Employee skills - List the employee’s skills.
- Language - Add language proficiency levels for speaking, reading, writing.
Tab 8: Attachment
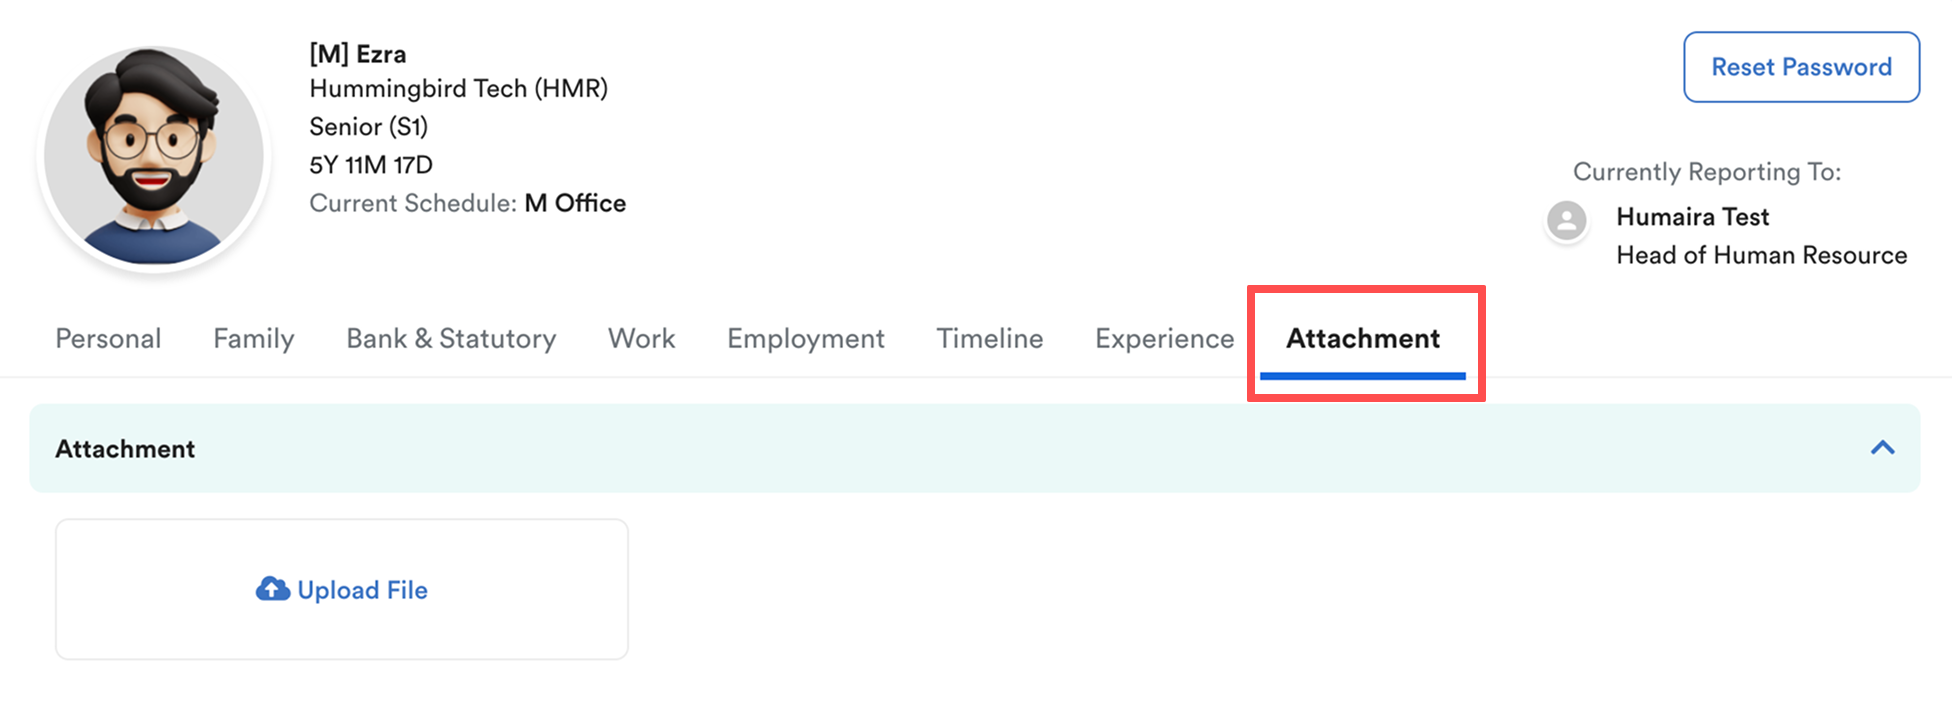
Upload employment-related documents (CVs, offer letters, referral letters).
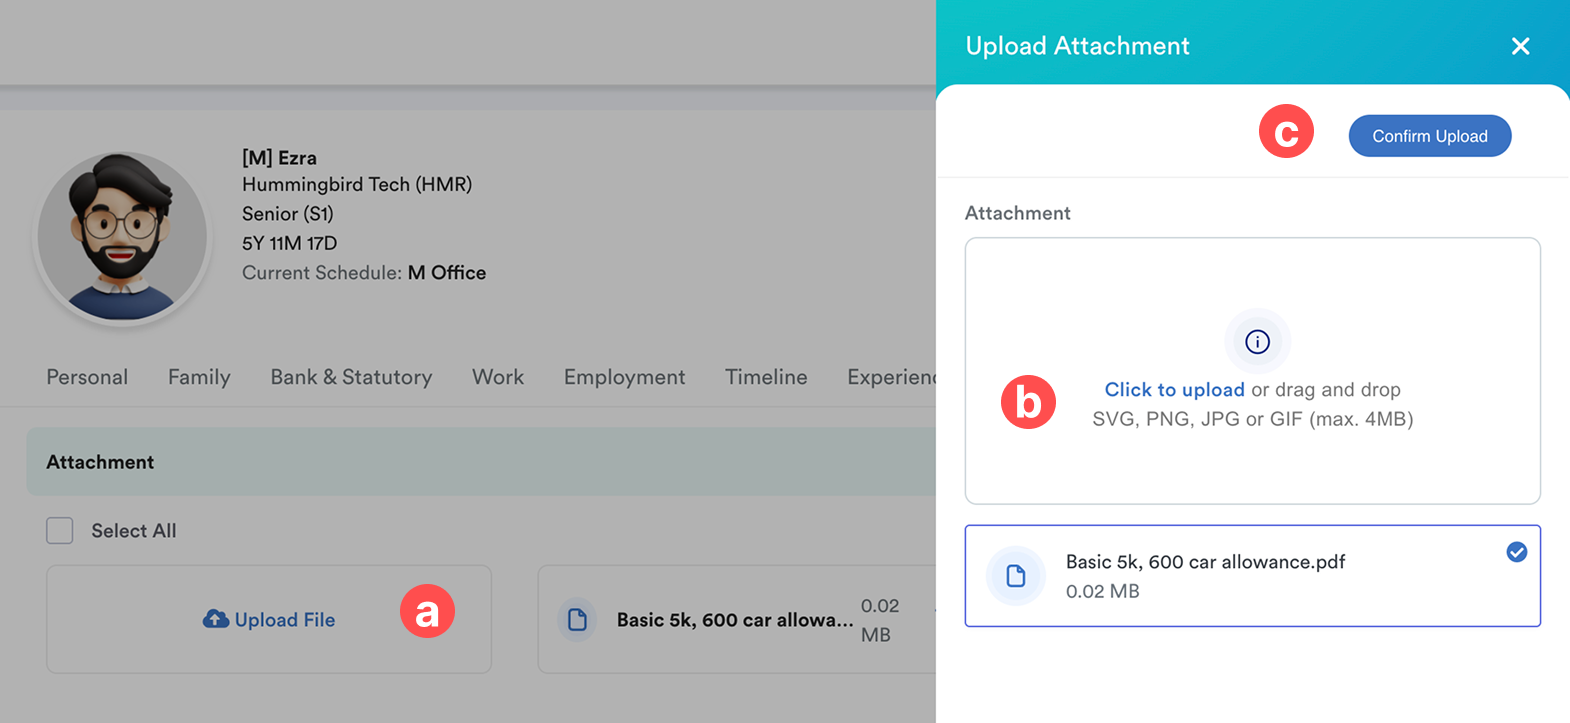
To upload:
- Click Upload File
- Click to upload or drag and drop file (SVG, PNG, JPG, GIF)
- Click Confirm Upload
Once all tabs are completed, click Save on the top-right to finalize the employee profile.
We hope this explanation clarifies the matter. If you require additional assistance, do not hesitate to contact our support team.
Was this article helpful?
That’s Great!
Thank you for your feedback
Sorry! We couldn't be helpful
Thank you for your feedback
Feedback sent
We appreciate your effort and will try to fix the article