This guide shows you how to set the overtime rate for the everyday overtime calculation. You can assign a different overtime rate to different employees as well.
Step 1
On the left menu, go to Settings (a) > Attendance (b) > Overtime Pattern (c).

Step 2
To create an overtime pattern, click the blue Add New button in the top right corner.

Or choose any existing overtime patterns from the list.
Step 3
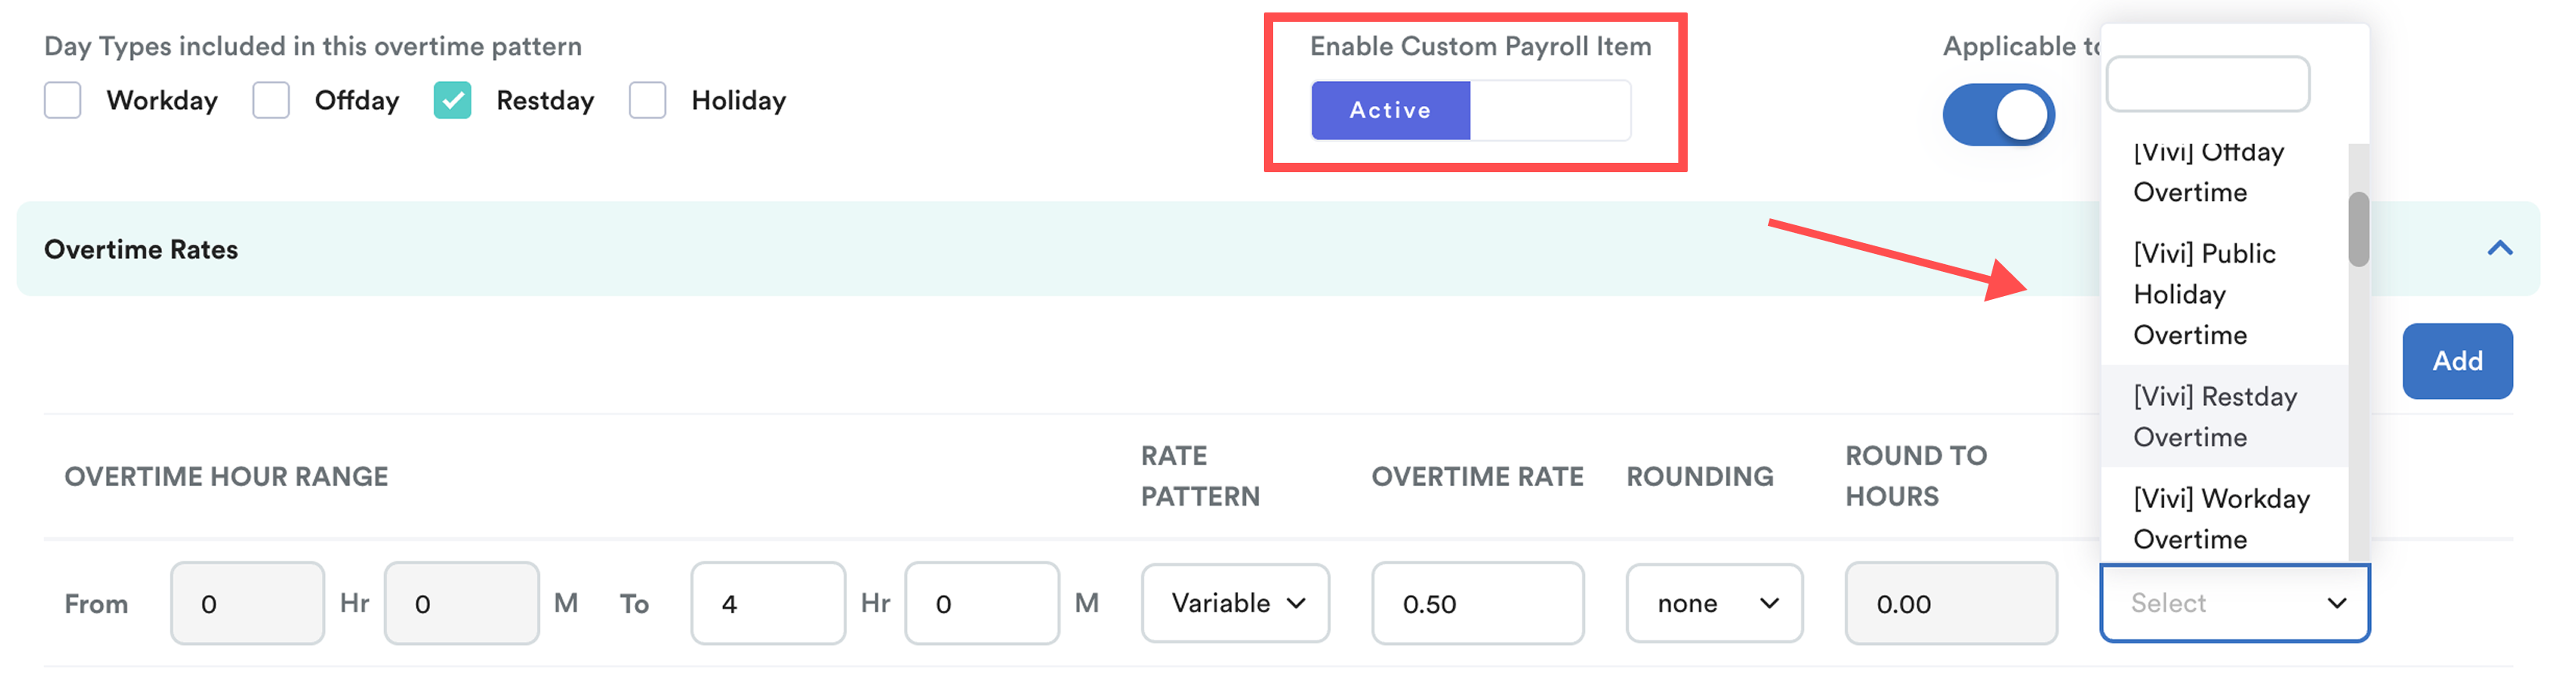
Below is the general setting to create the overtime pattern.

a) Overtime Rate Name: Enter a name for this overtime rate. (e.g. Restday OT)
b) Day Types Included in this overtime pattern: Tick which day types this OT rate applies to.
c) Overtime Rate Label: This label is used for display in attendance/payroll.
d) Enable Custom Payroll Item (optional): Toggle on if you want to assign a specific payroll item to this OT pattern.
Step 4 - Define Range, Rates, and Rounding
In this step, you will define how overtime is calculated by setting the Overtime Hour Range, assigning overtime rates, and rounding hours. To understand more on enable both overtime and replacement leaves, refer to How to Enable Both Overtime Pay and Replacement Leave as Overtime Pay Mode.
4.1 Overtime Hour Range

Click the Add button to create different rates for different hour blocks.
Example:

- From 0hr 0min to 4hr 0min
- From 4hr 1min to 8h 0min
- From 8h 1min to 15h 0min
Note: Ensure this is a continuous range to accurately capture the OT hour. Failing to fill in the continuous range and credit amount by days will lead to no replacement leave being credited to employees.
4.2 Overtime Rate
You can choose between two rate patterns when setting up an overtime range:
1. Fixed
- Assigns a flat monetary amount per hour (e.g. RM15/hour), regardless of salary.

2. Variable
- Calculates pay based on the employee's Hourly Rate of Pay (HRP) multiplied by a factor (e.g. 1.5x, 2.0x).

3. Leave
- Compensates overtime by crediting Replacement Leave
- You can set the rate to 0.
- Then, select the Leave Type to be earned once the range is met.

4. Time Off
- Compensates overtime by crediting Replacement Time off hours.
- You can set the rate to 0.
- Then, select the Leave Type (Time Off) to be earned once the range is met.

To understand the overnight OT rate, refer to Set Overnight OT Rate in Overtime Pattern.

4.3 Rounding
The rounding logic changes based on the Rate Pattern selected:
| Rate Pattern | Rounding Options | Description |
| Fixed & Variable | None | Uses exact approved hours based on your "Auto Overtime Approval" settings. |
| Custom | Rounds up to a specific number. Example: If 2h 30m is worked in a 4–8h range set to round to 8h, the system calculates for 8h. | |
| Leave | Days | Defines the total leave days credited when the range is met. |
| Time Off | Hours | Defines the total time off hours credited when the range is met. |
Example for Custom Rounding
In the example, the approval method is the intersection between actual and pre-approved. 
For custom, it will round to the rounding hours that you set.
Example:
0-4hrs, round to 4hr;
4-8hrs, round to 8hr;
8-12hrs, round to 12hr.
For 4-8hrs range, the approved OT is only 2h30m, and it will be rounded to 8 hours as per the setting in the overtime pattern. This value will be used for overtime calculation.

Therefore, if your company does not have specific rules, we would recommend just using None as the default.
Step 5
After completing the above steps, choose any of the selection methods to assign employees under this rate.

Step 6
Review the employee list and click Save to apply this overtime pattern.

You will be redirected back to the Overtime Pattern List screen. To set the order of priority, use the drag-and-drop icon next to each overtime pattern to move it higher or lower.

To enable auto credit replacement leave, please refer to Earn Replacement Leave Outside of Work Shift Automatically
To set overtime rate based on total overtime hours accumulated within a month, please refer to Monthly Overtime Pattern.Refer this article to learn about standard overtime rates in Malaysia: Guide to Overtime Rates Under the Employment Act 1955We hope this explanation clarifies the matter. If you require further assistance, please don't hesitate to contact our support team.
Was this article helpful?
That’s Great!
Thank you for your feedback
Sorry! We couldn't be helpful
Thank you for your feedback
Feedback sent
We appreciate your effort and will try to fix the article